Guide overview
This guide explains how to create documents such as quotations, delivery slips, invoices, and purchase orders using data from Sanka and external integrations.Step 1: Open template settings
- From the left menu, go to Workspace > Object Management and select the target object.
- Open Document Template (PDF) at the bottom of the property settings.
Step 2: Choose a base template
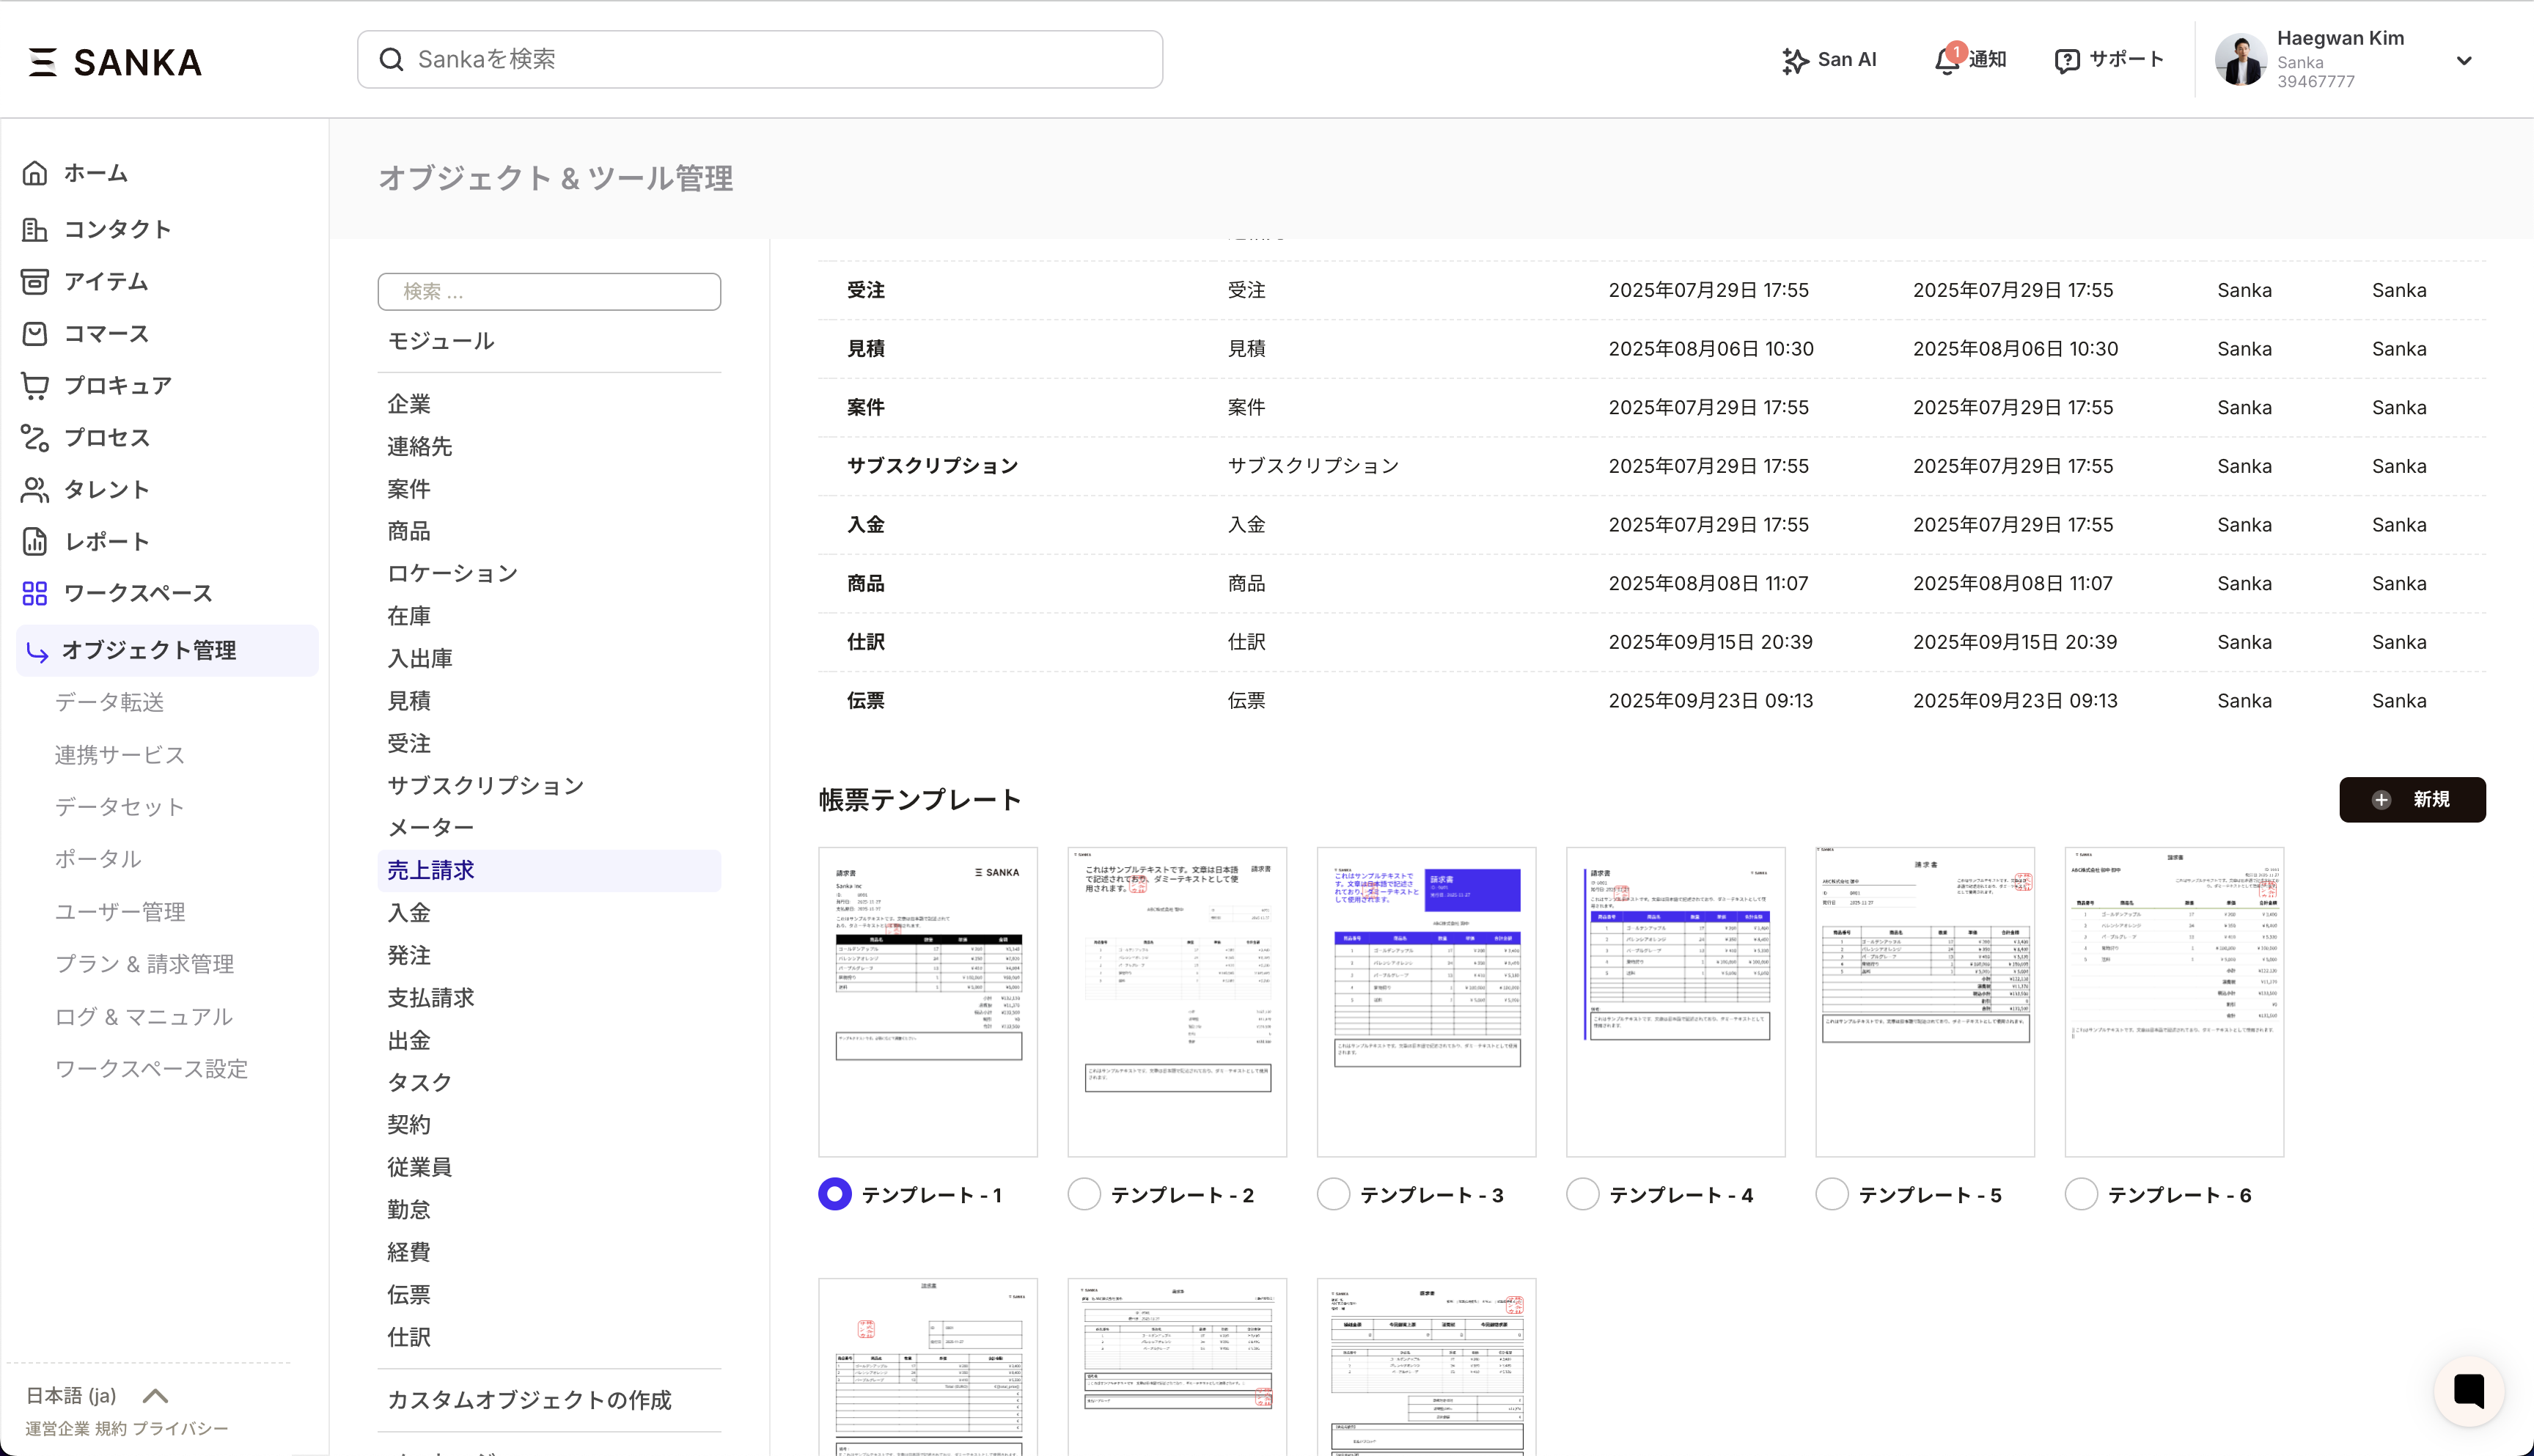
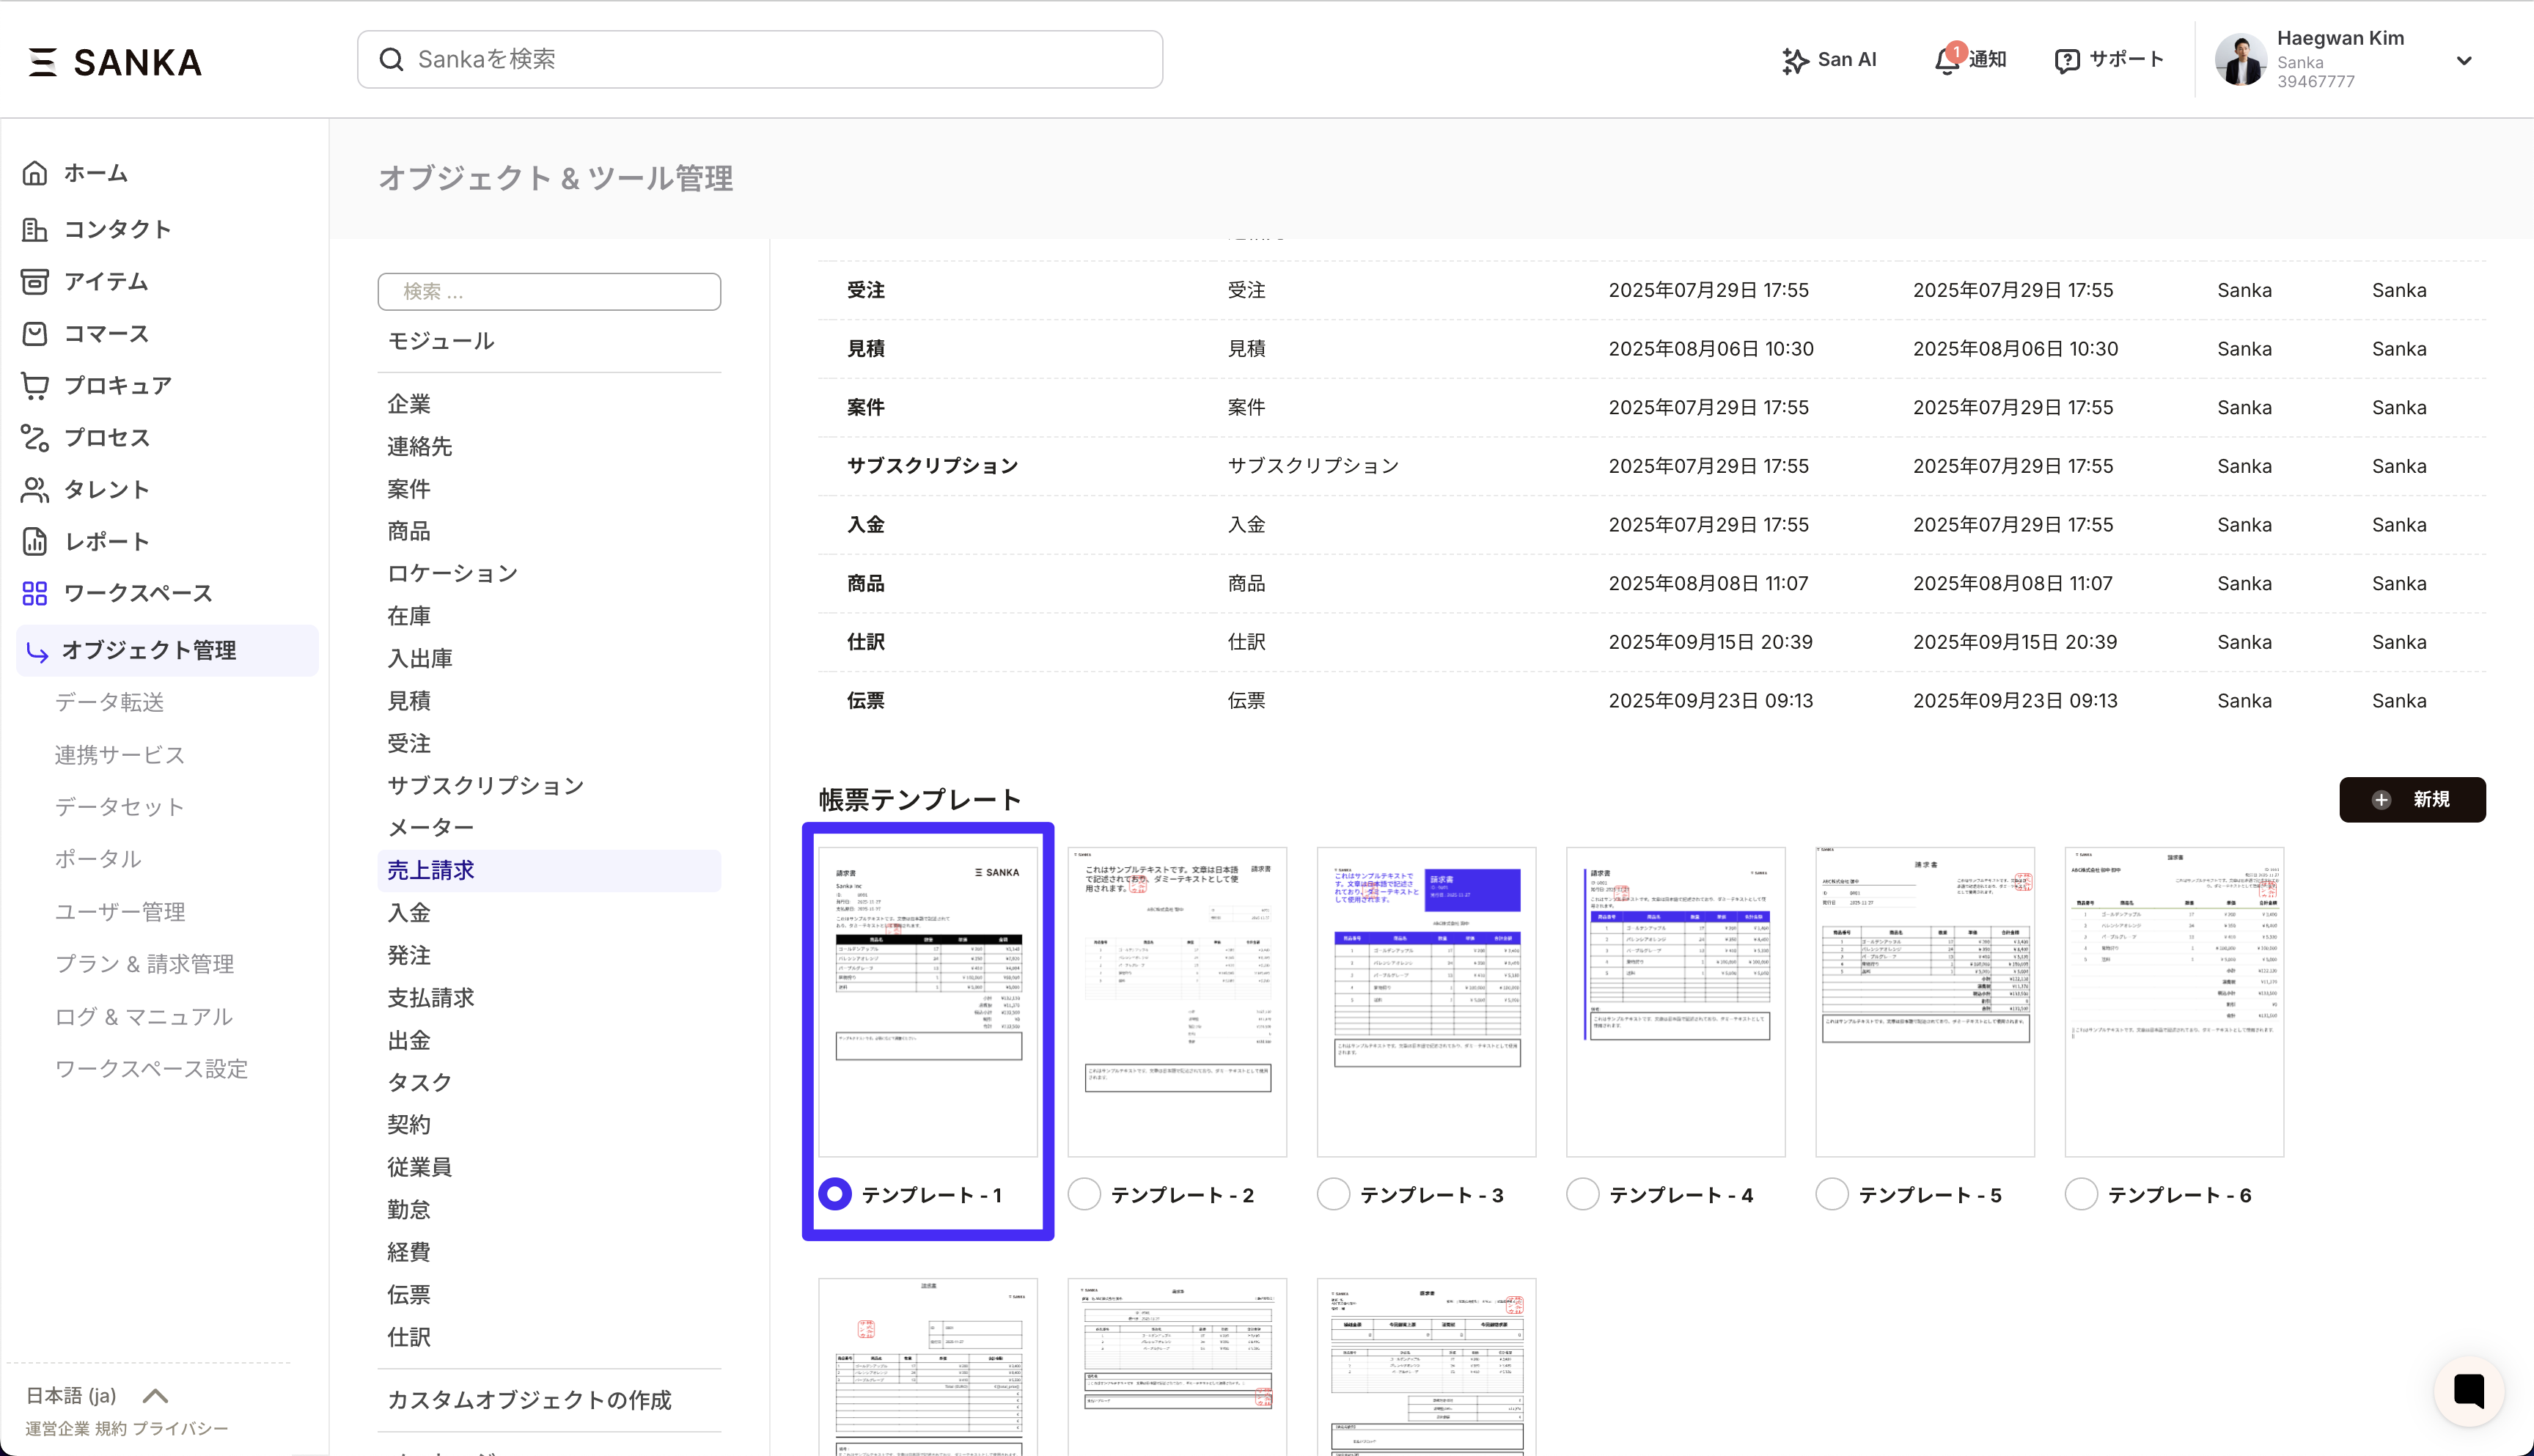
- Click Preview in the list to check the design.
- First, decide the template type. Click a template thumbnail to see the preview.
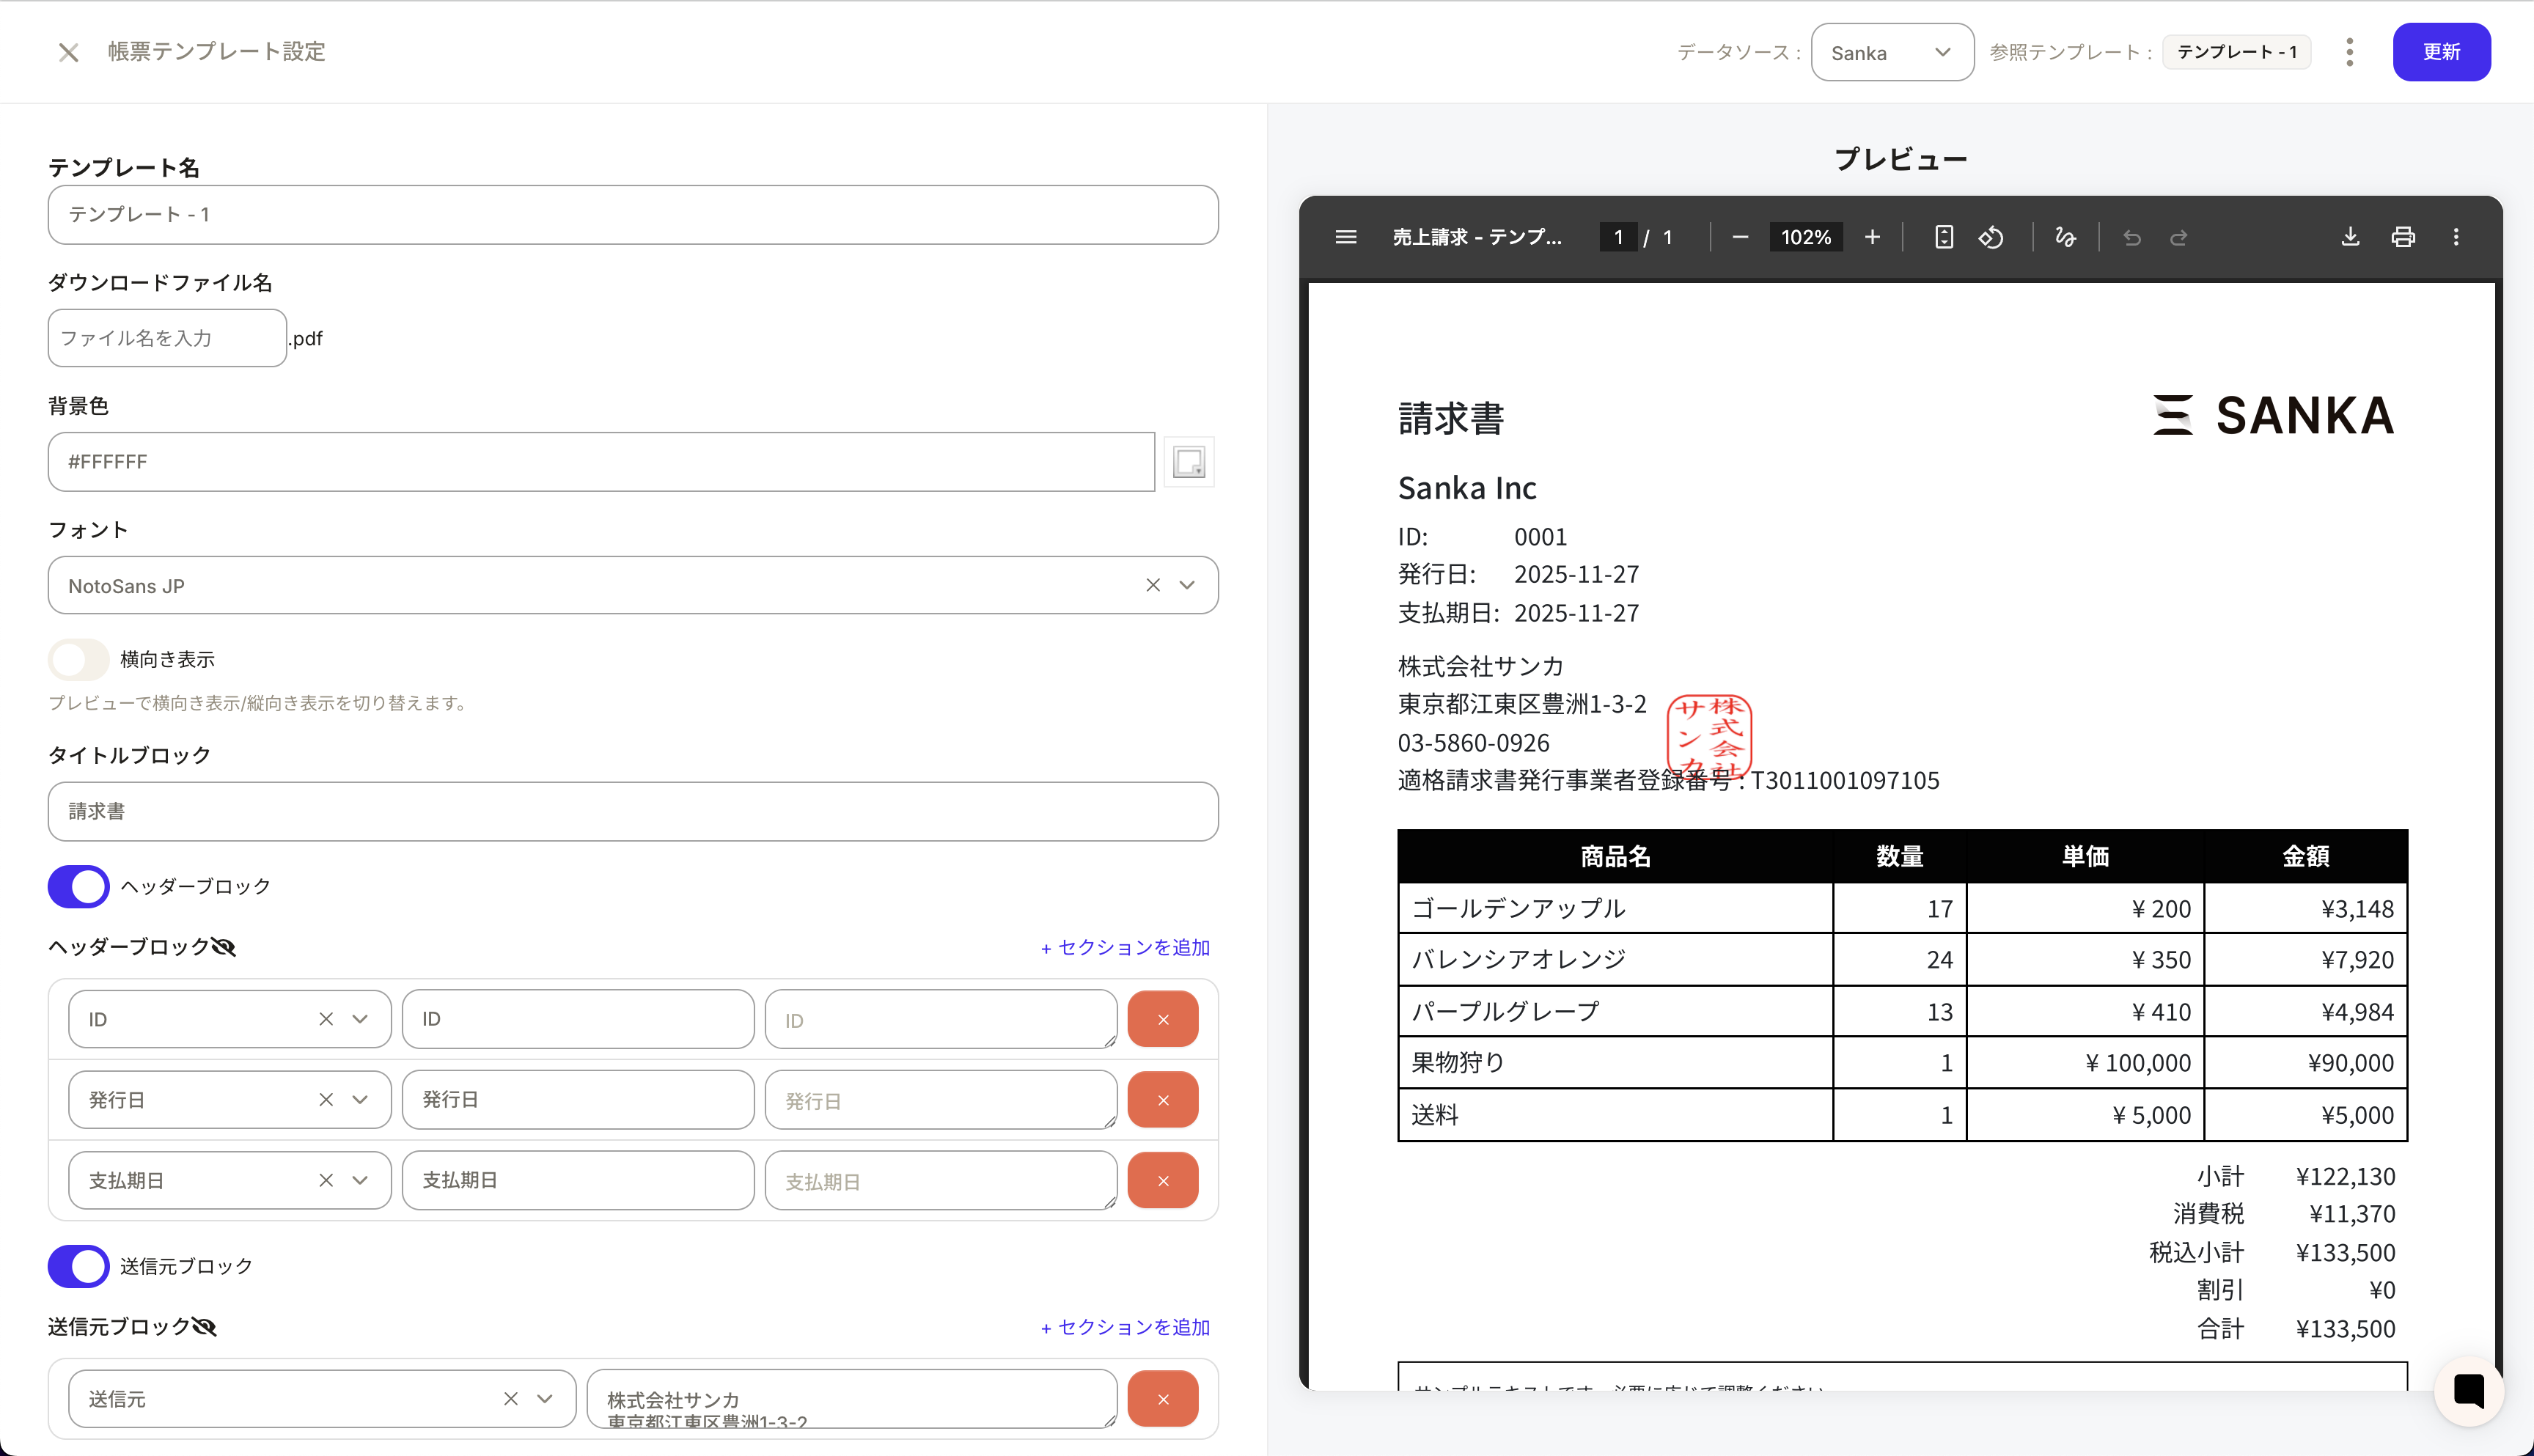
Step 3: Set basic information
Configure the items that should appear on the template. You can set the following:- Title: Reflected in the title at the top of the document.
- Header block: Add or remove properties such as ID and issue date.
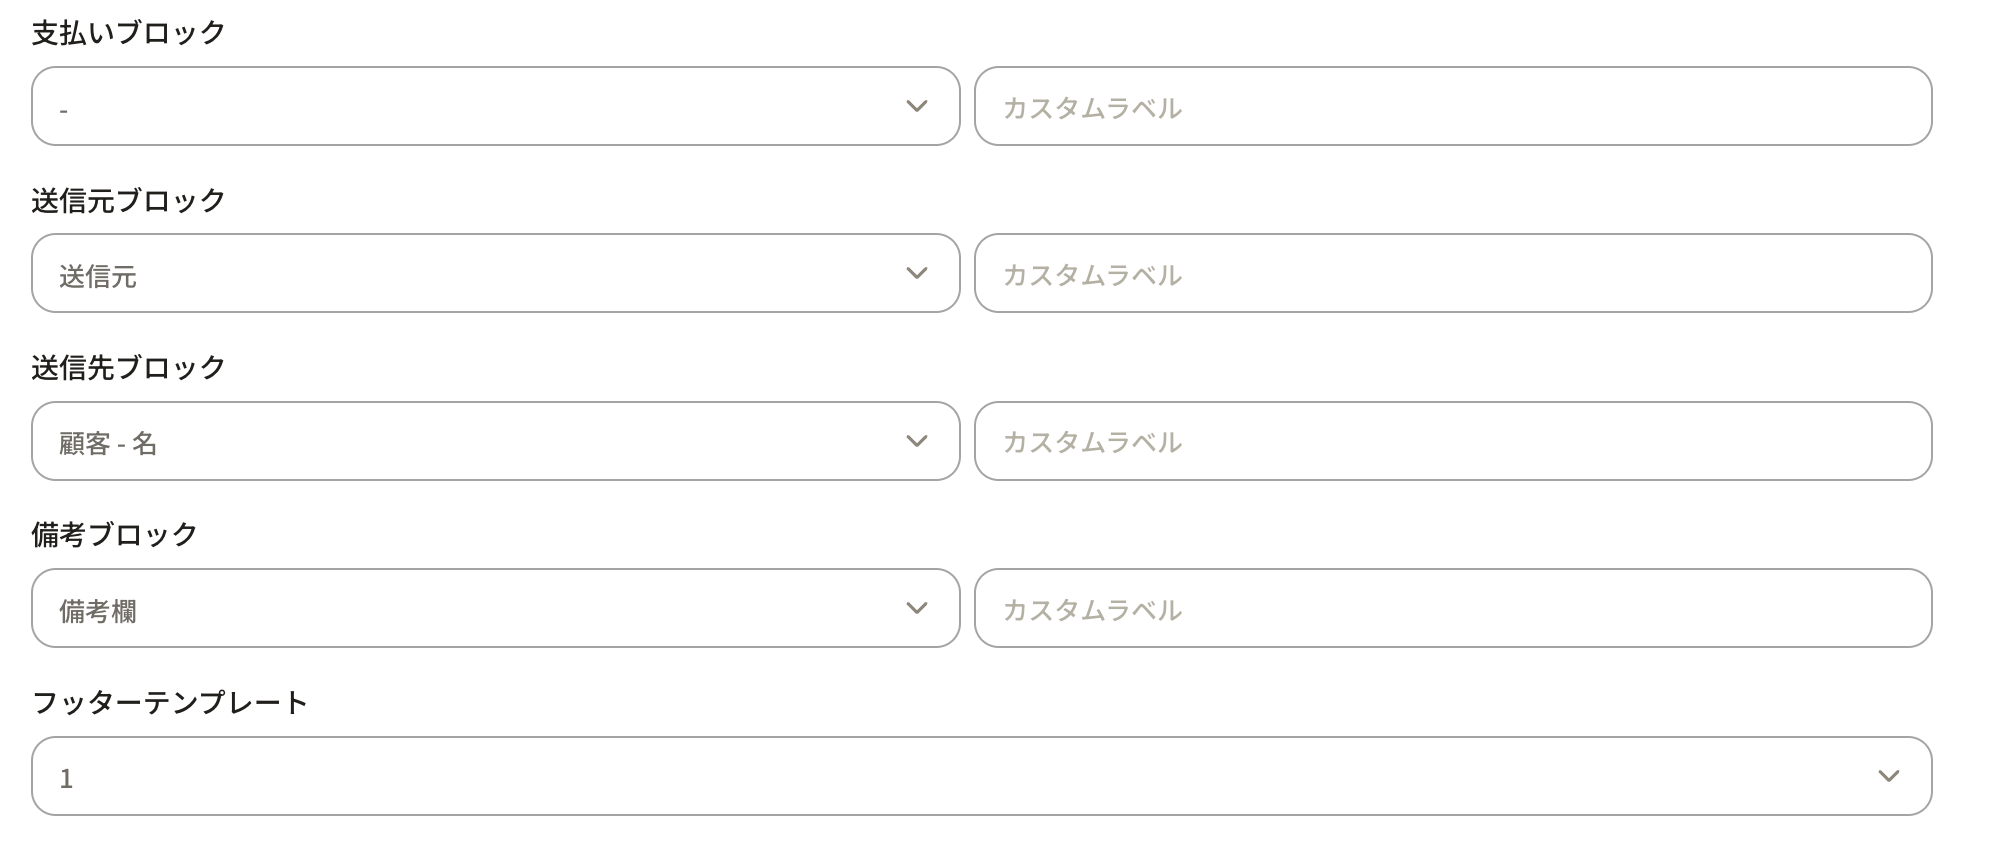
- Recipient / Sender block: Specify which customer and company information to display.
- Payment block: Set billing address and payment terms.
- Notes block: Add remarks or messages.
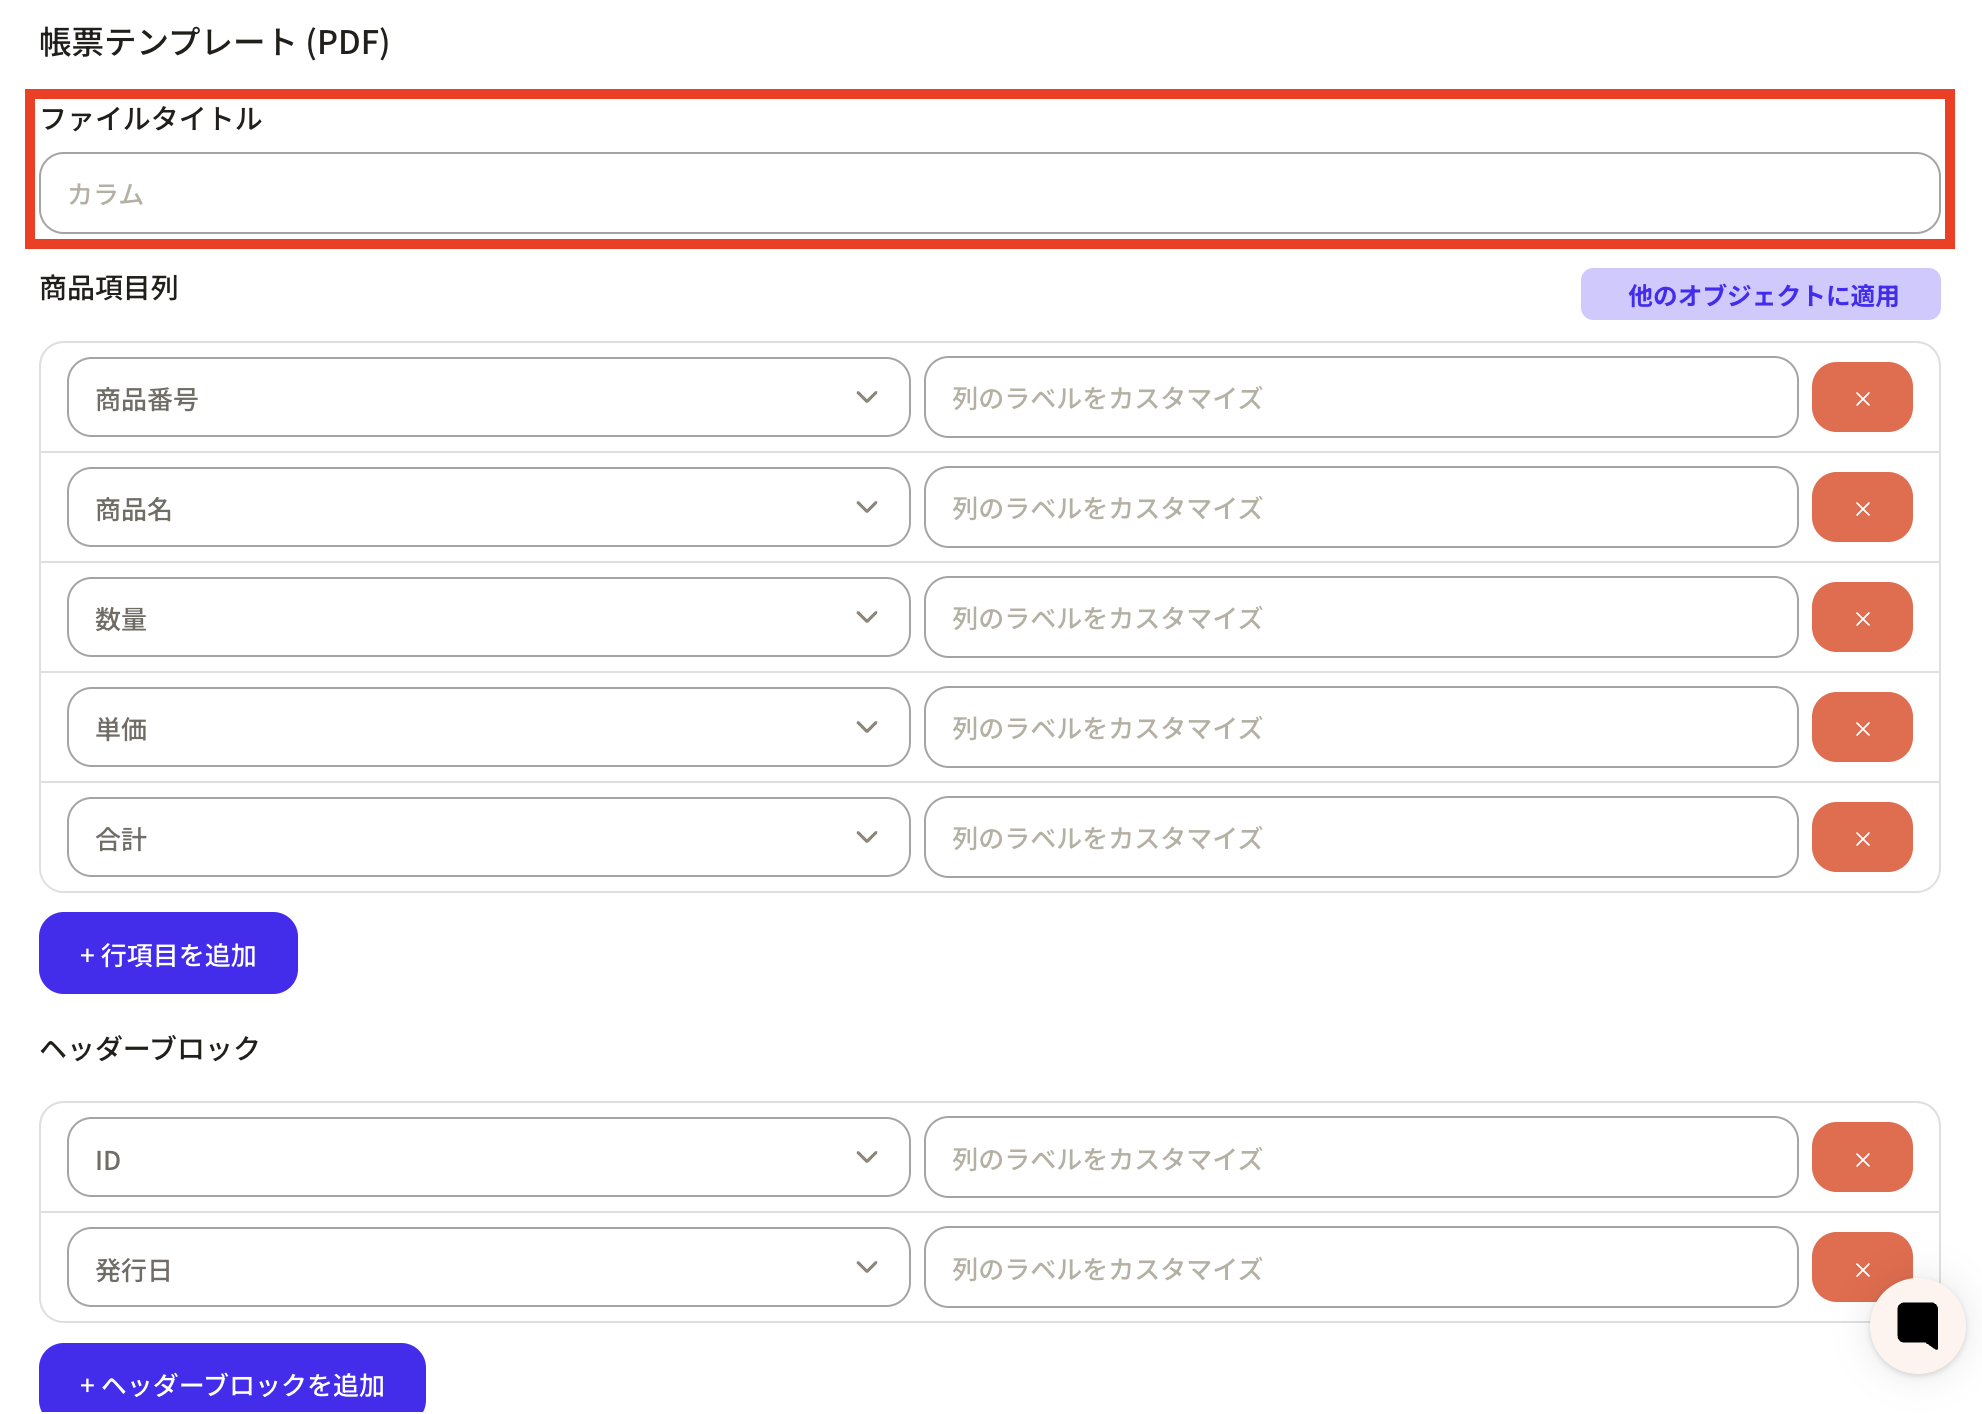
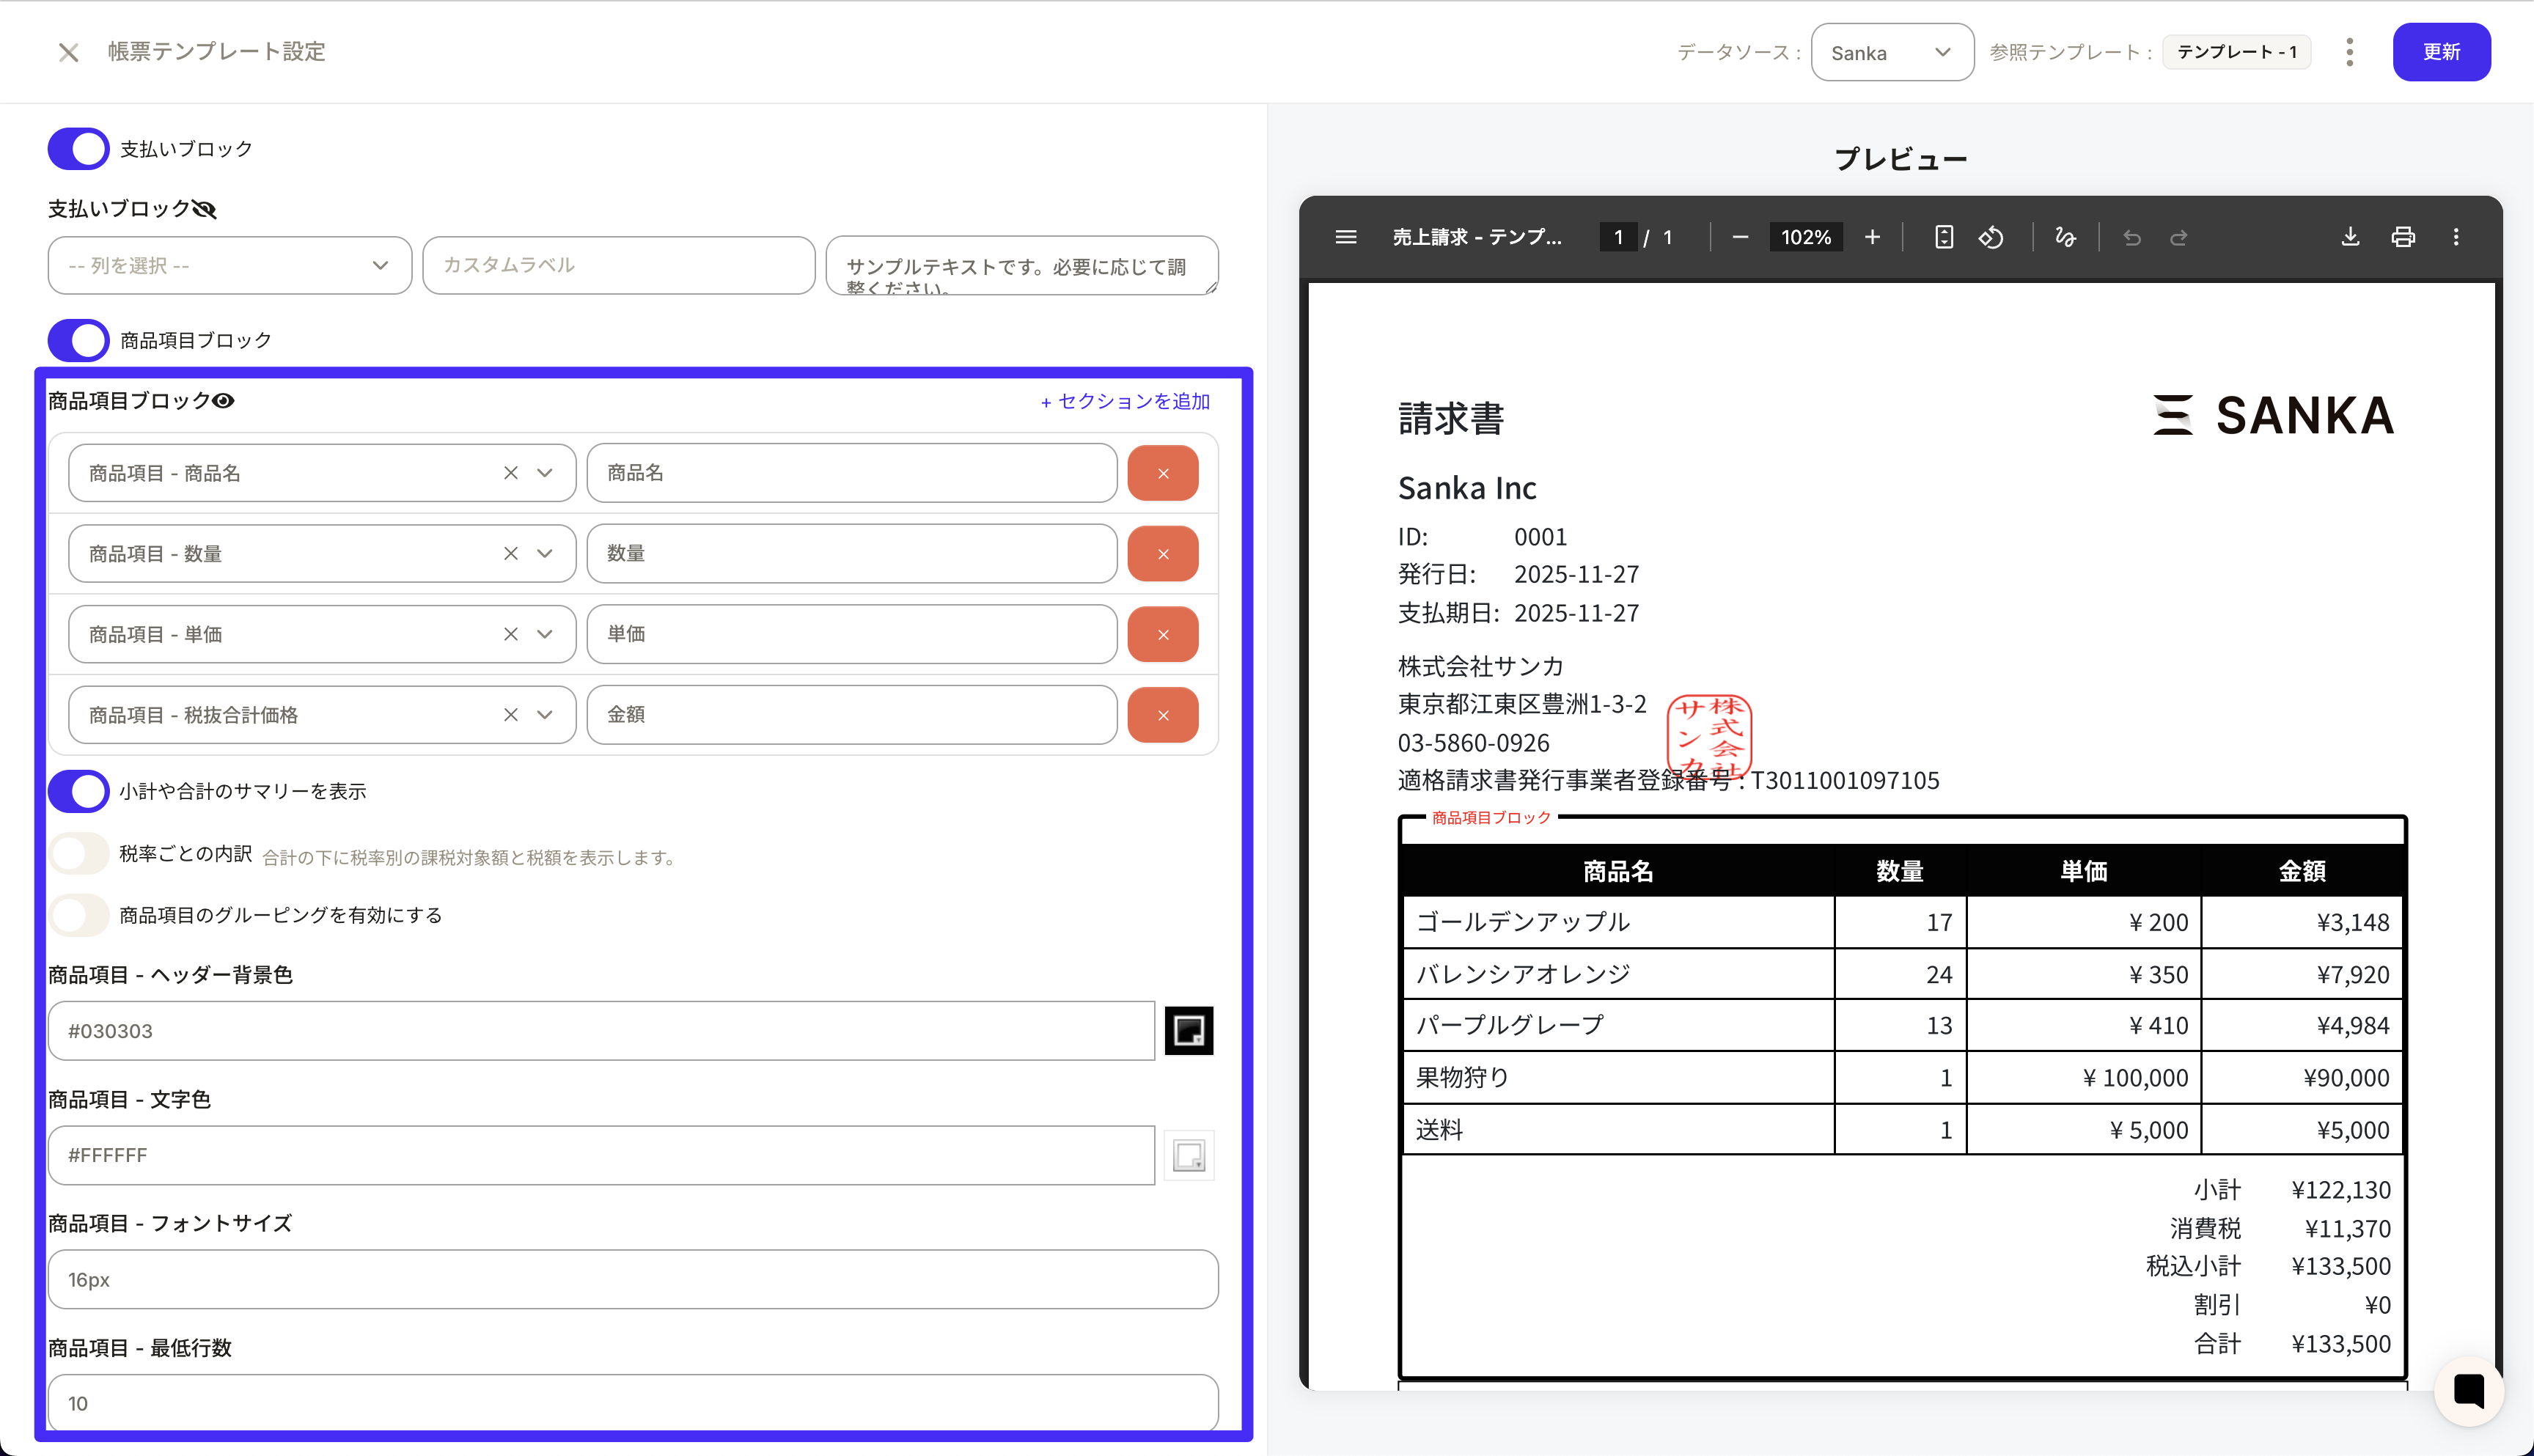
Step 4: Adjust the line item block
- Under Line item columns, select the columns to show in the detail table (for example, item name, SKU, unit price, tax category, tax inclusive/exclusive).
- Click Add line item to add a property. Use the left side to choose the property, the right side to edit the column header, and the drag handle on the left to reorder.
- Use Line item text color to change header text color, and Line item font size to adjust the size.
Step 5: Set style and footer
- Company logo / company seal: Display images registered in the Company Logo and Company Seal properties on the document.
- Set background color / theme color / font and size for each template.
- In the footer template, select the page number format (for example, Page 1 / 4, 1 of 4, or page number only).
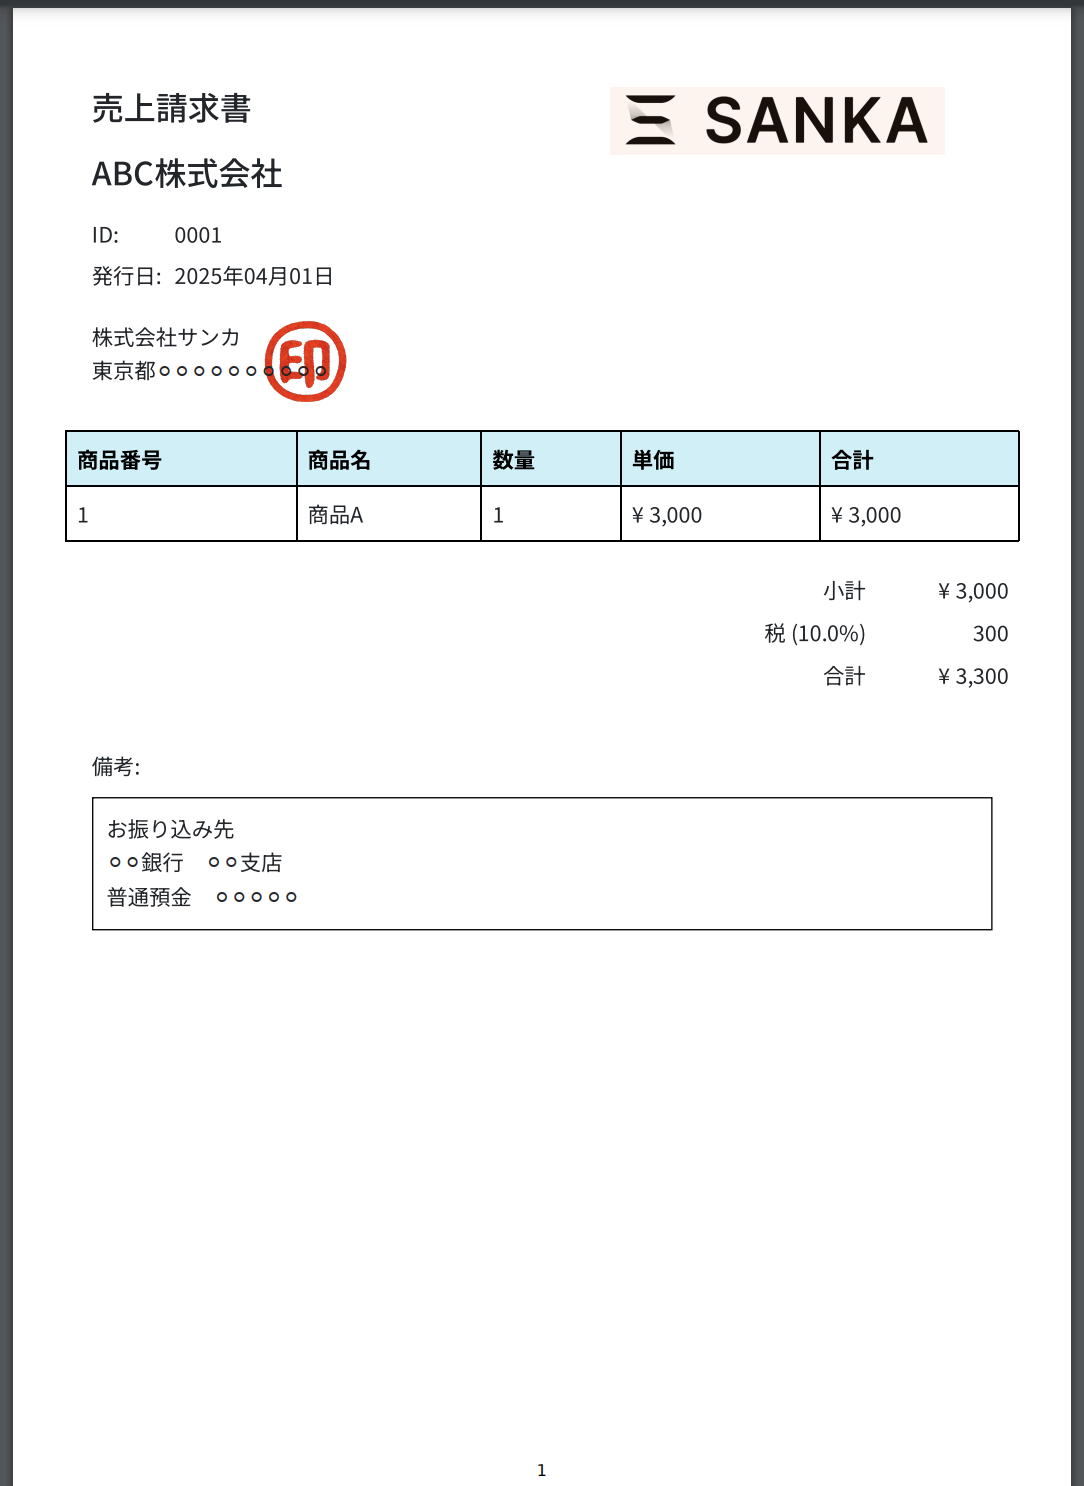
Step 6: Save changes and preview
After configuring everything, be sure to click Update. After updating, use Download preview in the top-right to check the PDF with real data applied.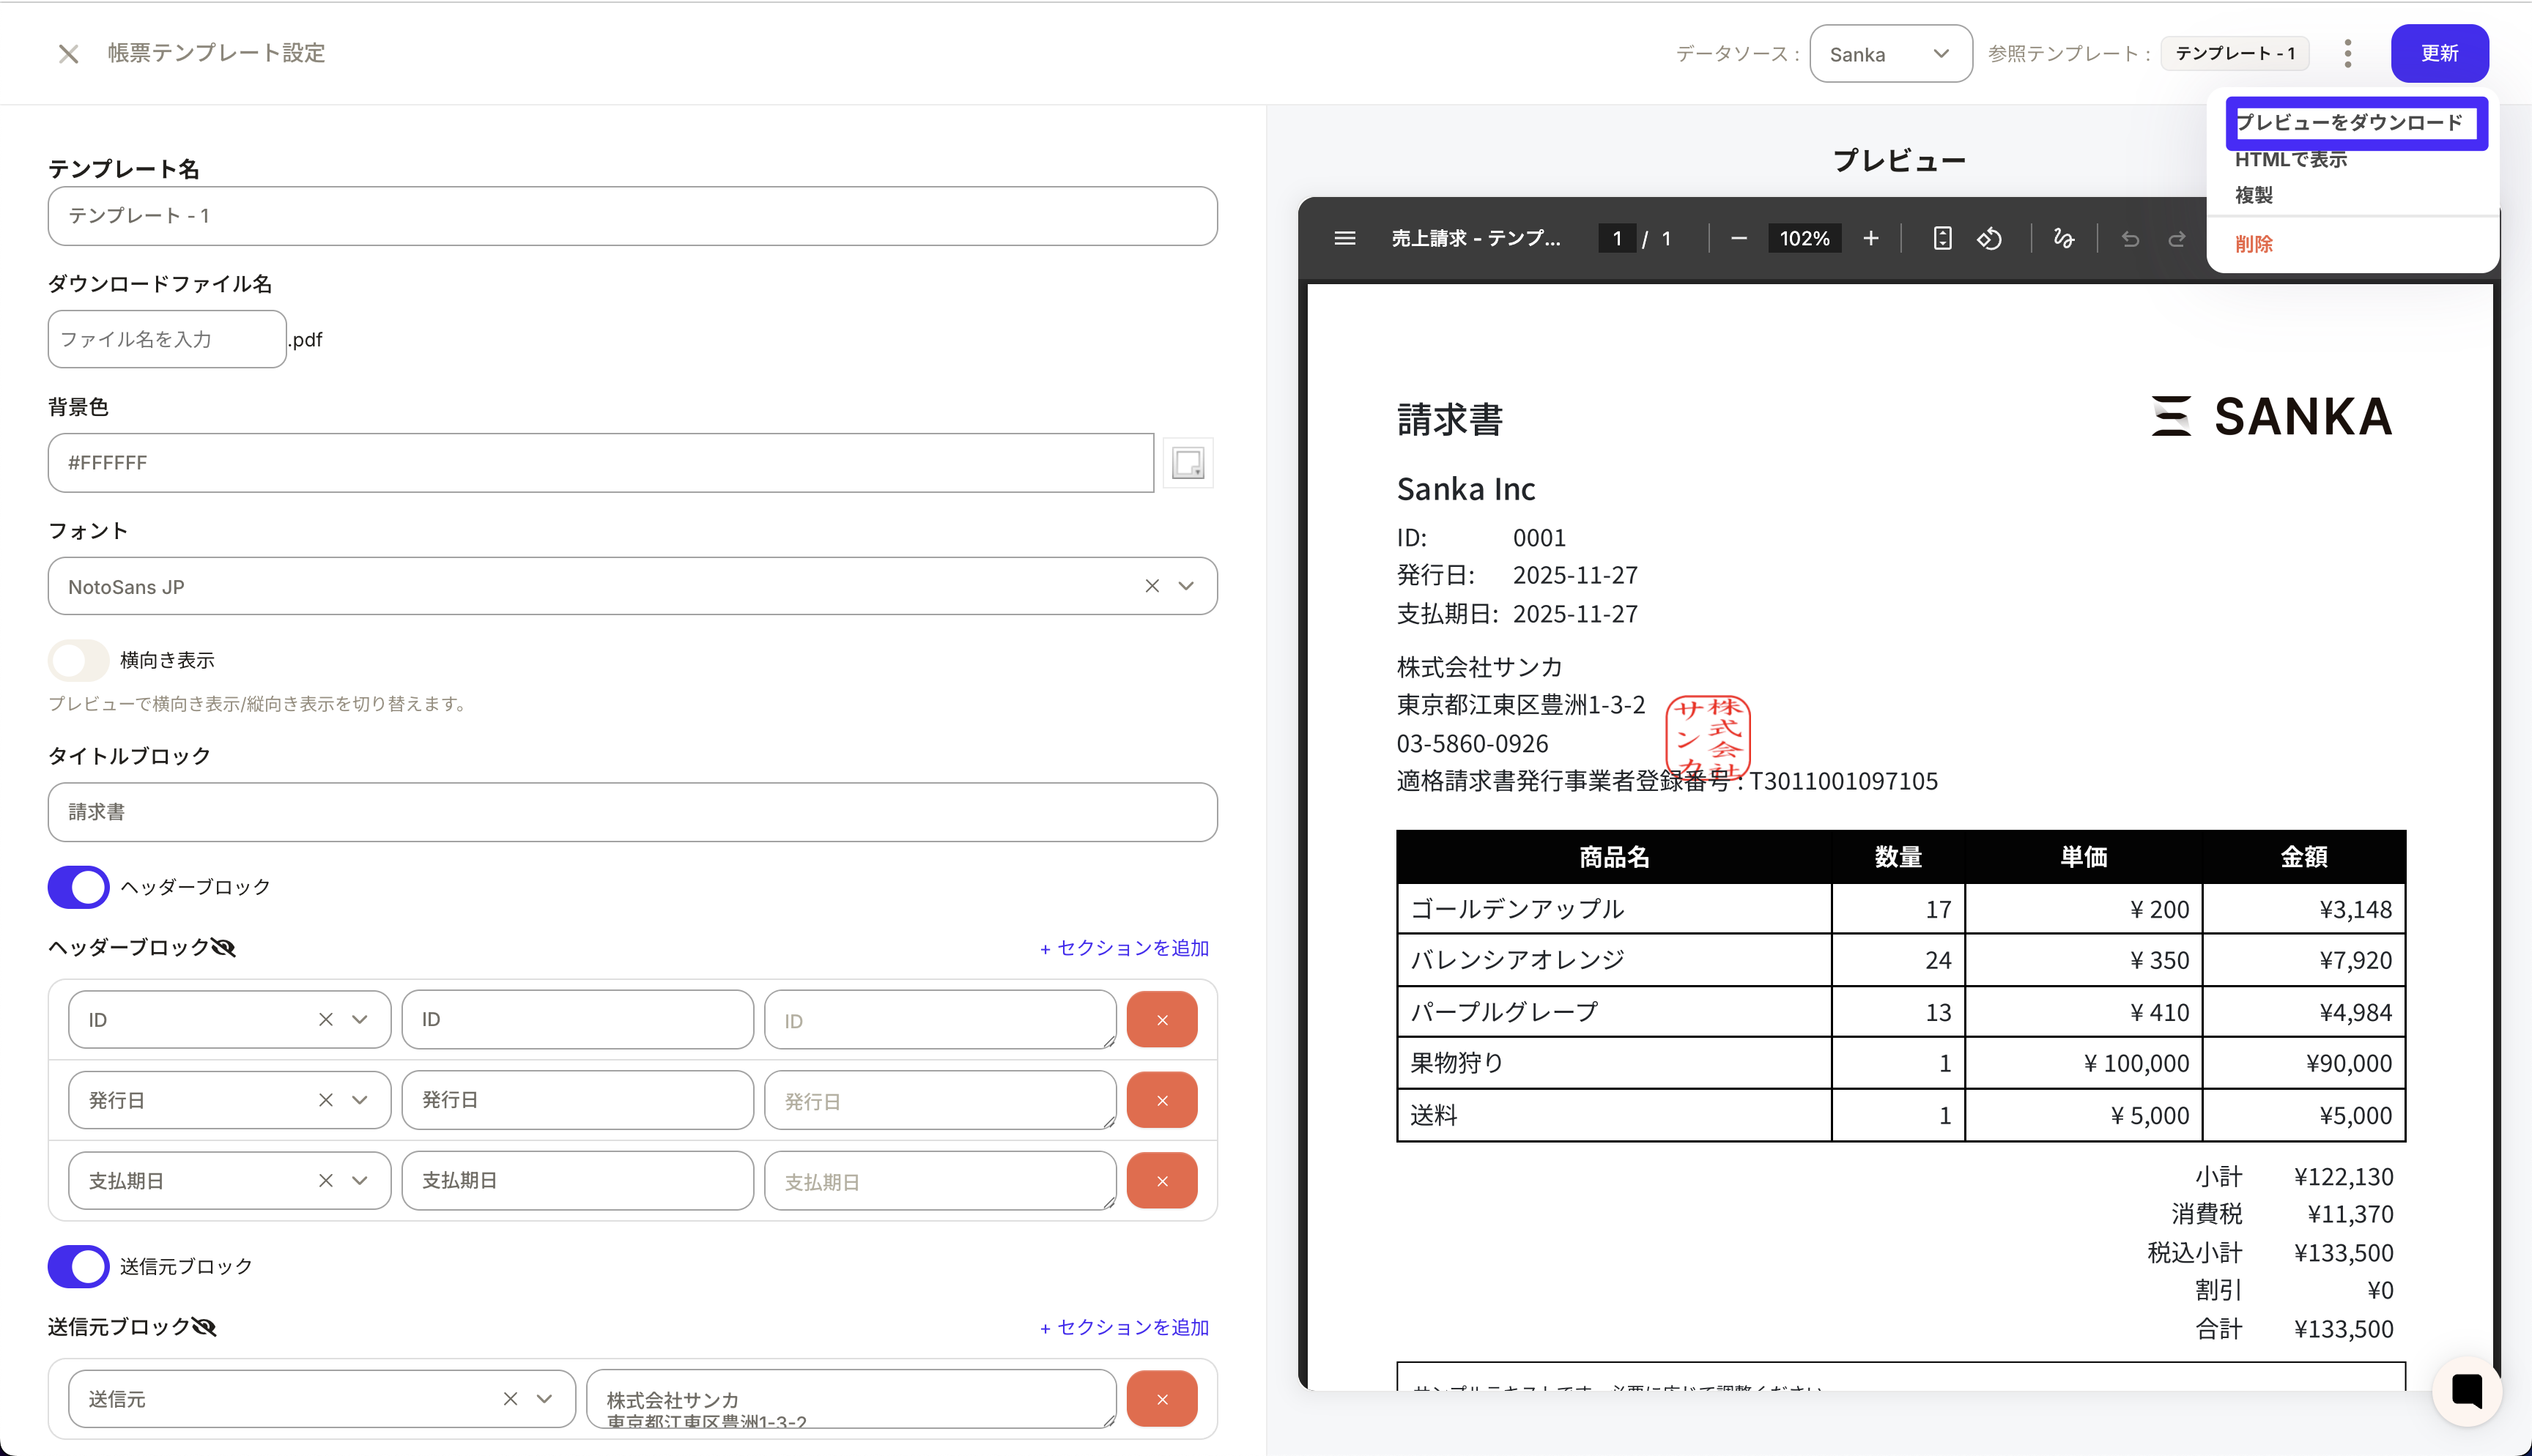
Notes and troubleshooting
- If the logo or company seal does not appear, check that the image is uploaded and that the selected template supports a logo area.
- Changing line item columns changes the detail display in the PDF. Keep any columns required for tax and amount calculations.
- If the output does not match your expectations, review the layout preview and adjust the base template or color settings as needed.