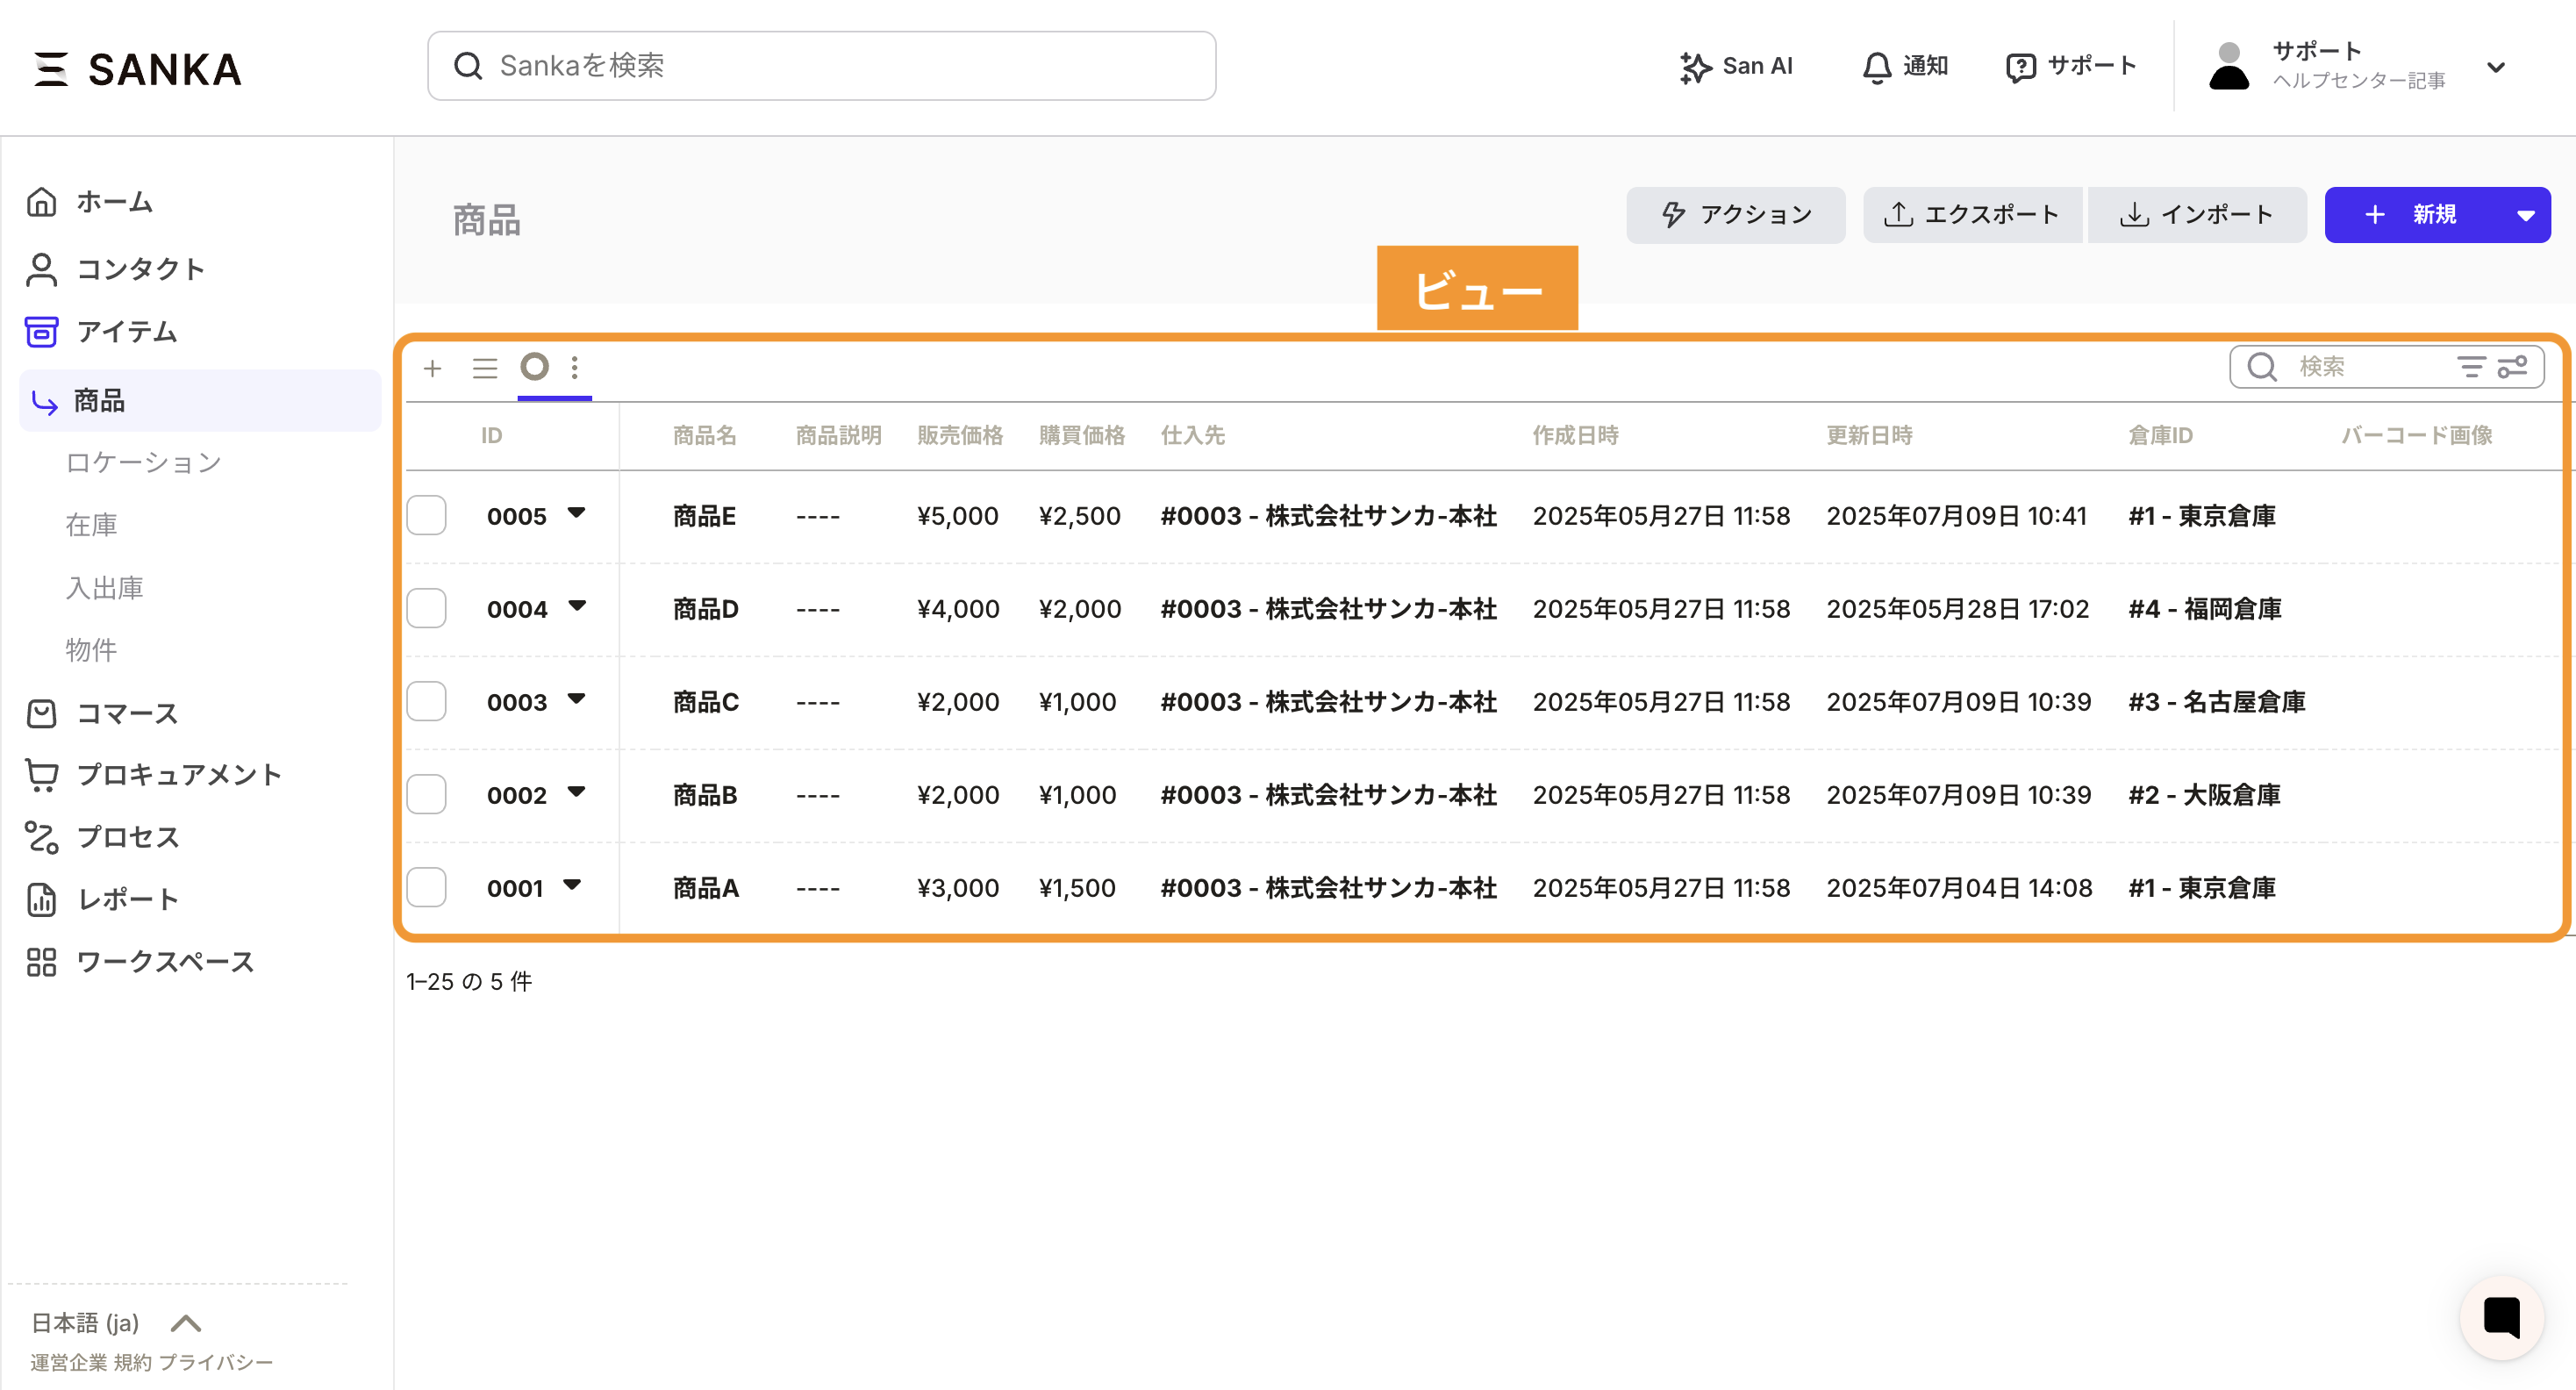
A view controls which properties are shown and how the record list looks in each object.In view management, you can freely customize the properties shown in the object and the order of records.Once you master view management, you can display records by product group or let each user set their own preferred view. By default, the system uses the default view.
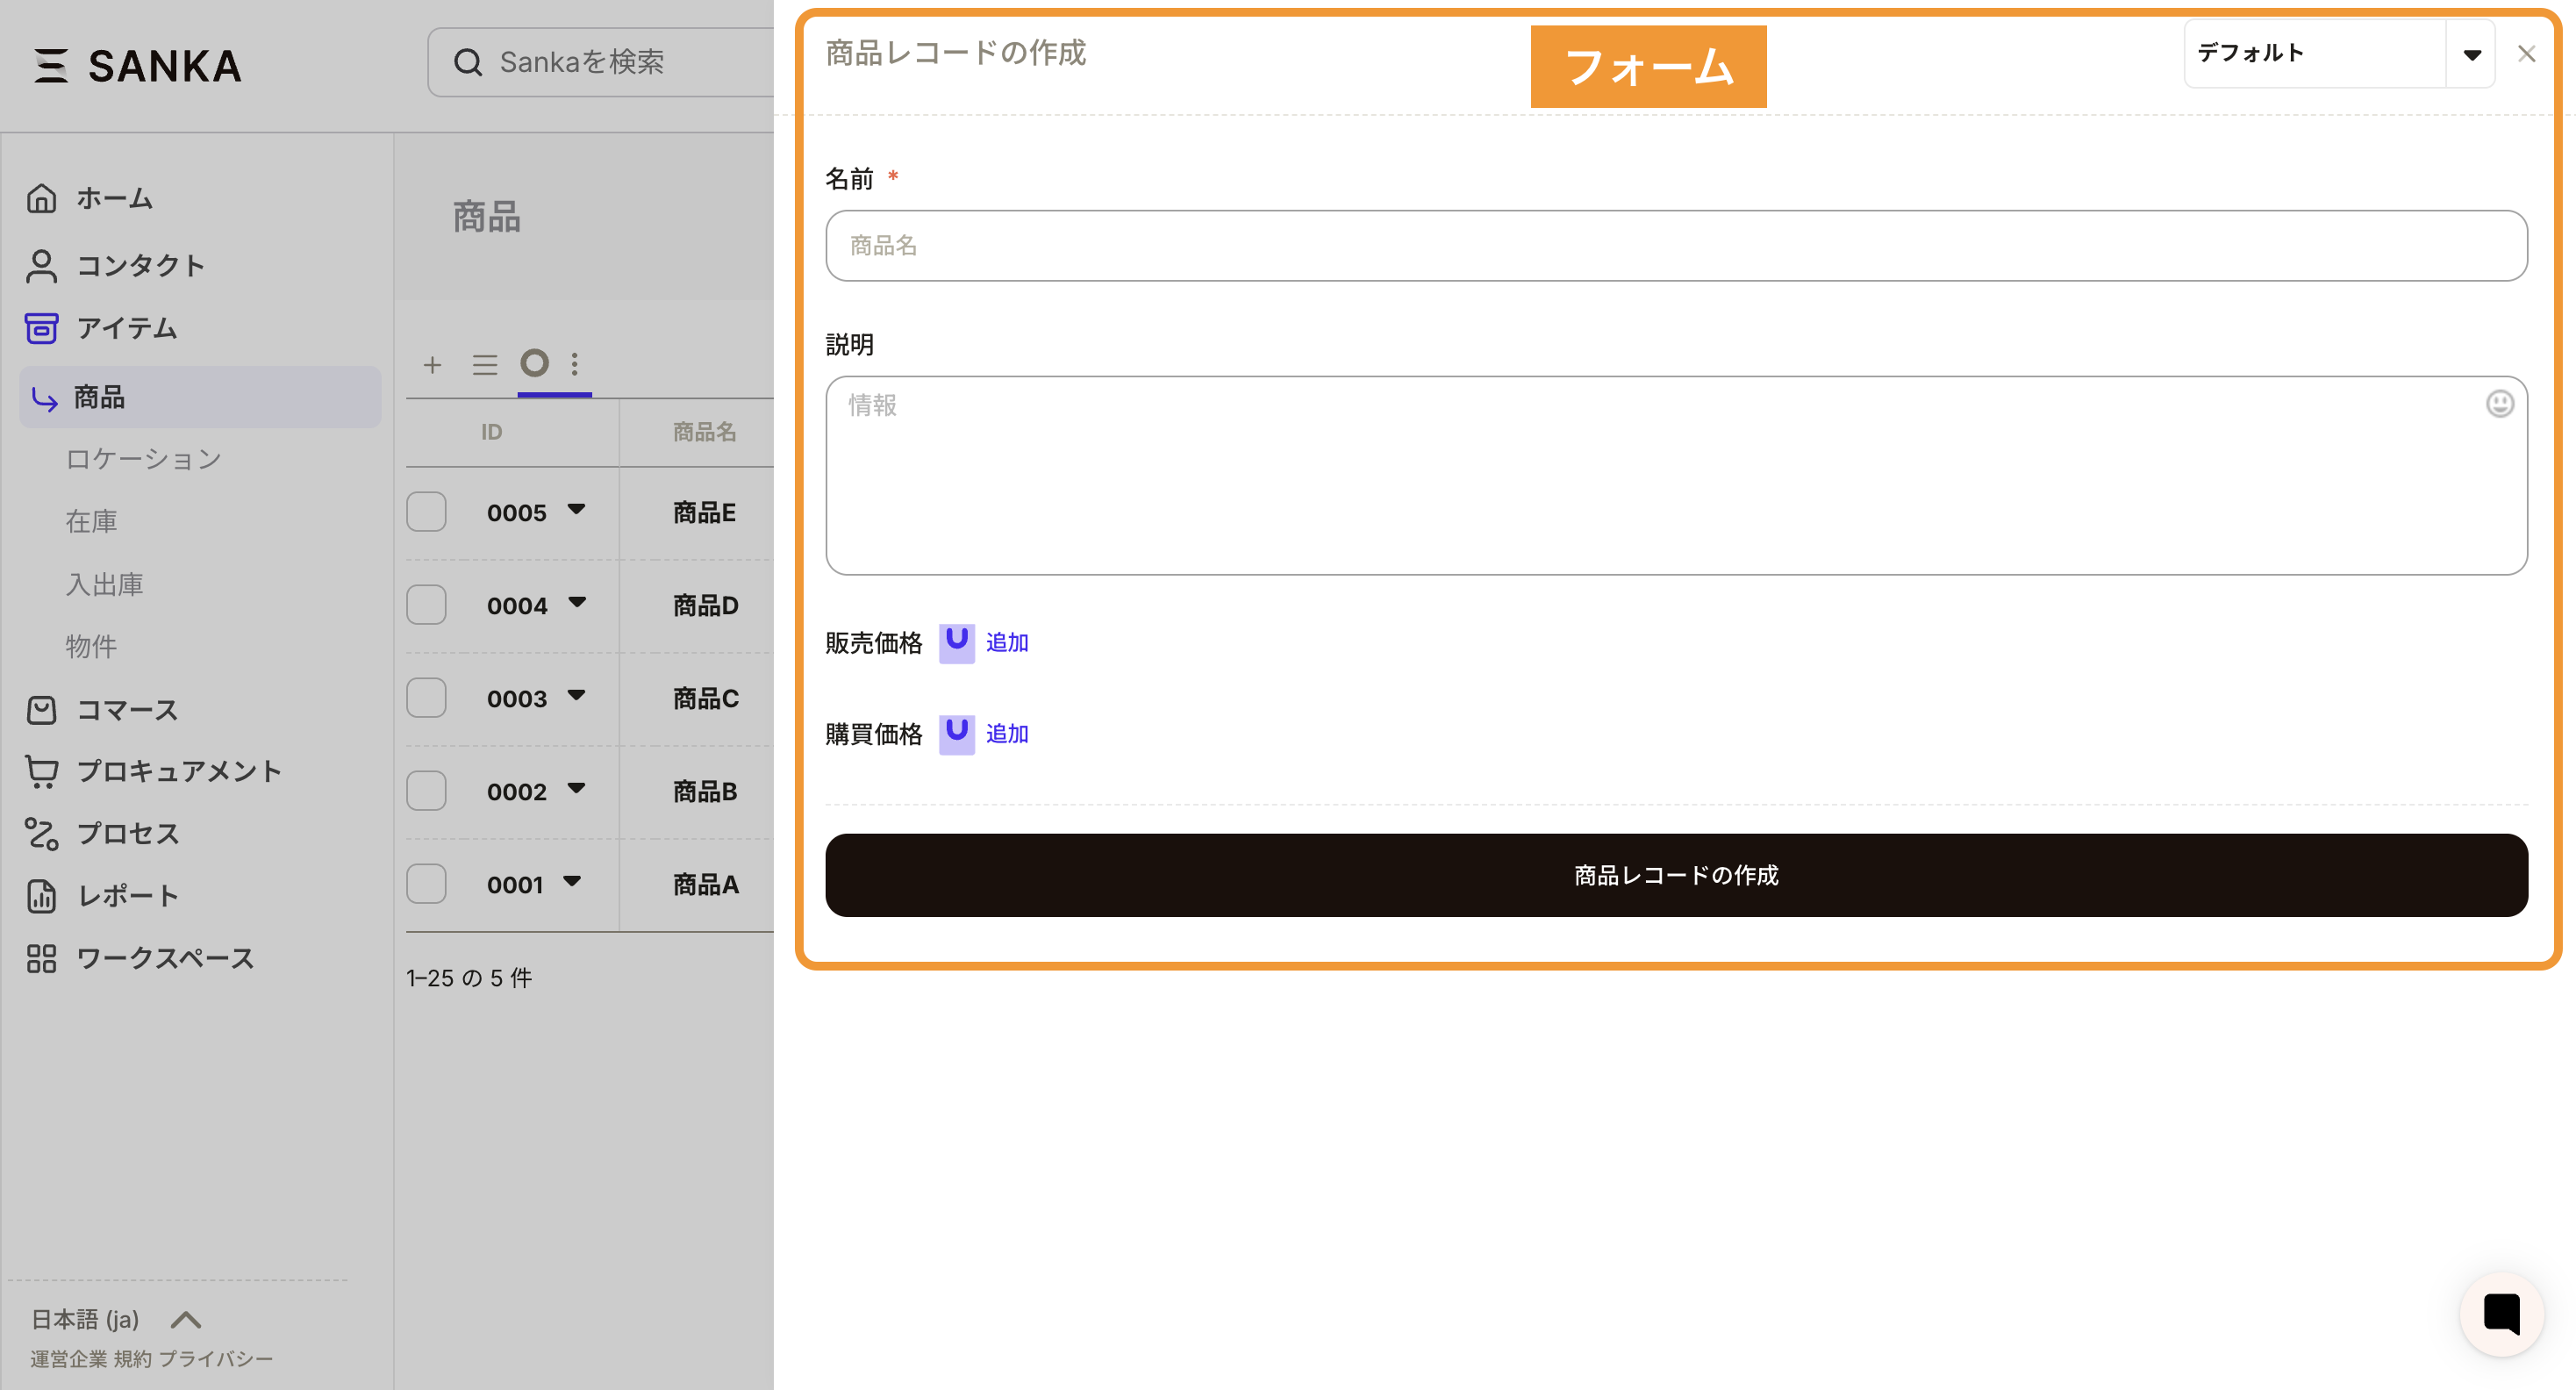
A form is the input screen used when creating a new record.By default, the input fields (properties) are set to a default layout, but you can customize them freely in form management.
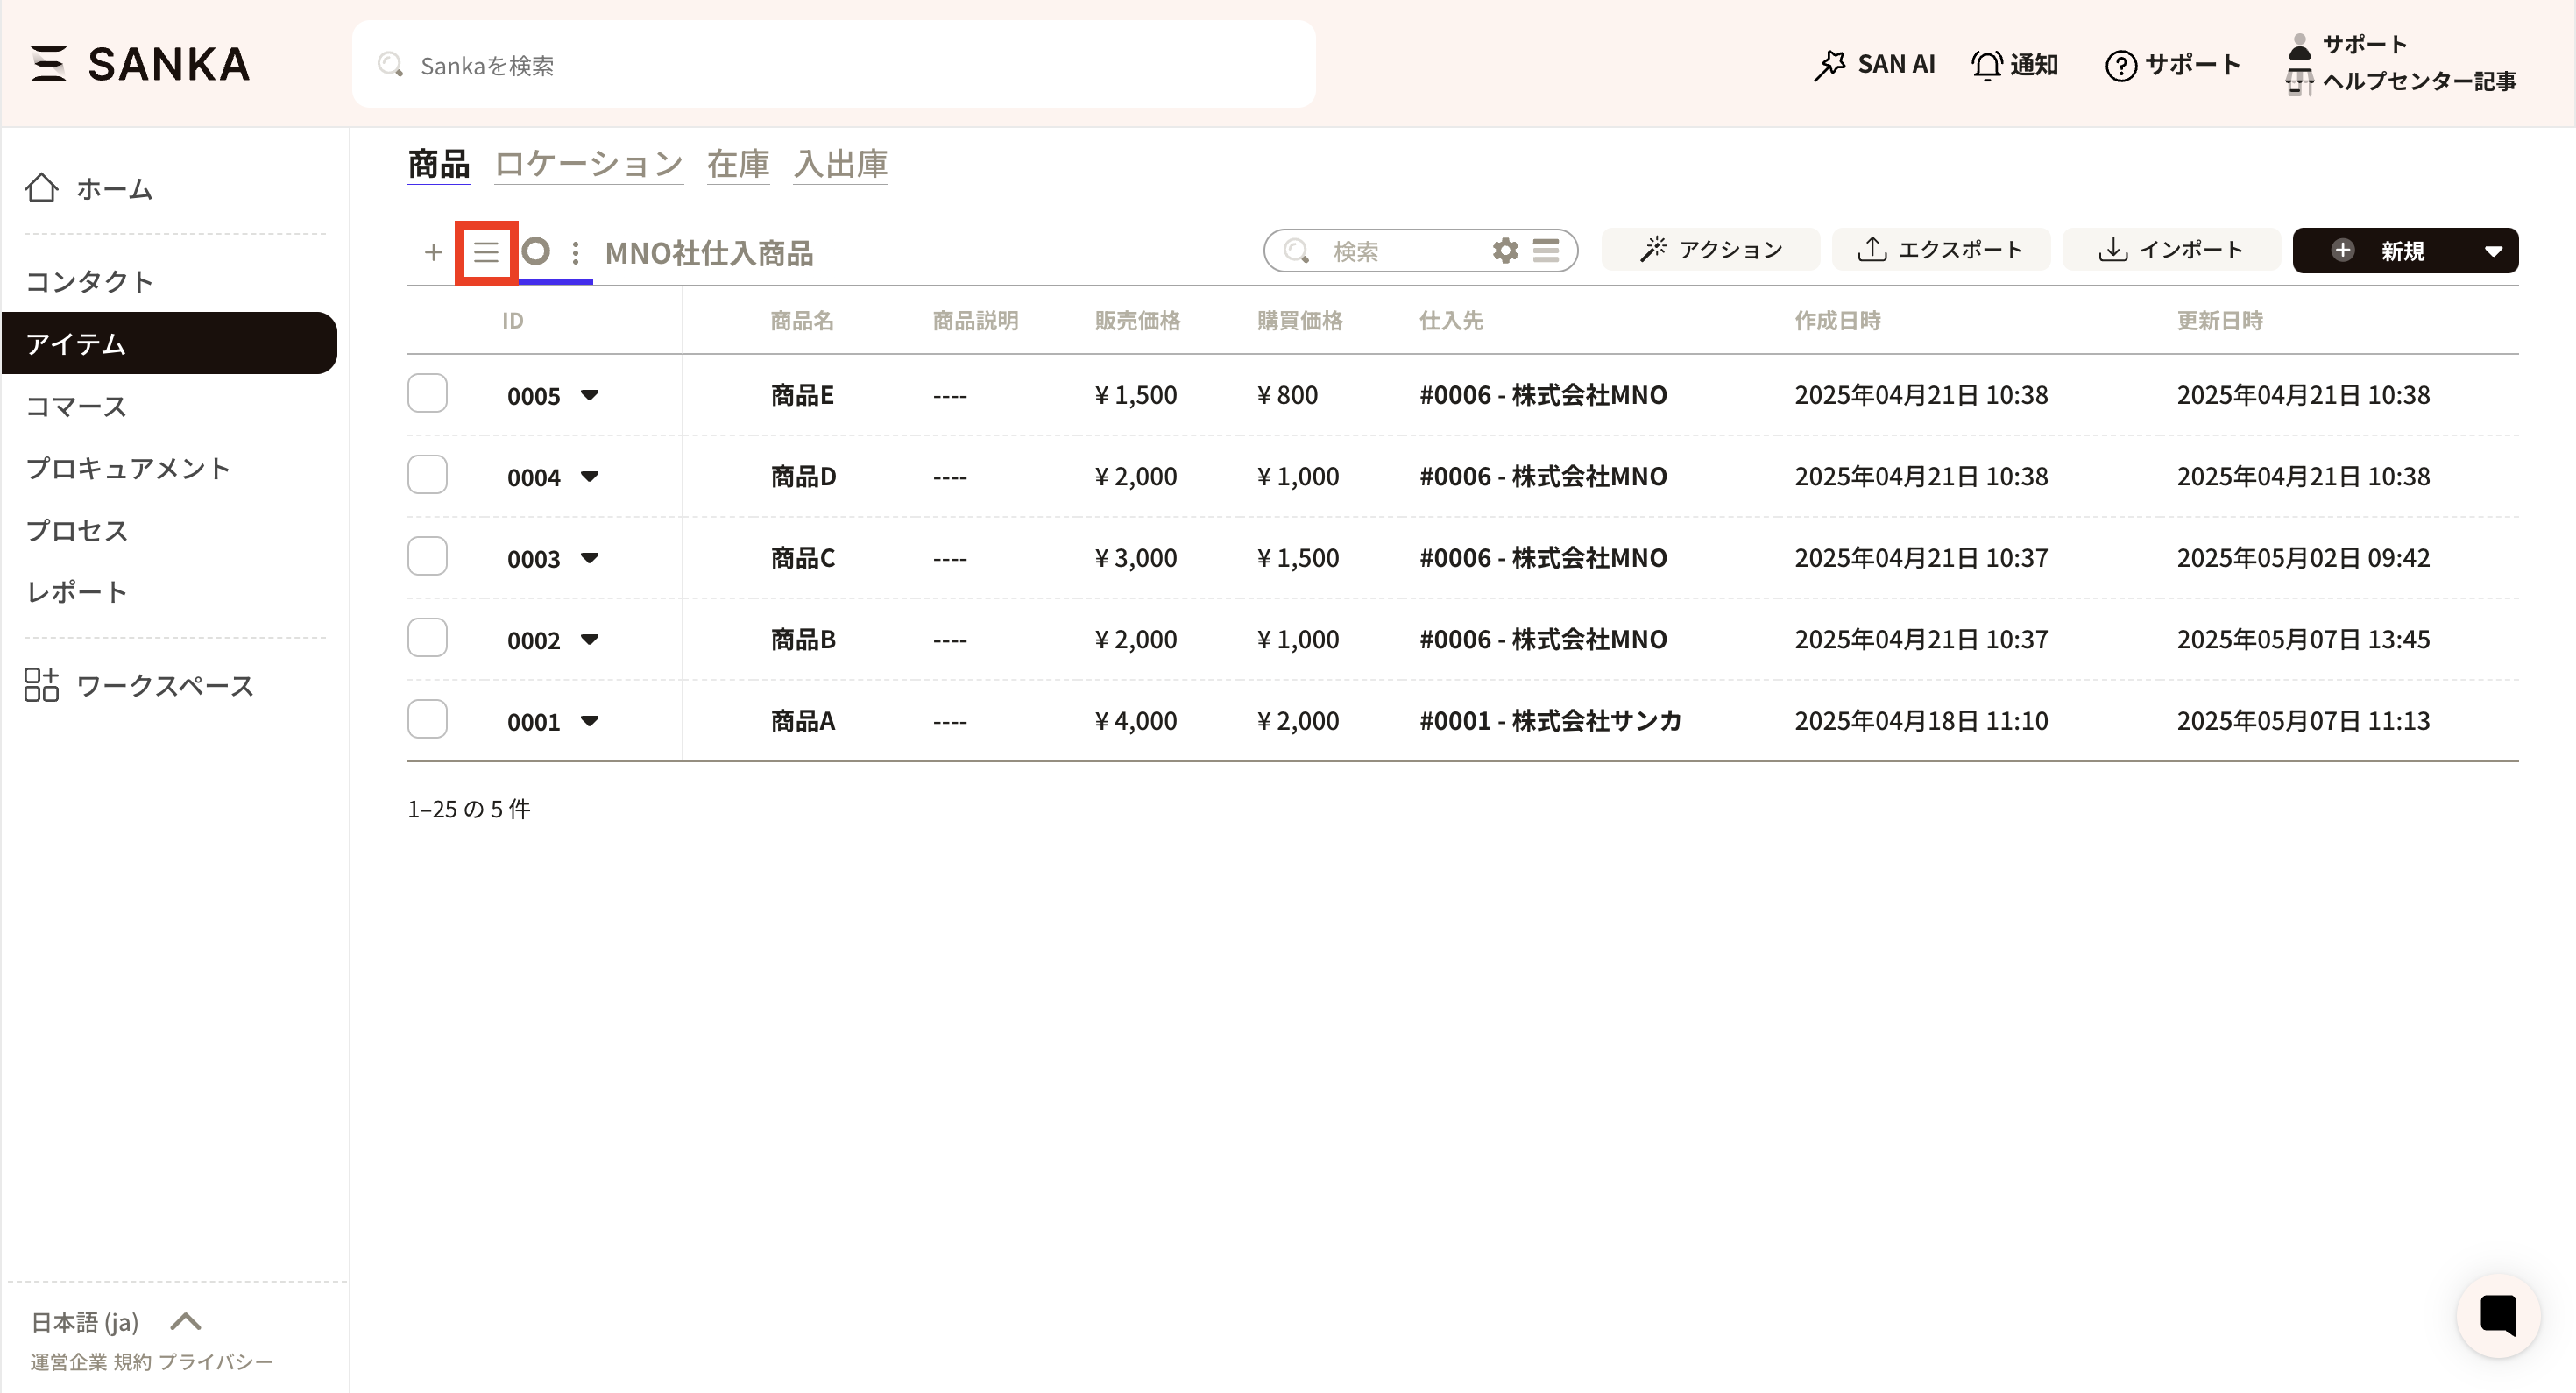
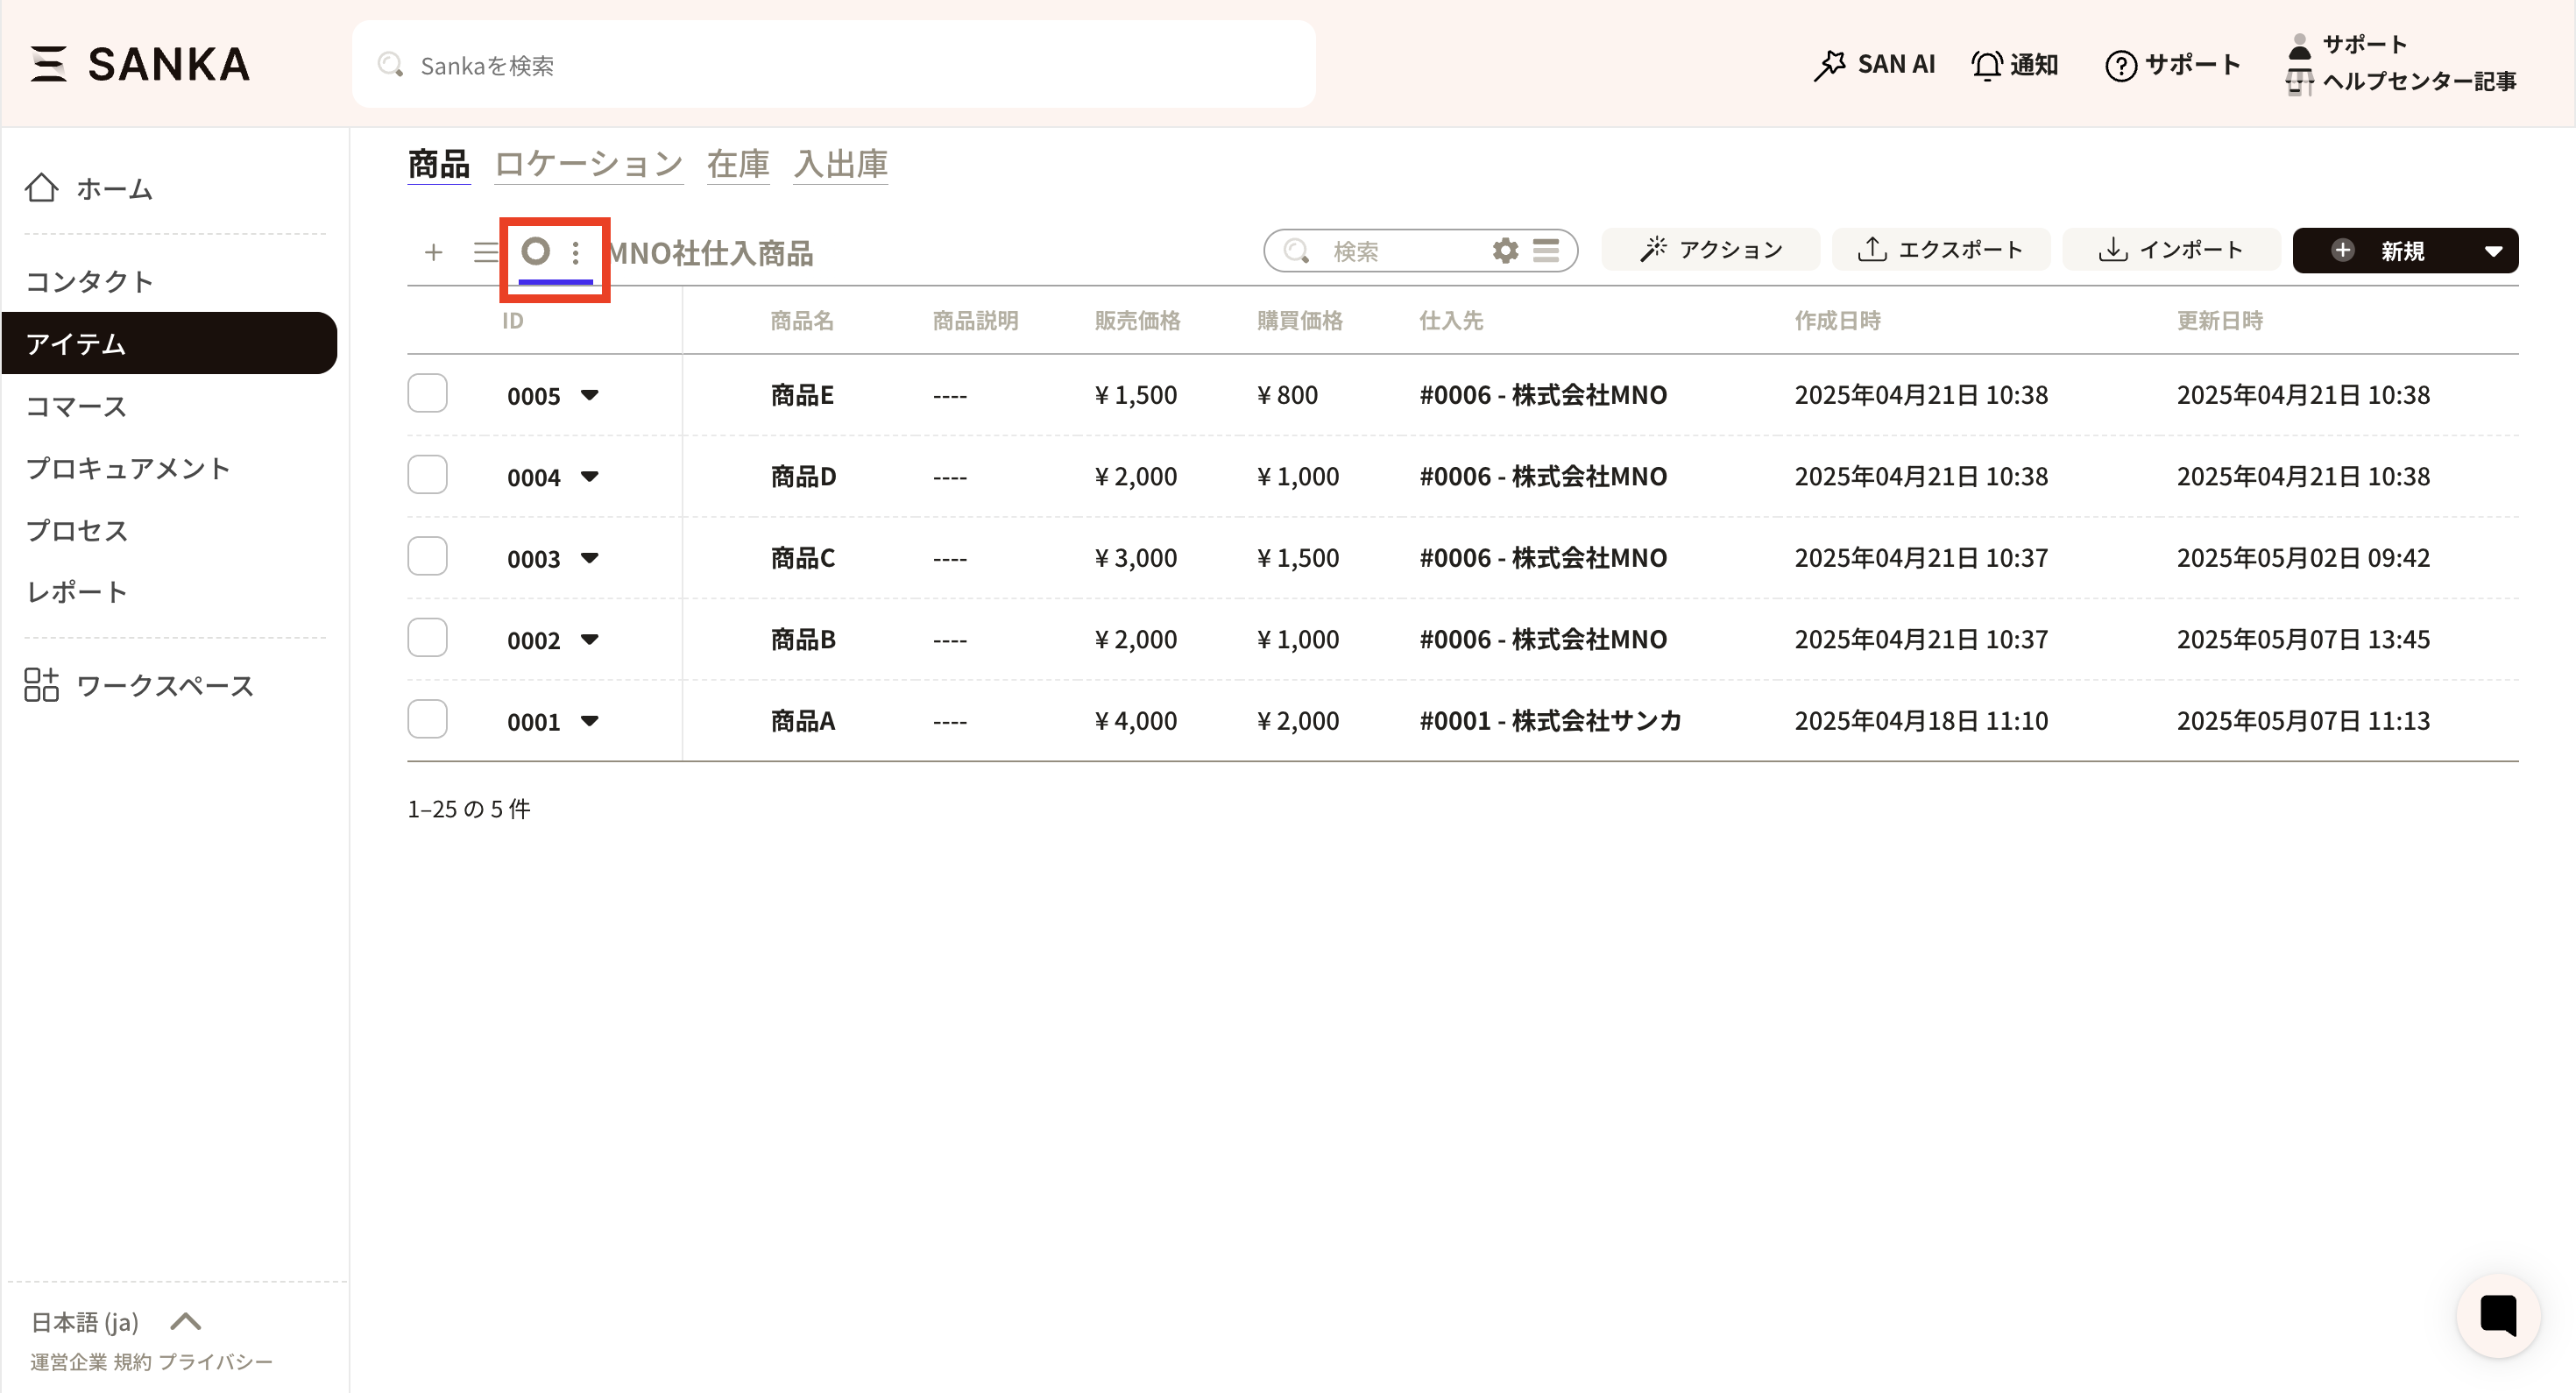
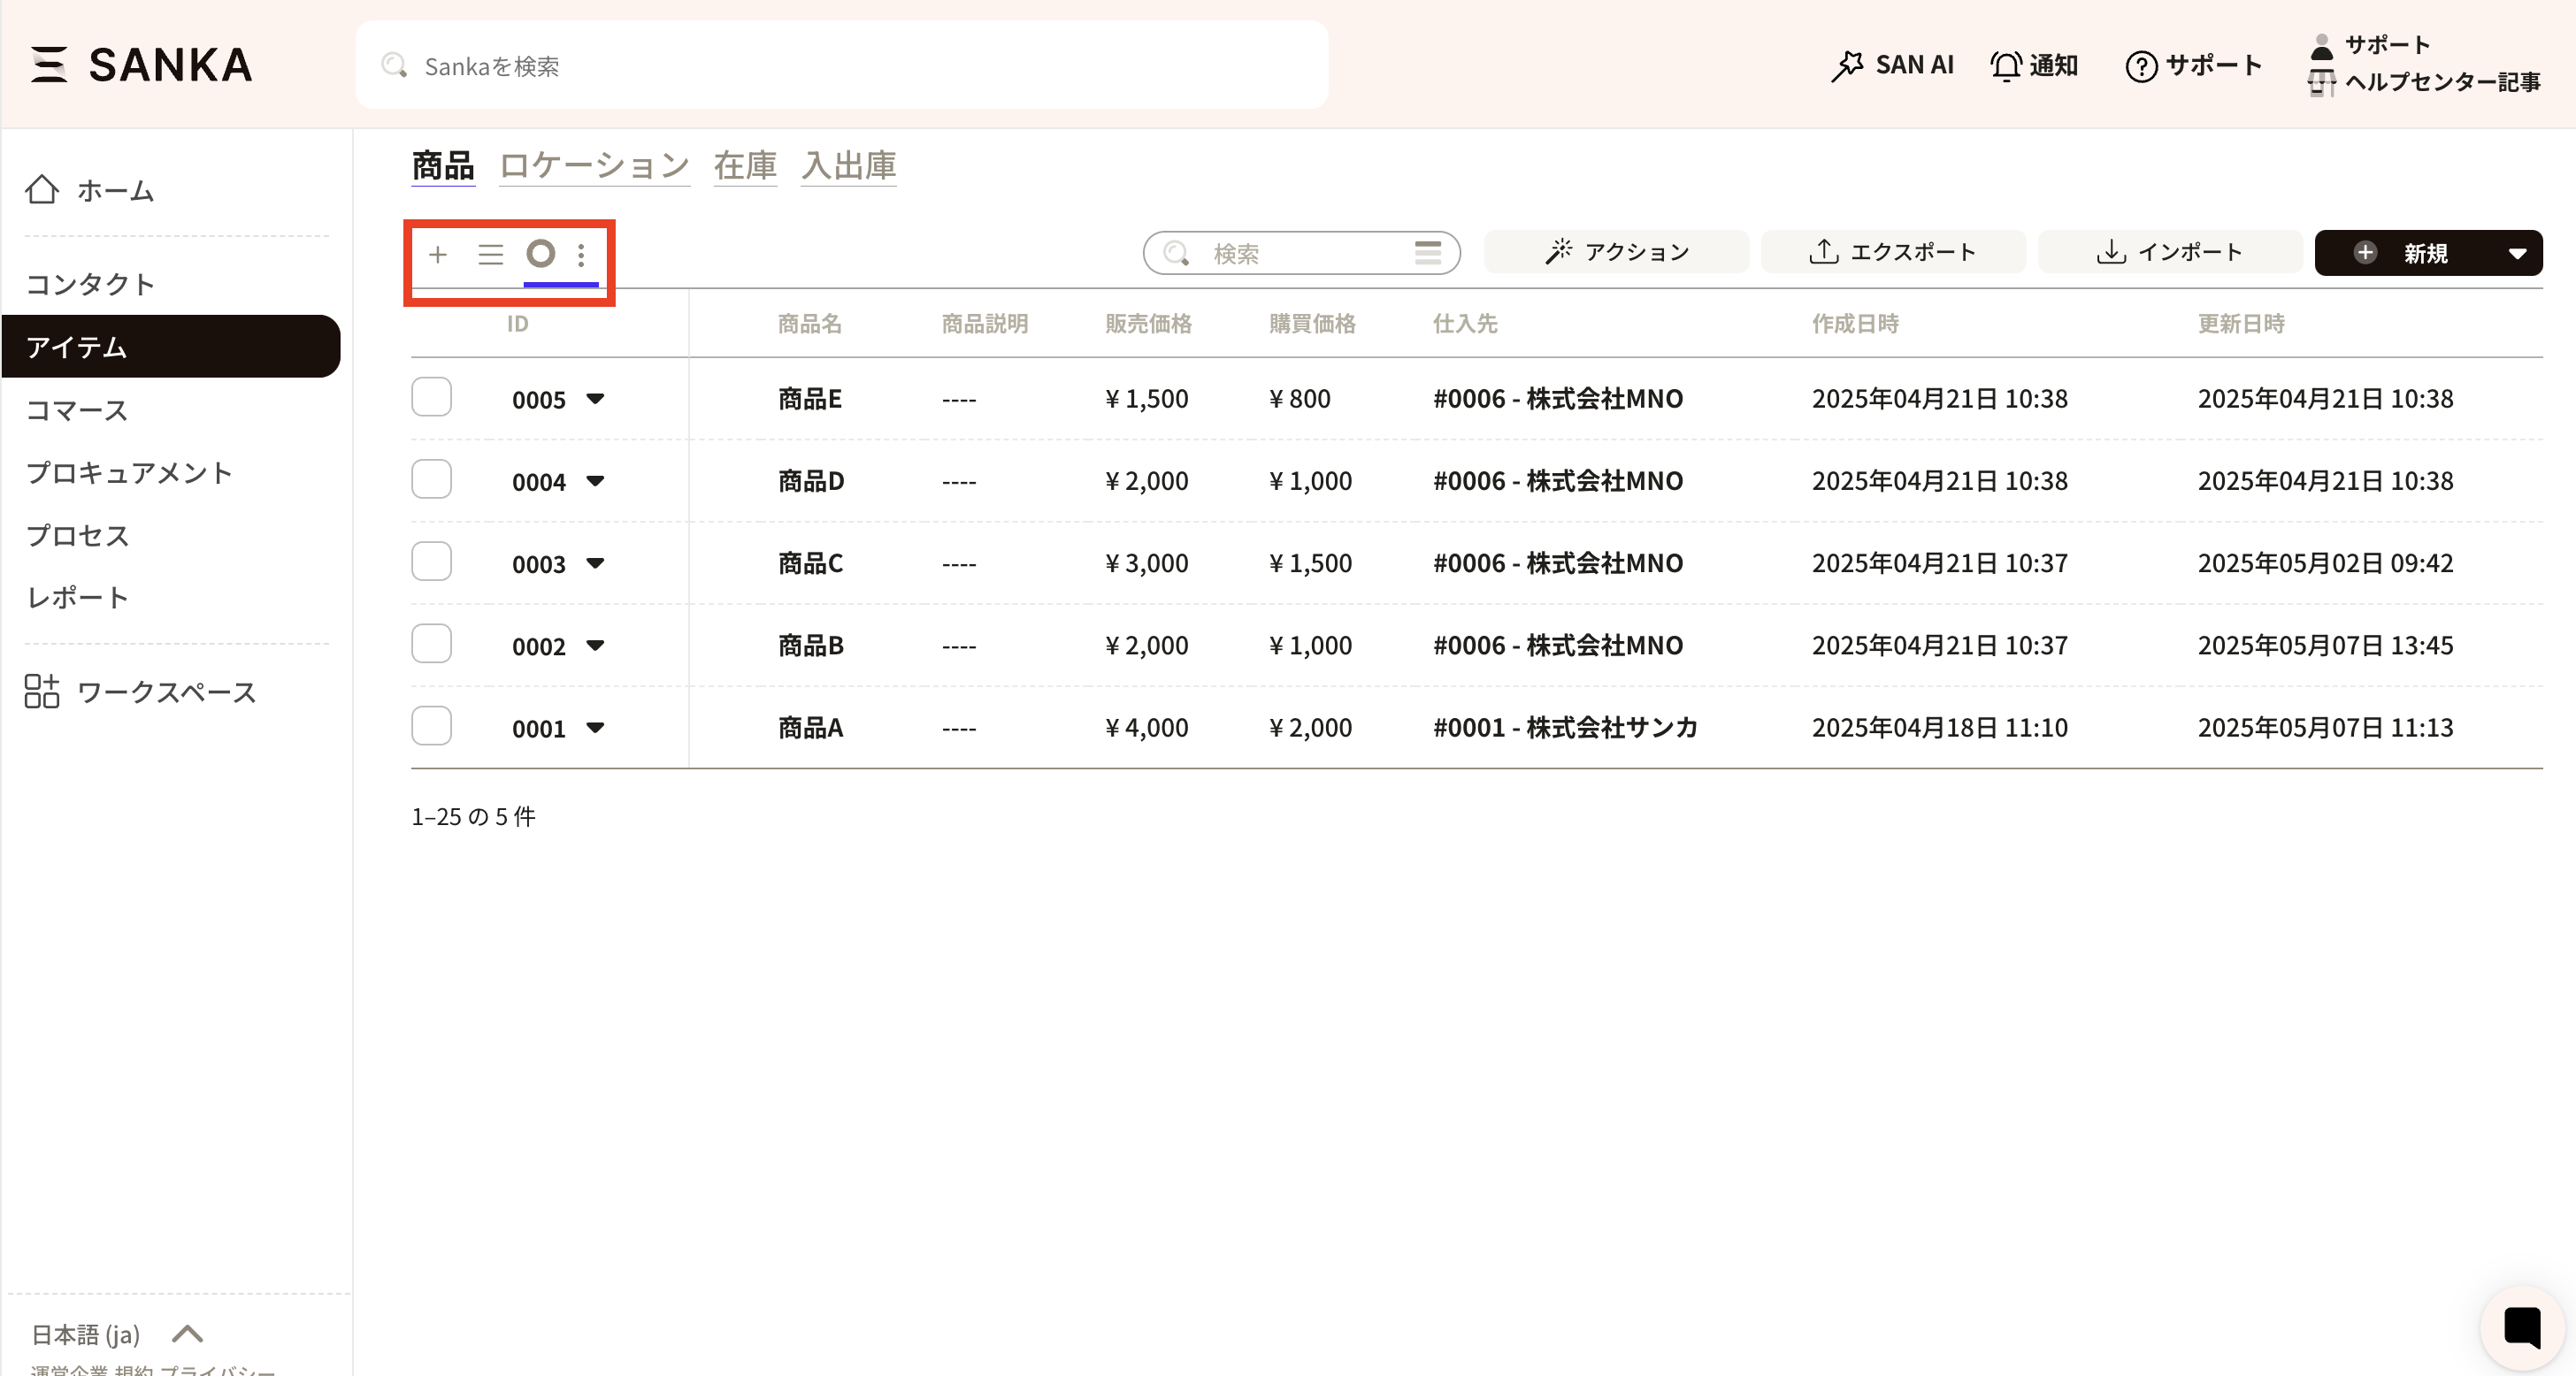
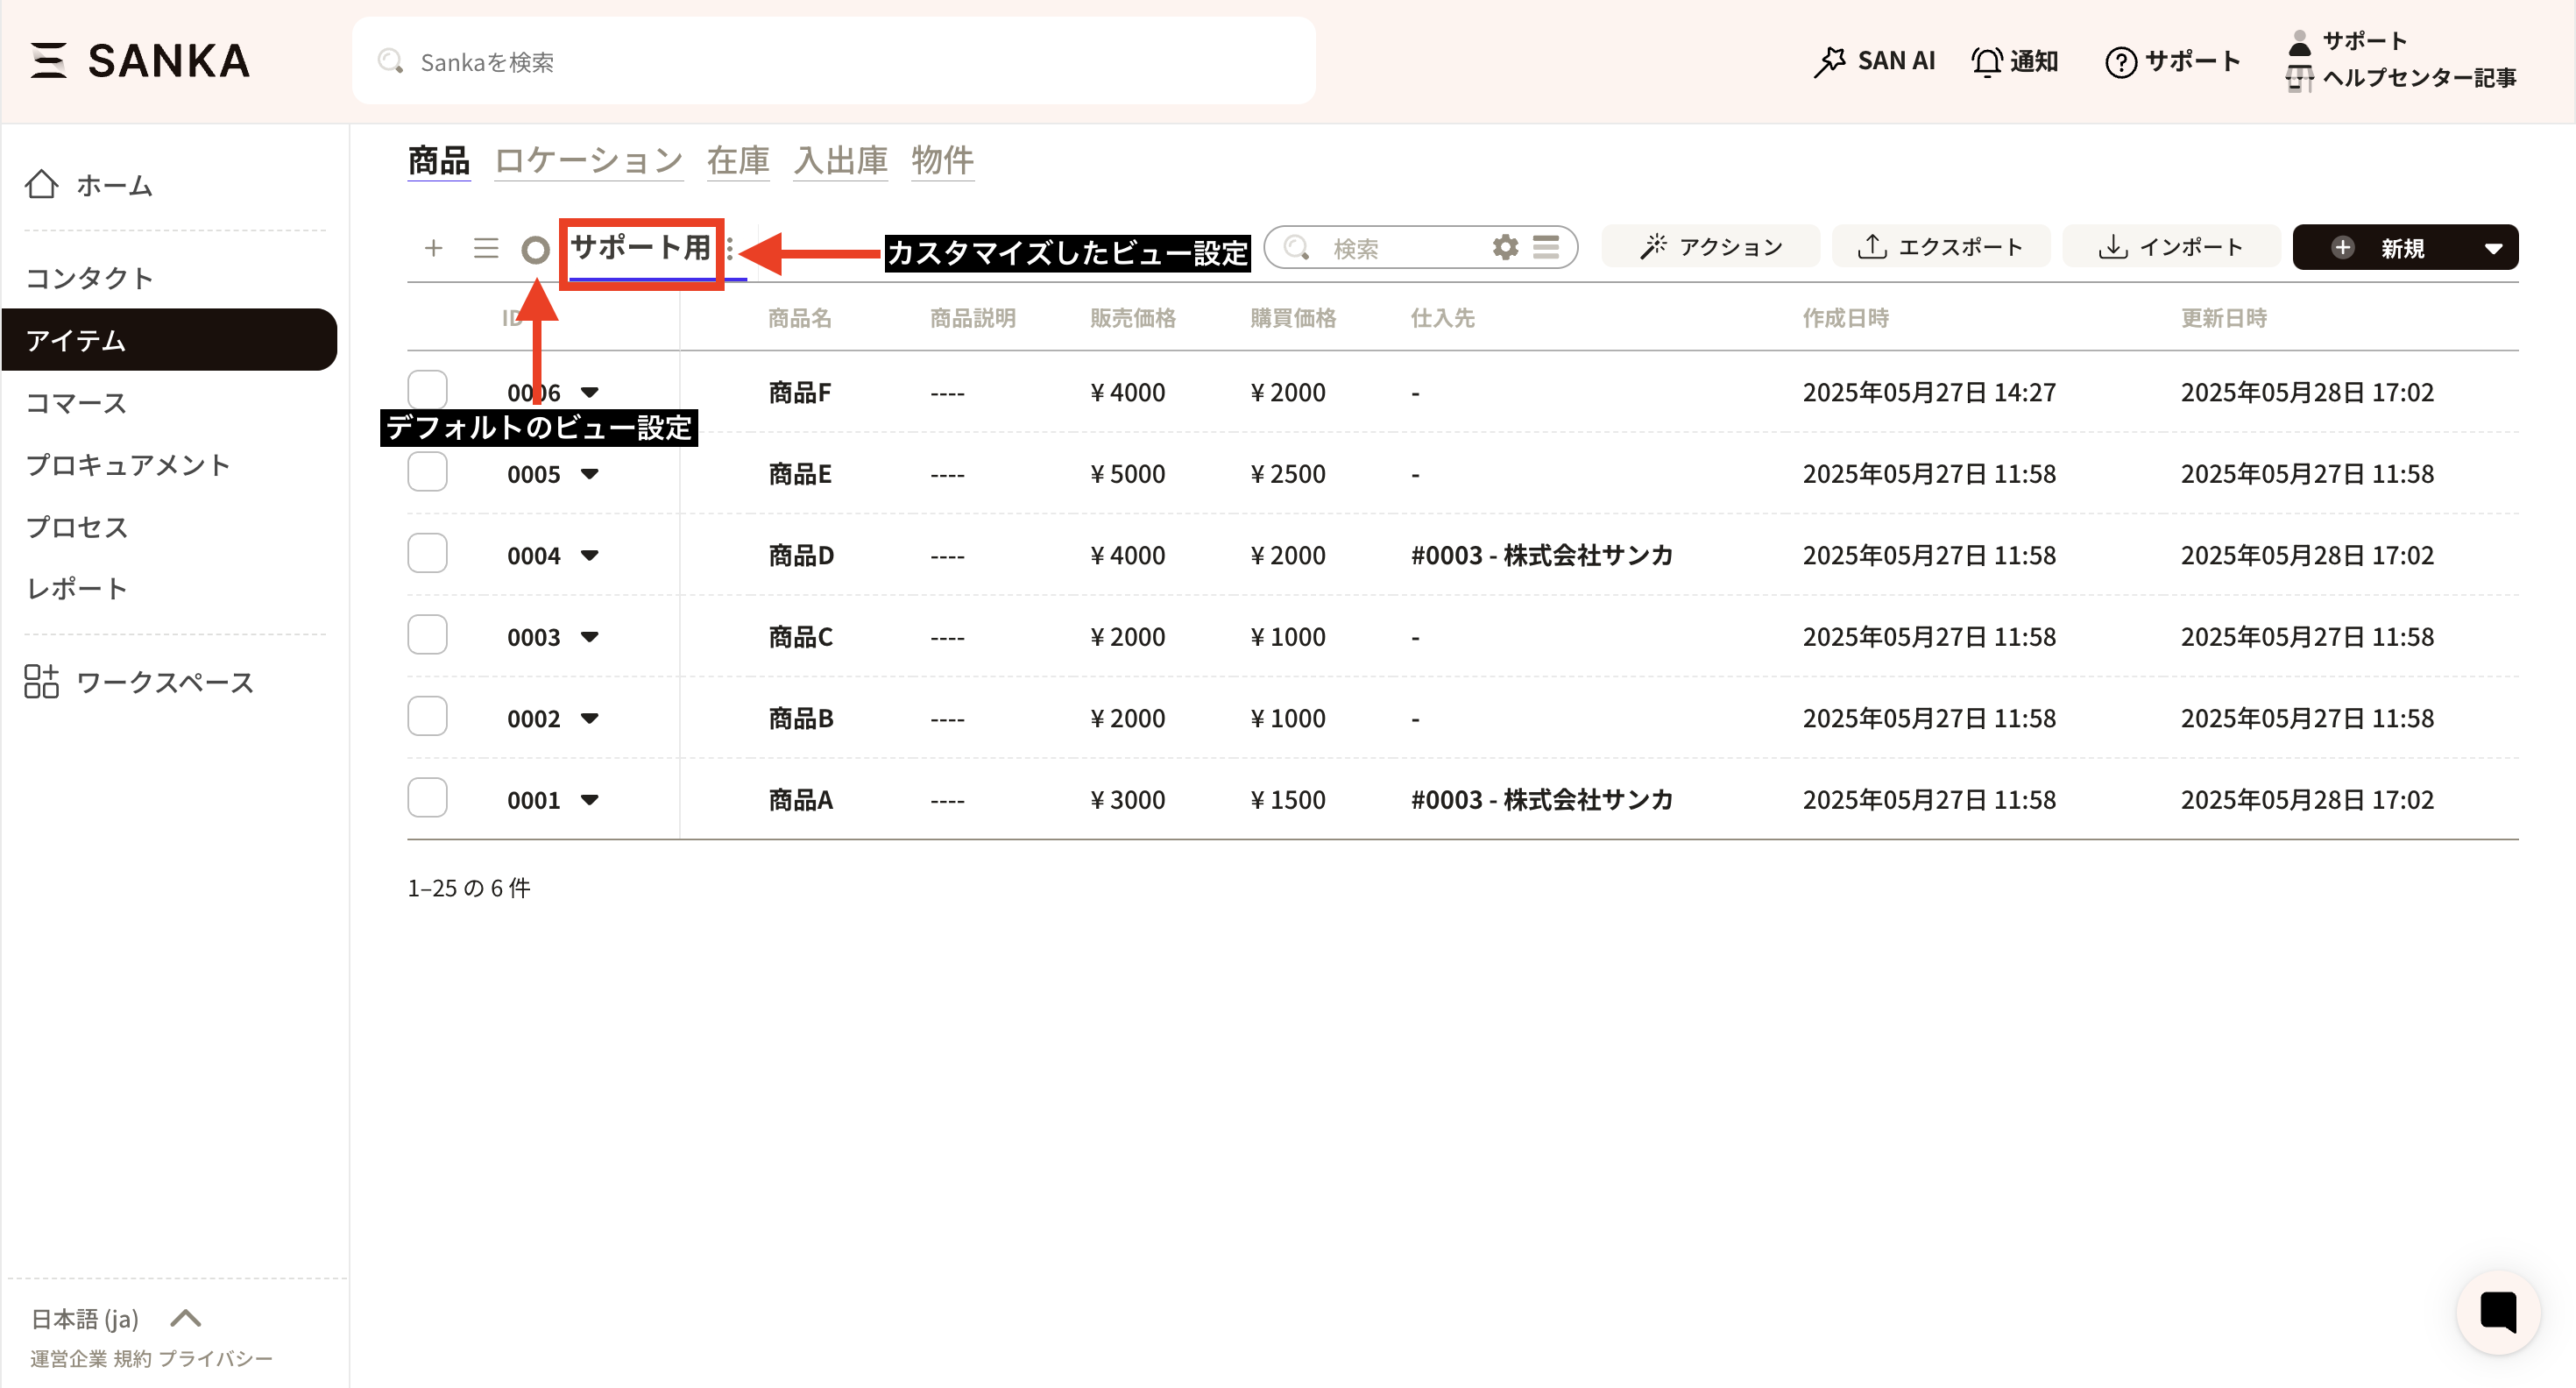
In Sanka, you can customize views and forms to match your workflow.View management is done from the top-left of the record list using two controls: Create view and the View switcher (≡).
Create view: Create a new view. You can also create forms here.
View switcher (≡): Switch between registered views.
Circle icon: Indicates the default view. The default view is registered first.
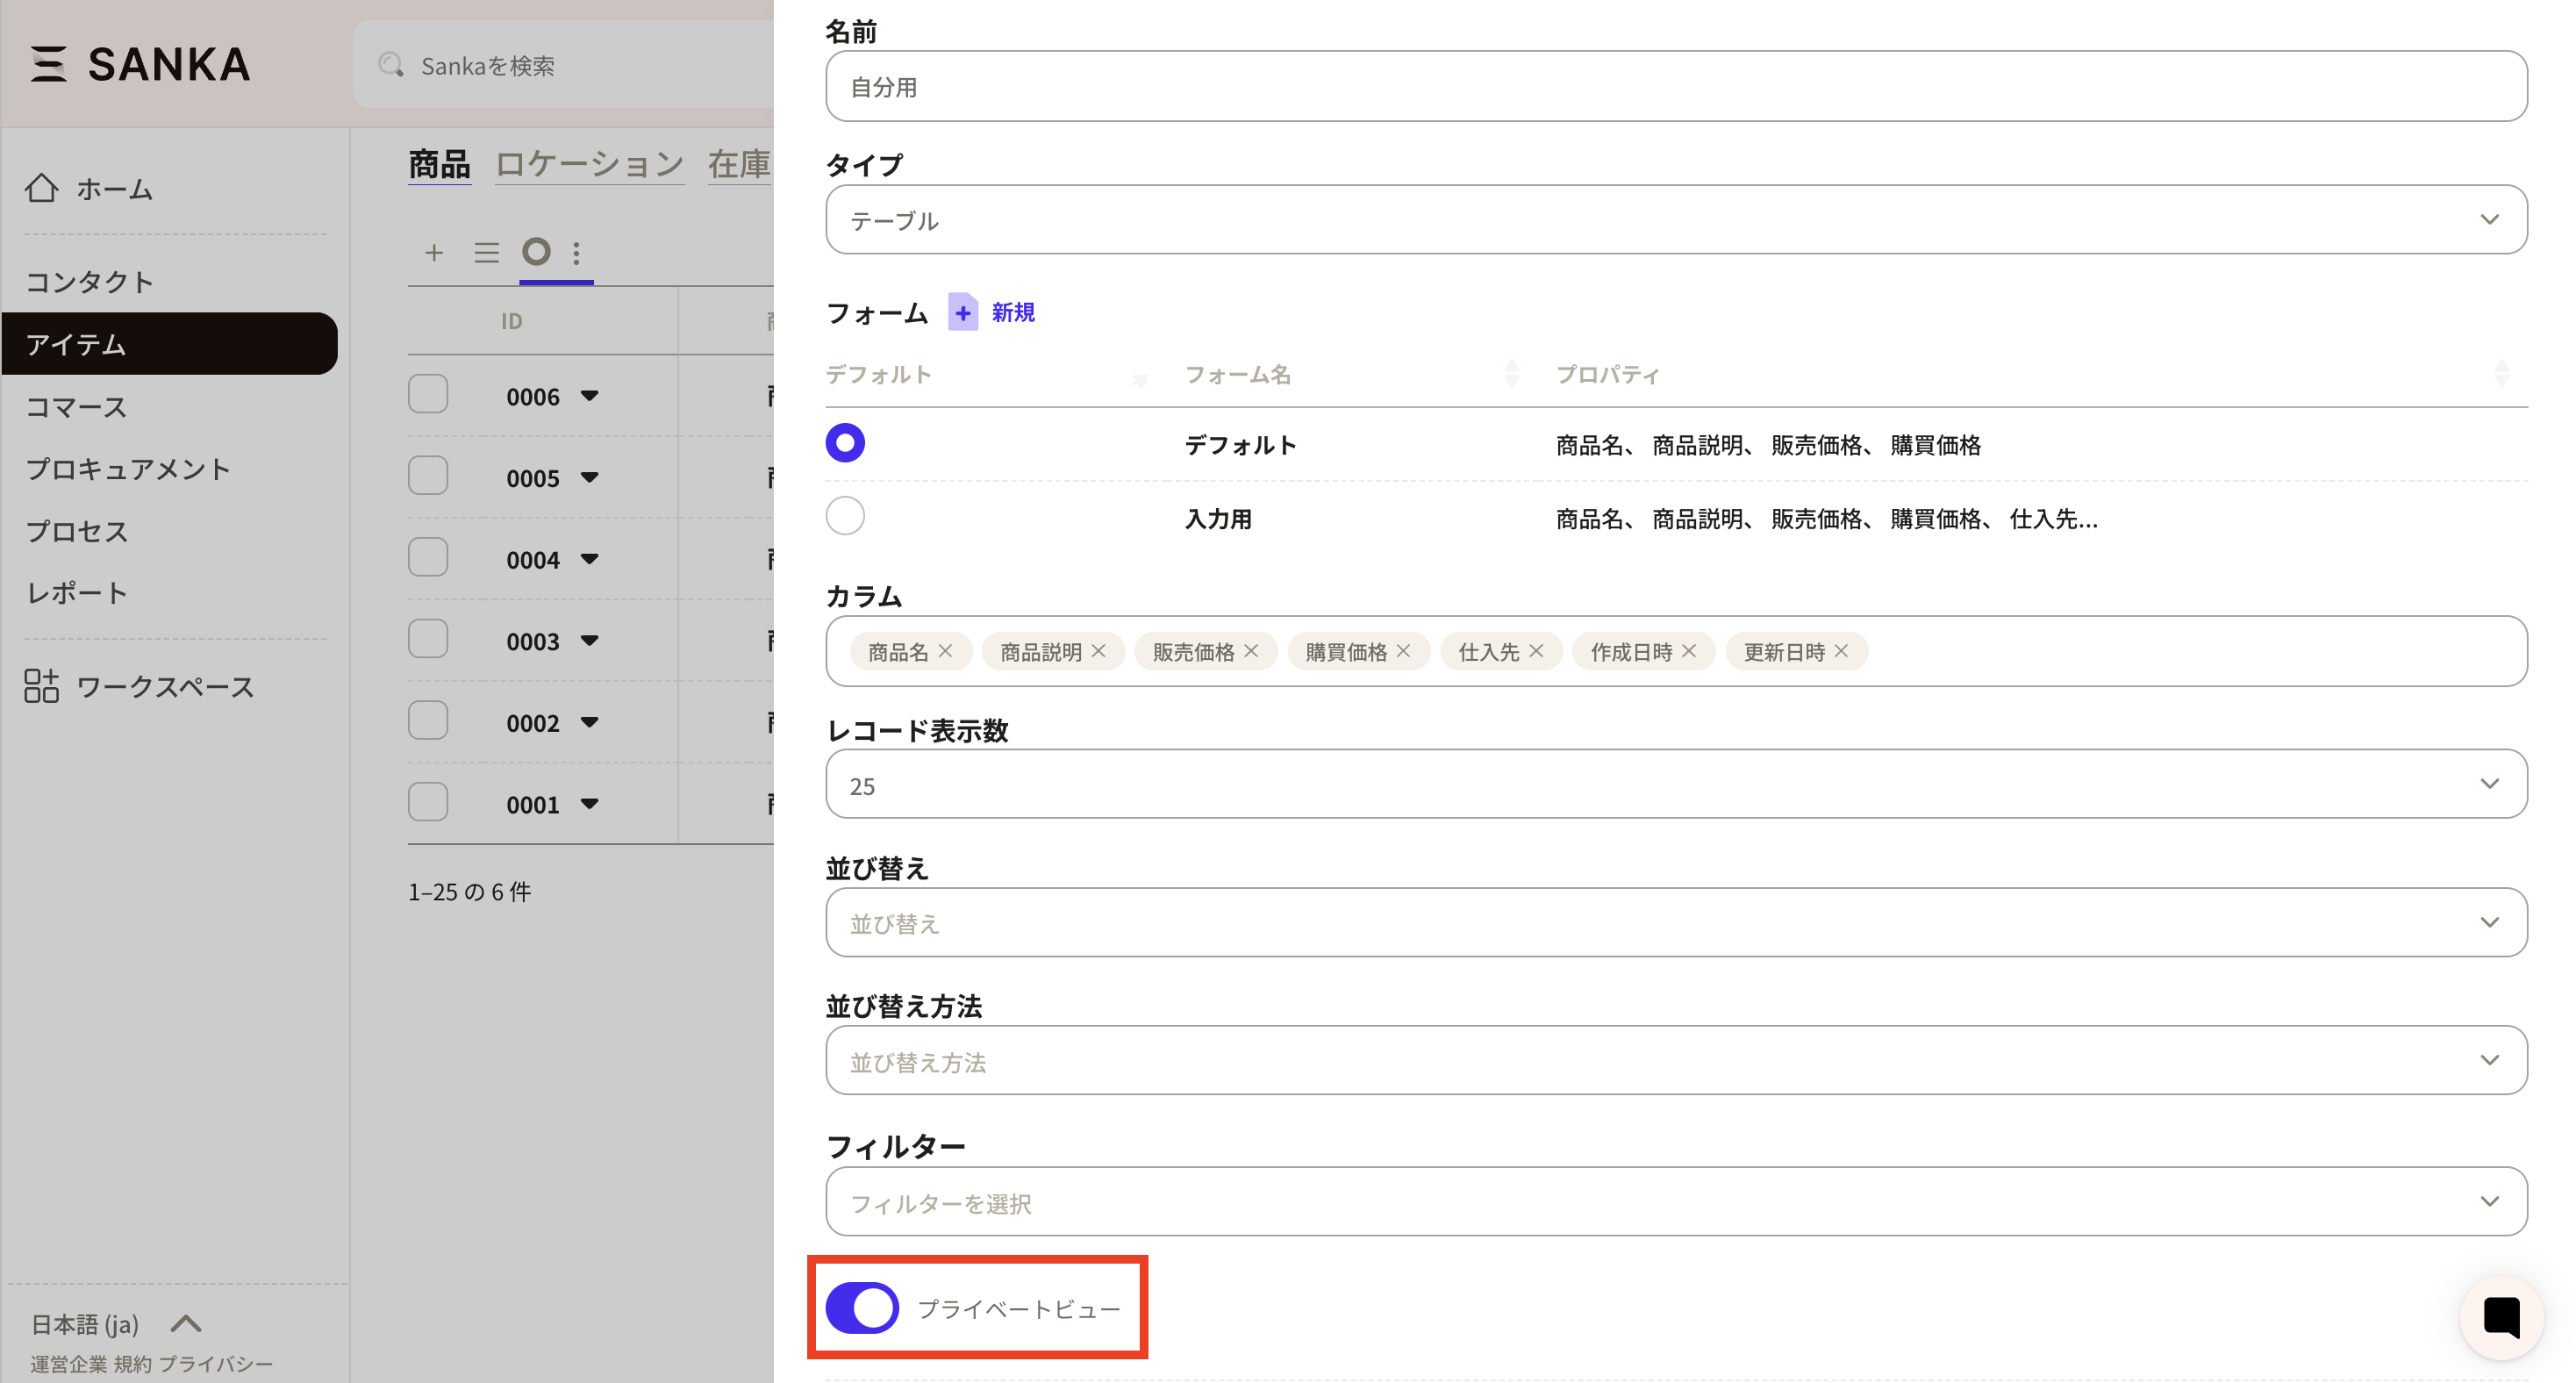
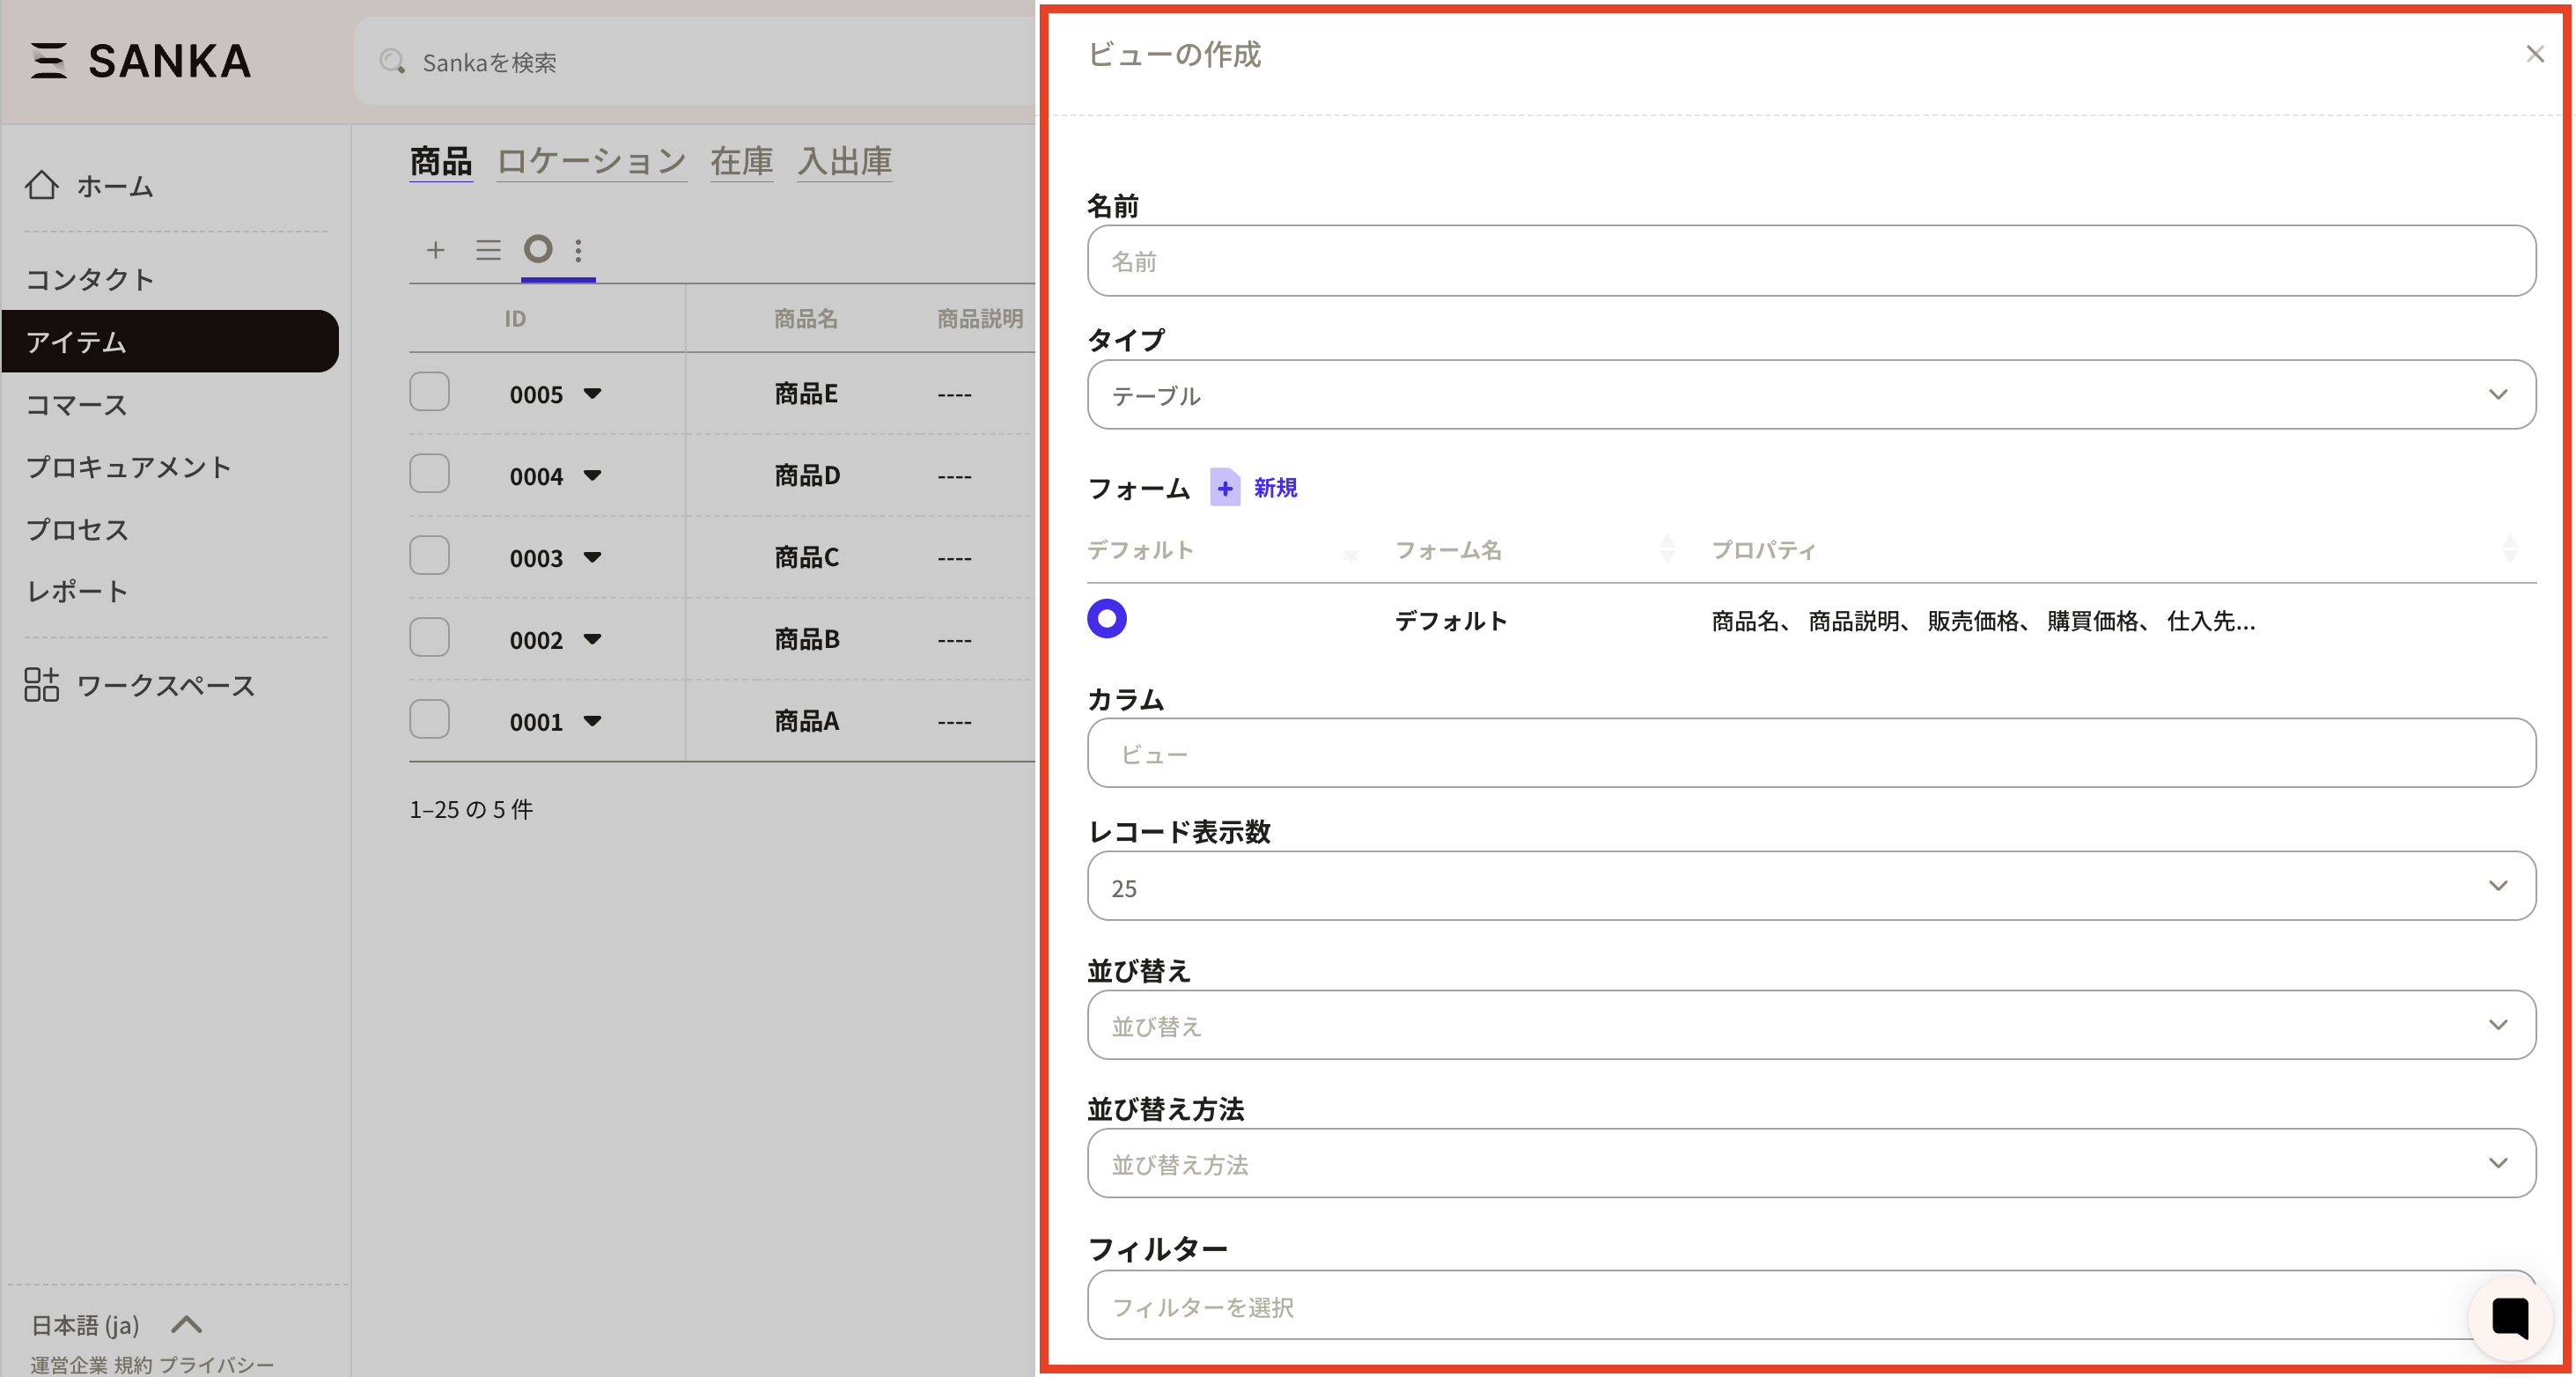
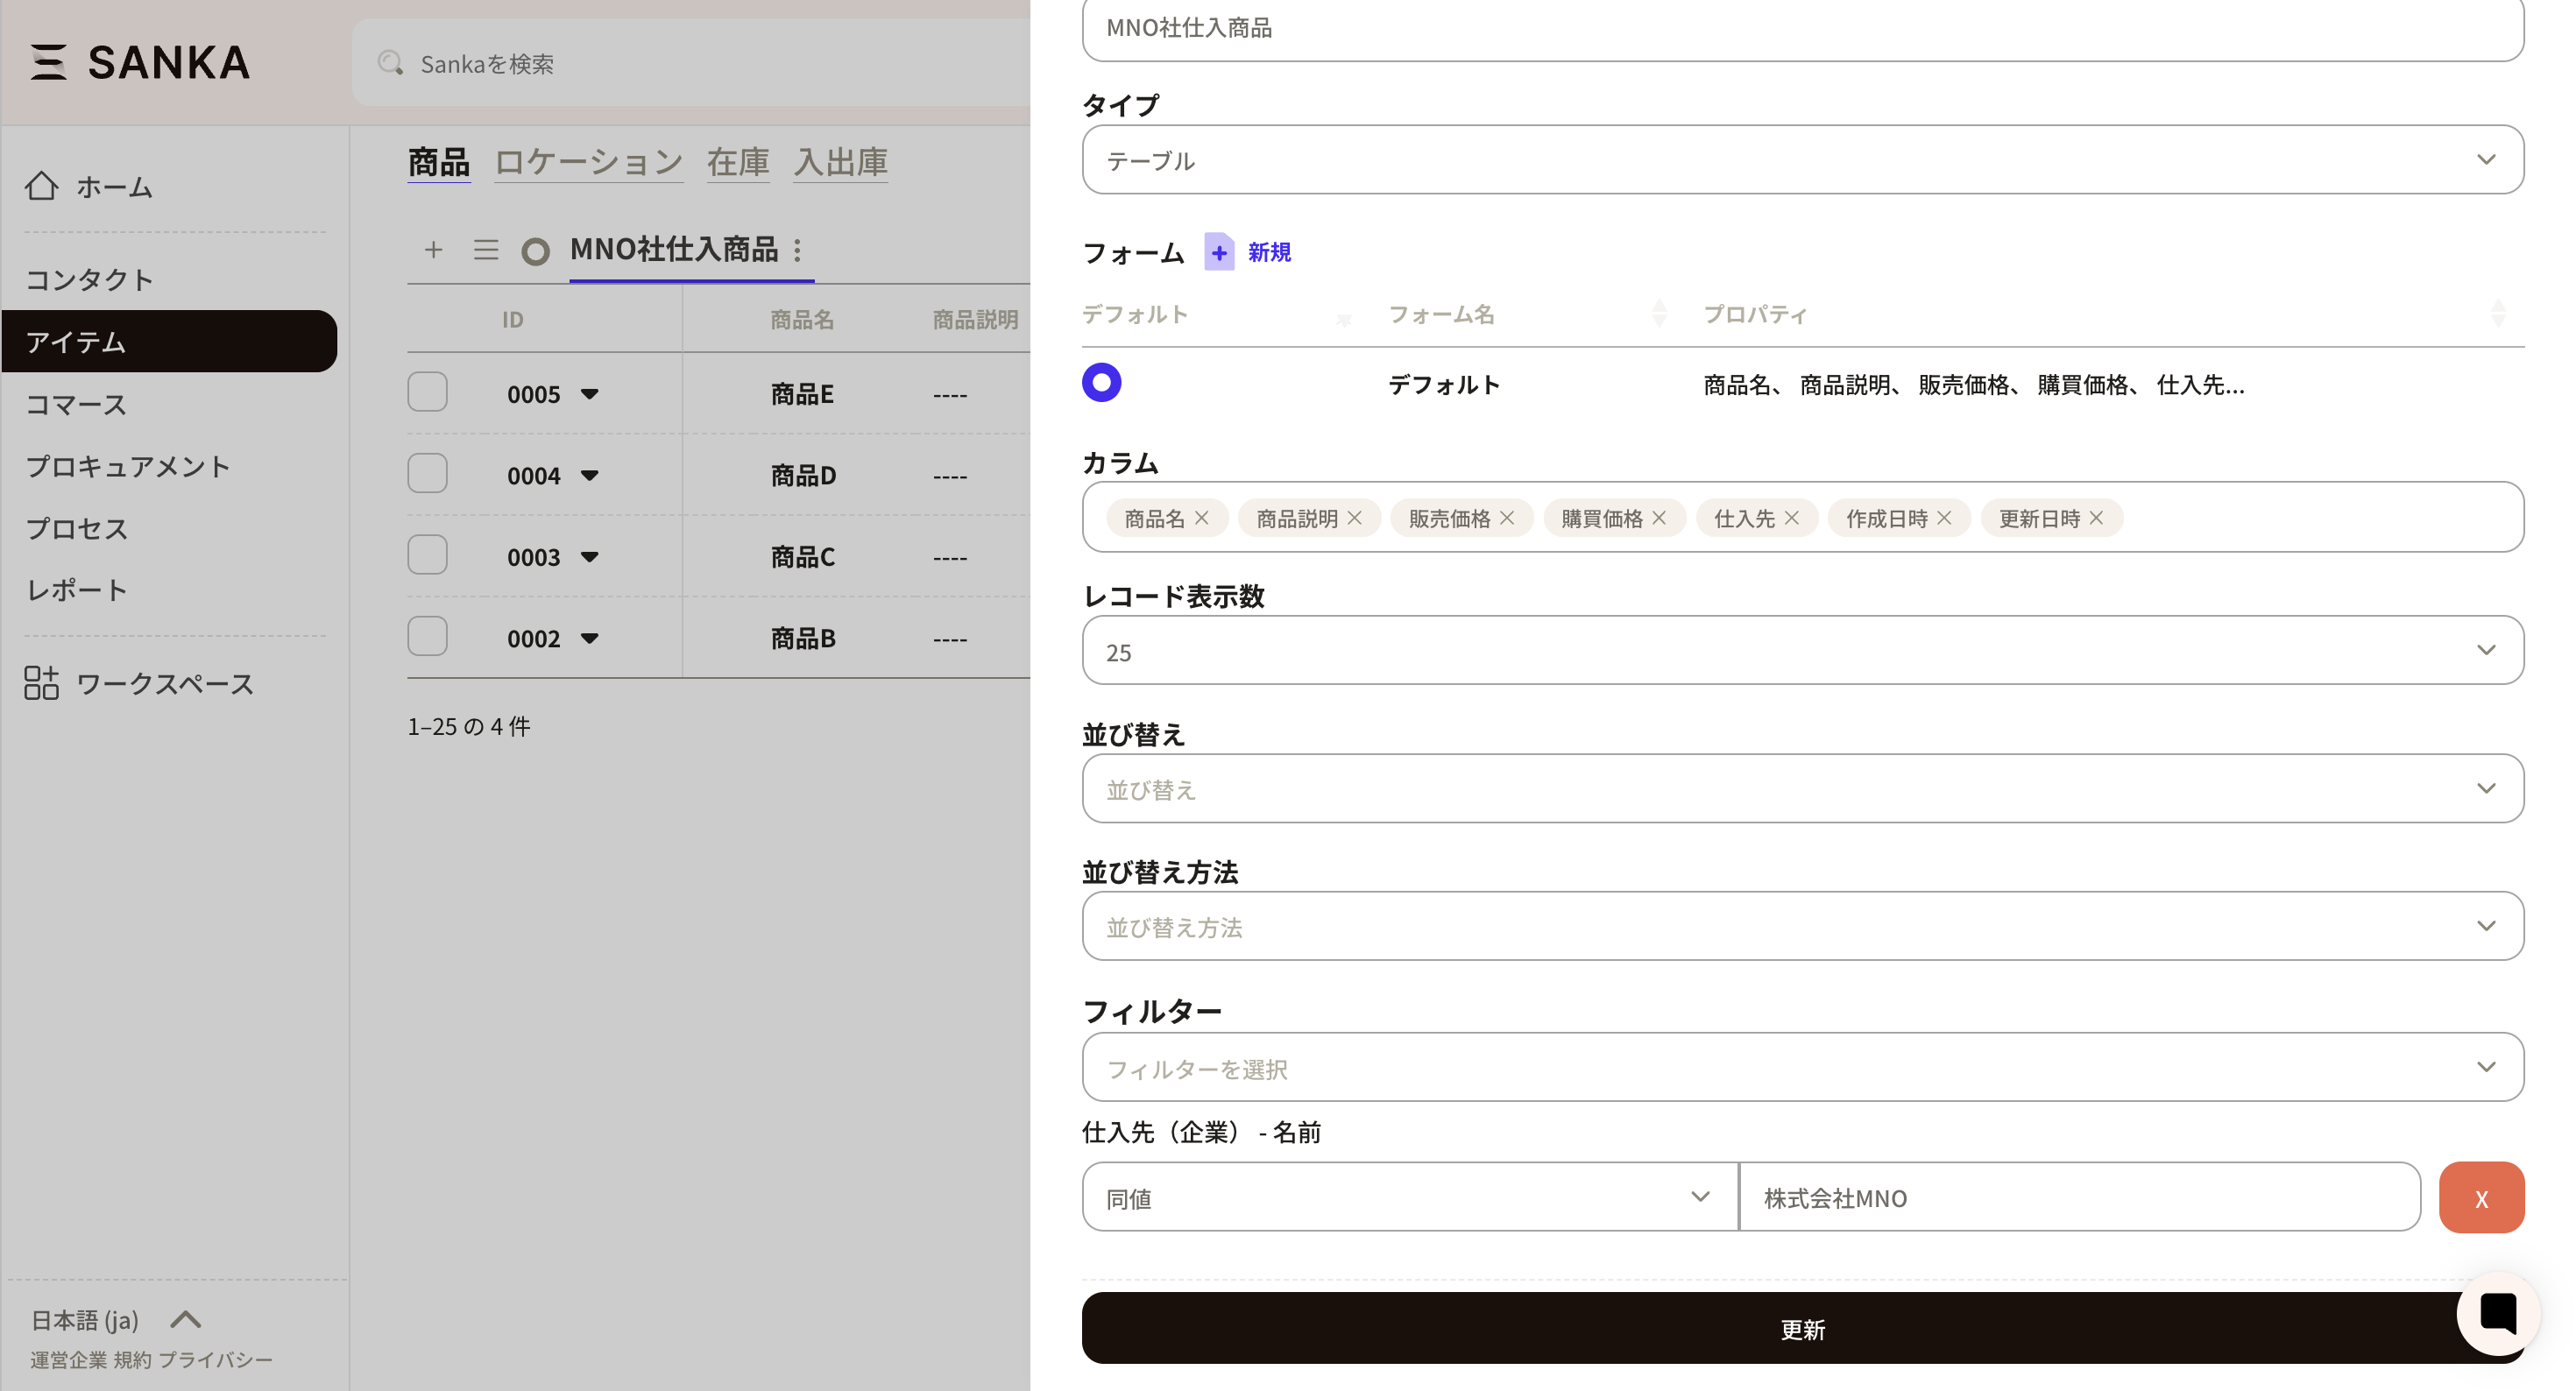
This section shows how to customize a view to your workflow. Click Create view at the top-left of the record list to open the view creation screen. Below are the settings you can configure.Name: Set the view name. Choose a clear, recognizable name.This is how it appears.Type: Choose between a table view or a group table view. The default is a table view that lists records. For most cases, the table view is sufficient.Form: Customize the properties shown on the Create record form. By default, it uses the system form. You can create a new form with New.Items set on the form are reflected in the new record form.Columns: Choose which properties appear in the record list. Click a column slot to select properties and arrange them freely.Select property names to add them. You can also drag properties to reorder.These column settings appear as the header in the record list (the red line section below).Record count: Set how many records to display per page.Sort: Change the record order to ascending or descending. First choose the property to sort by. Only numeric properties can be used here.Sort order: Linked to the selected sort property. Choose ascending or descending.Filter: Set which records to include or exclude.In this example, we create a view that shows only products purchased from company MNO. Set the filter to Supplier (Company) - Name, and set the value to MNO Co., Ltd. You can choose values based on your own properties.Update button: After setting the information, be sure to click Update.The new view is applied, and only items from MNO appear. You can create multiple views to match your workflow.
Can I create a view that only applies to my account?
Yes. You can set a private view that only applies to your account.As shared views grow, you might think, “I only use this view, but everyone can see it” or “The list is getting cluttered.” A private view lets you customize without impacting the team.You can only set a view to private when creating it. You cannot change an existing public view to private.When creating a view, turn on the Private view tab and save it.
We also receive many questions about forms. This section explains how to add, edit, and delete forms.There are two ways to add a form: from view management, or directly from the form screen.
Open view management. Here, we open the default view.
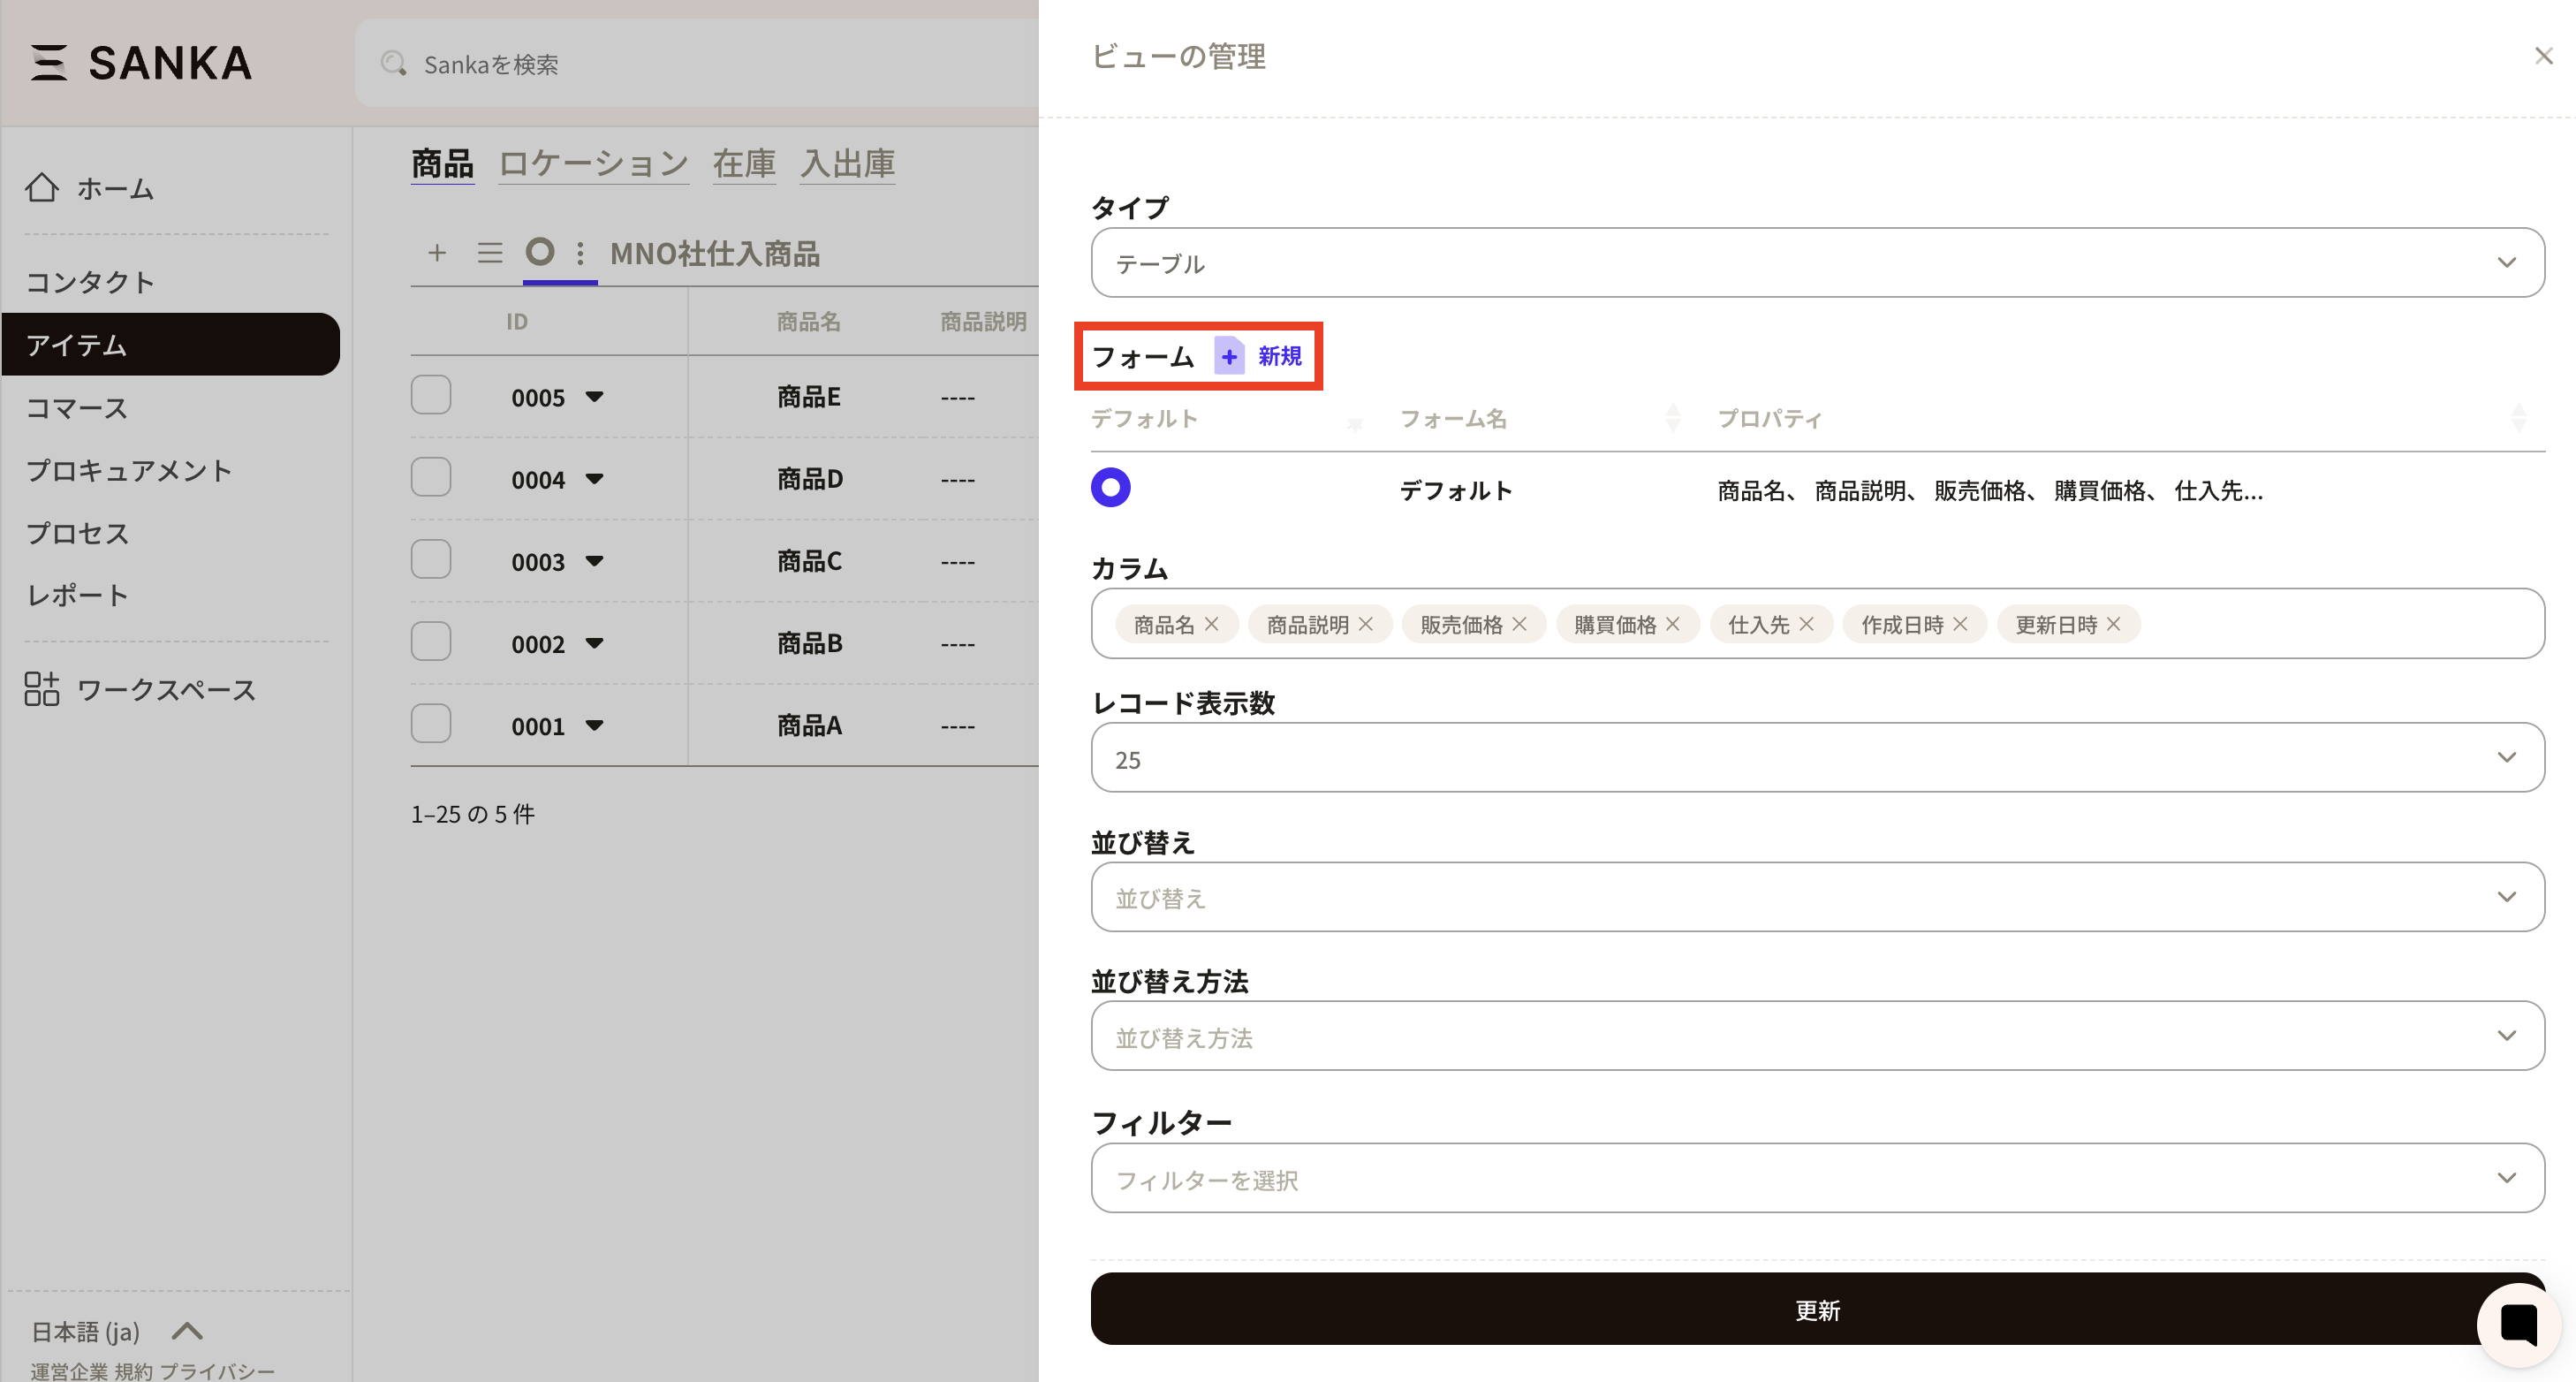
The view management screen appears. Click New to the right of Form to create a new form.
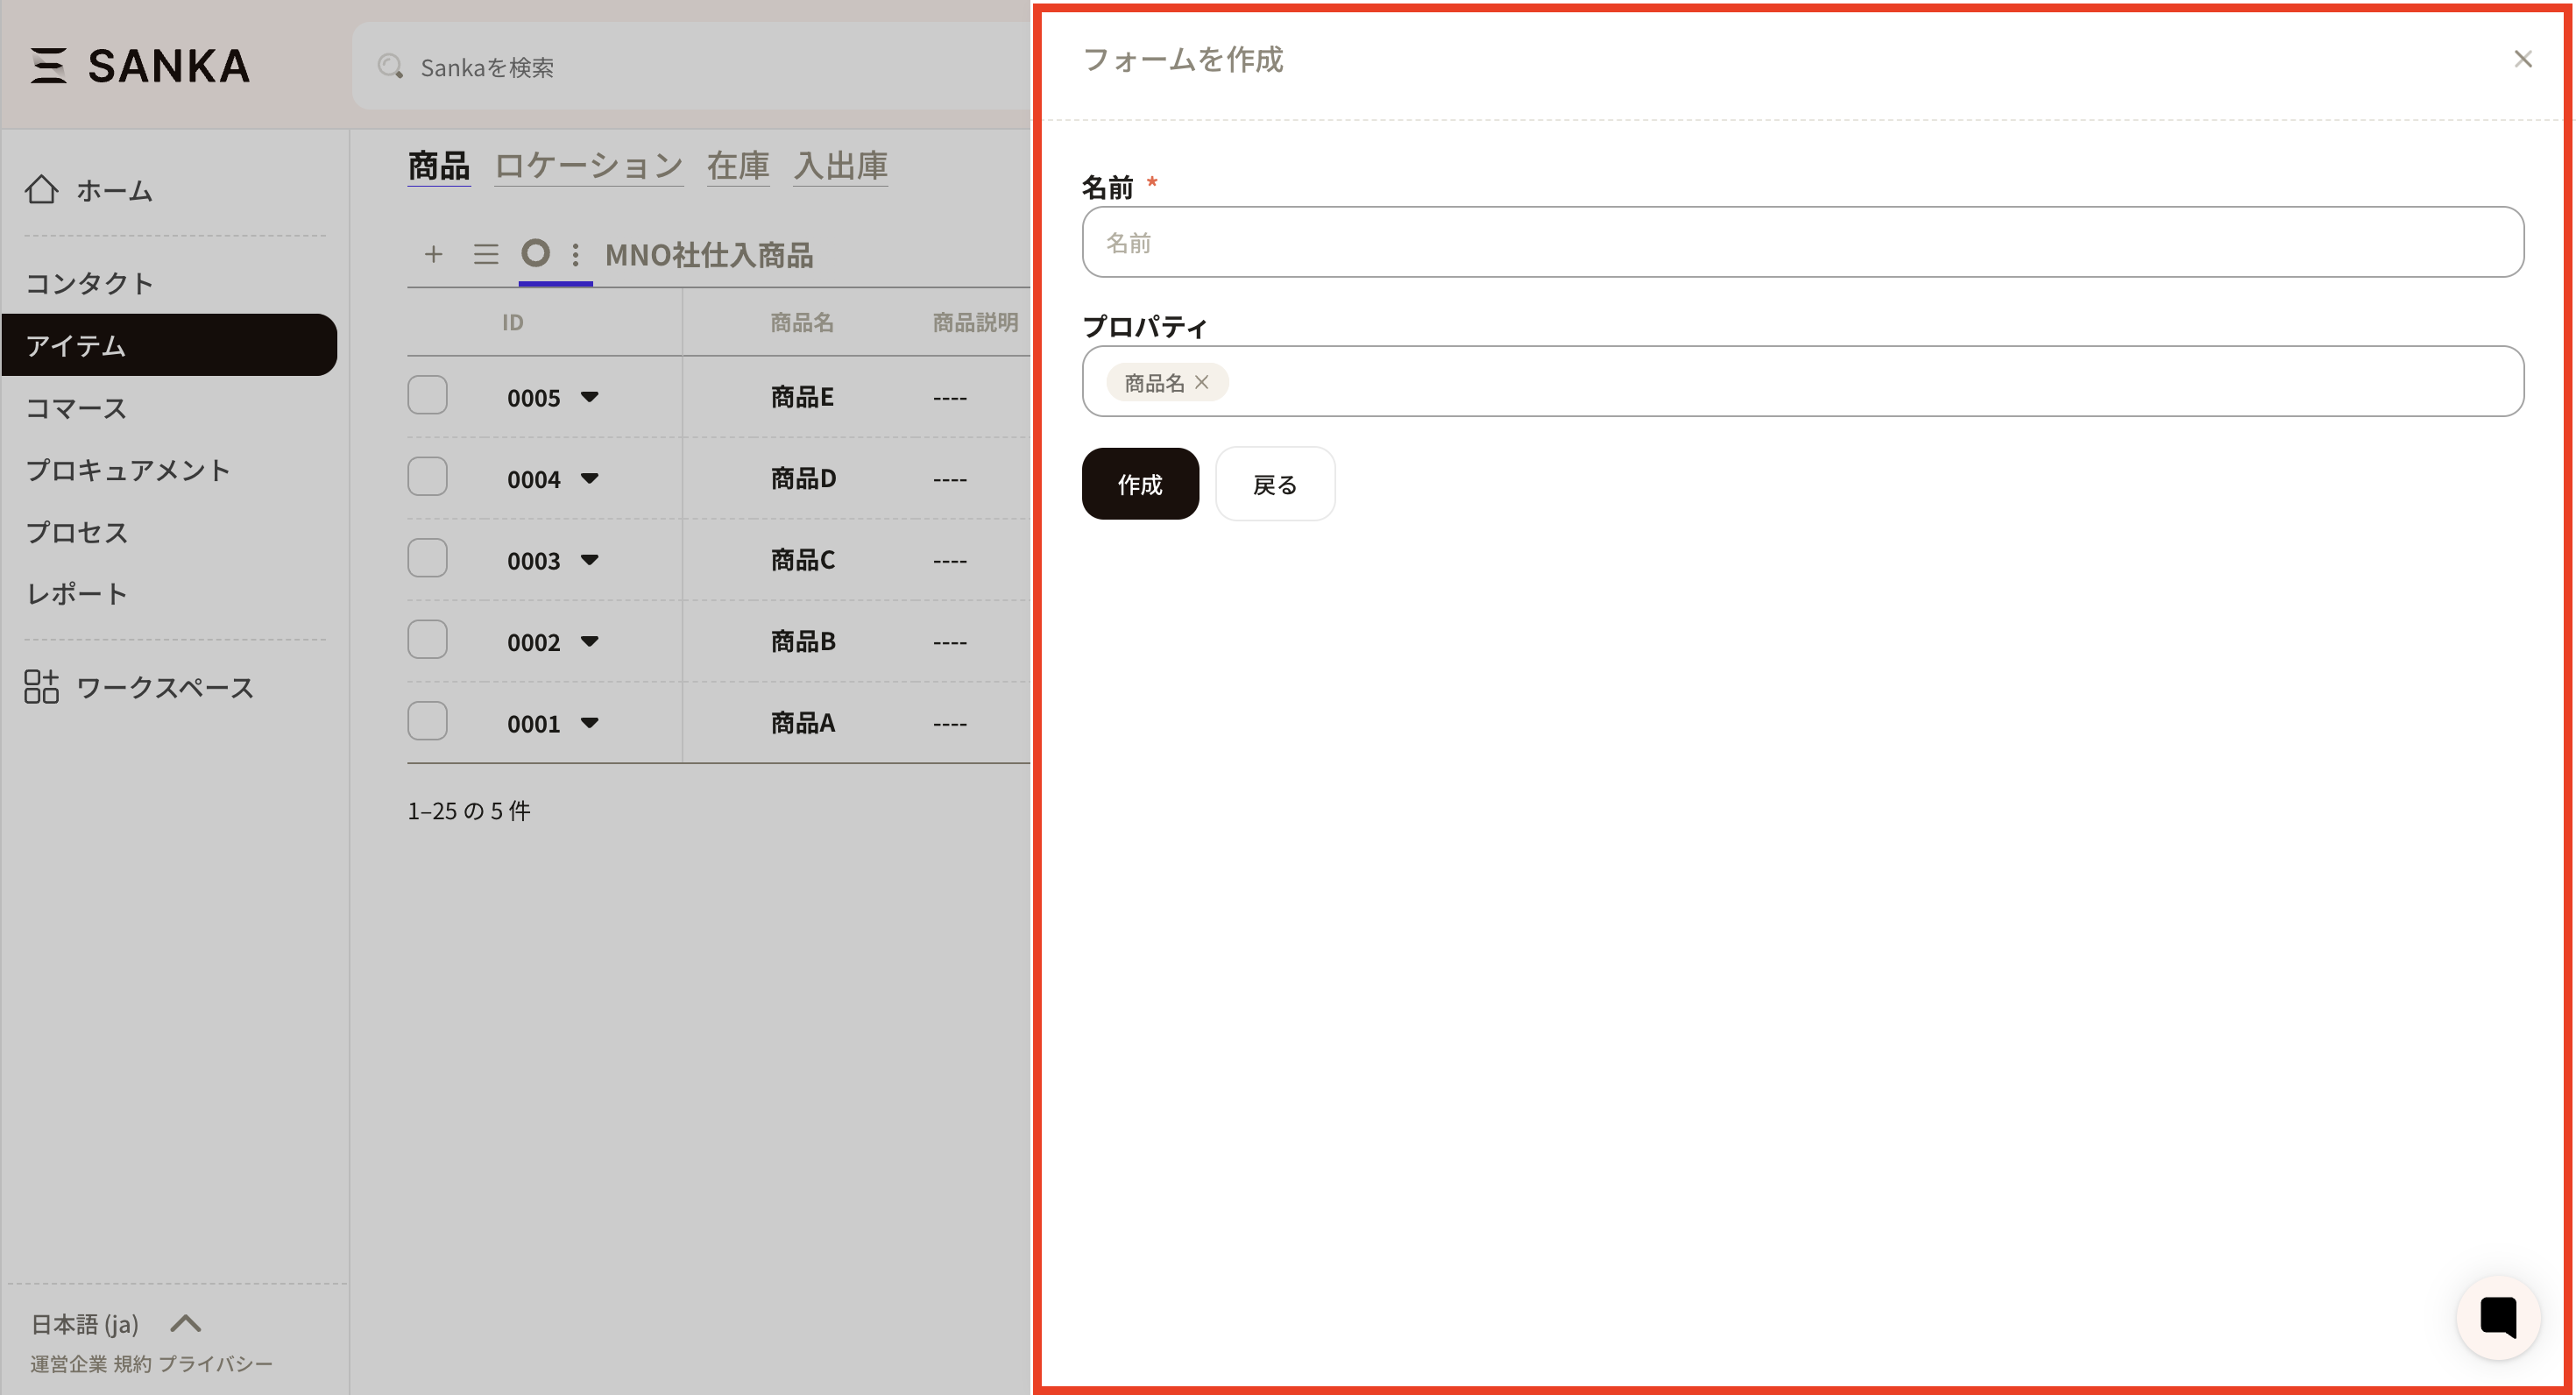
The Create form screen appears.
Set the required items.
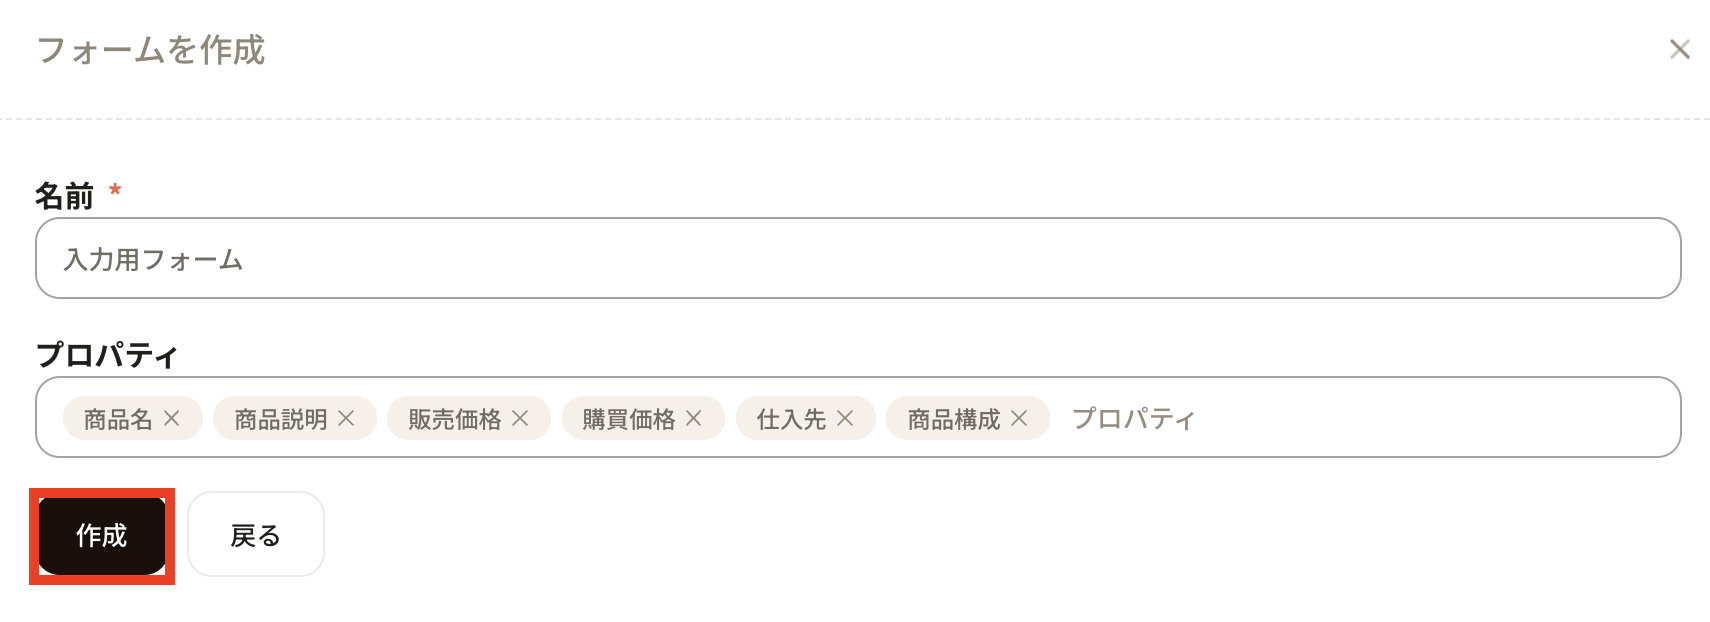
Set a clear name. Select all properties you want users to enter. You can drag properties to change the order.
Click Create to register.
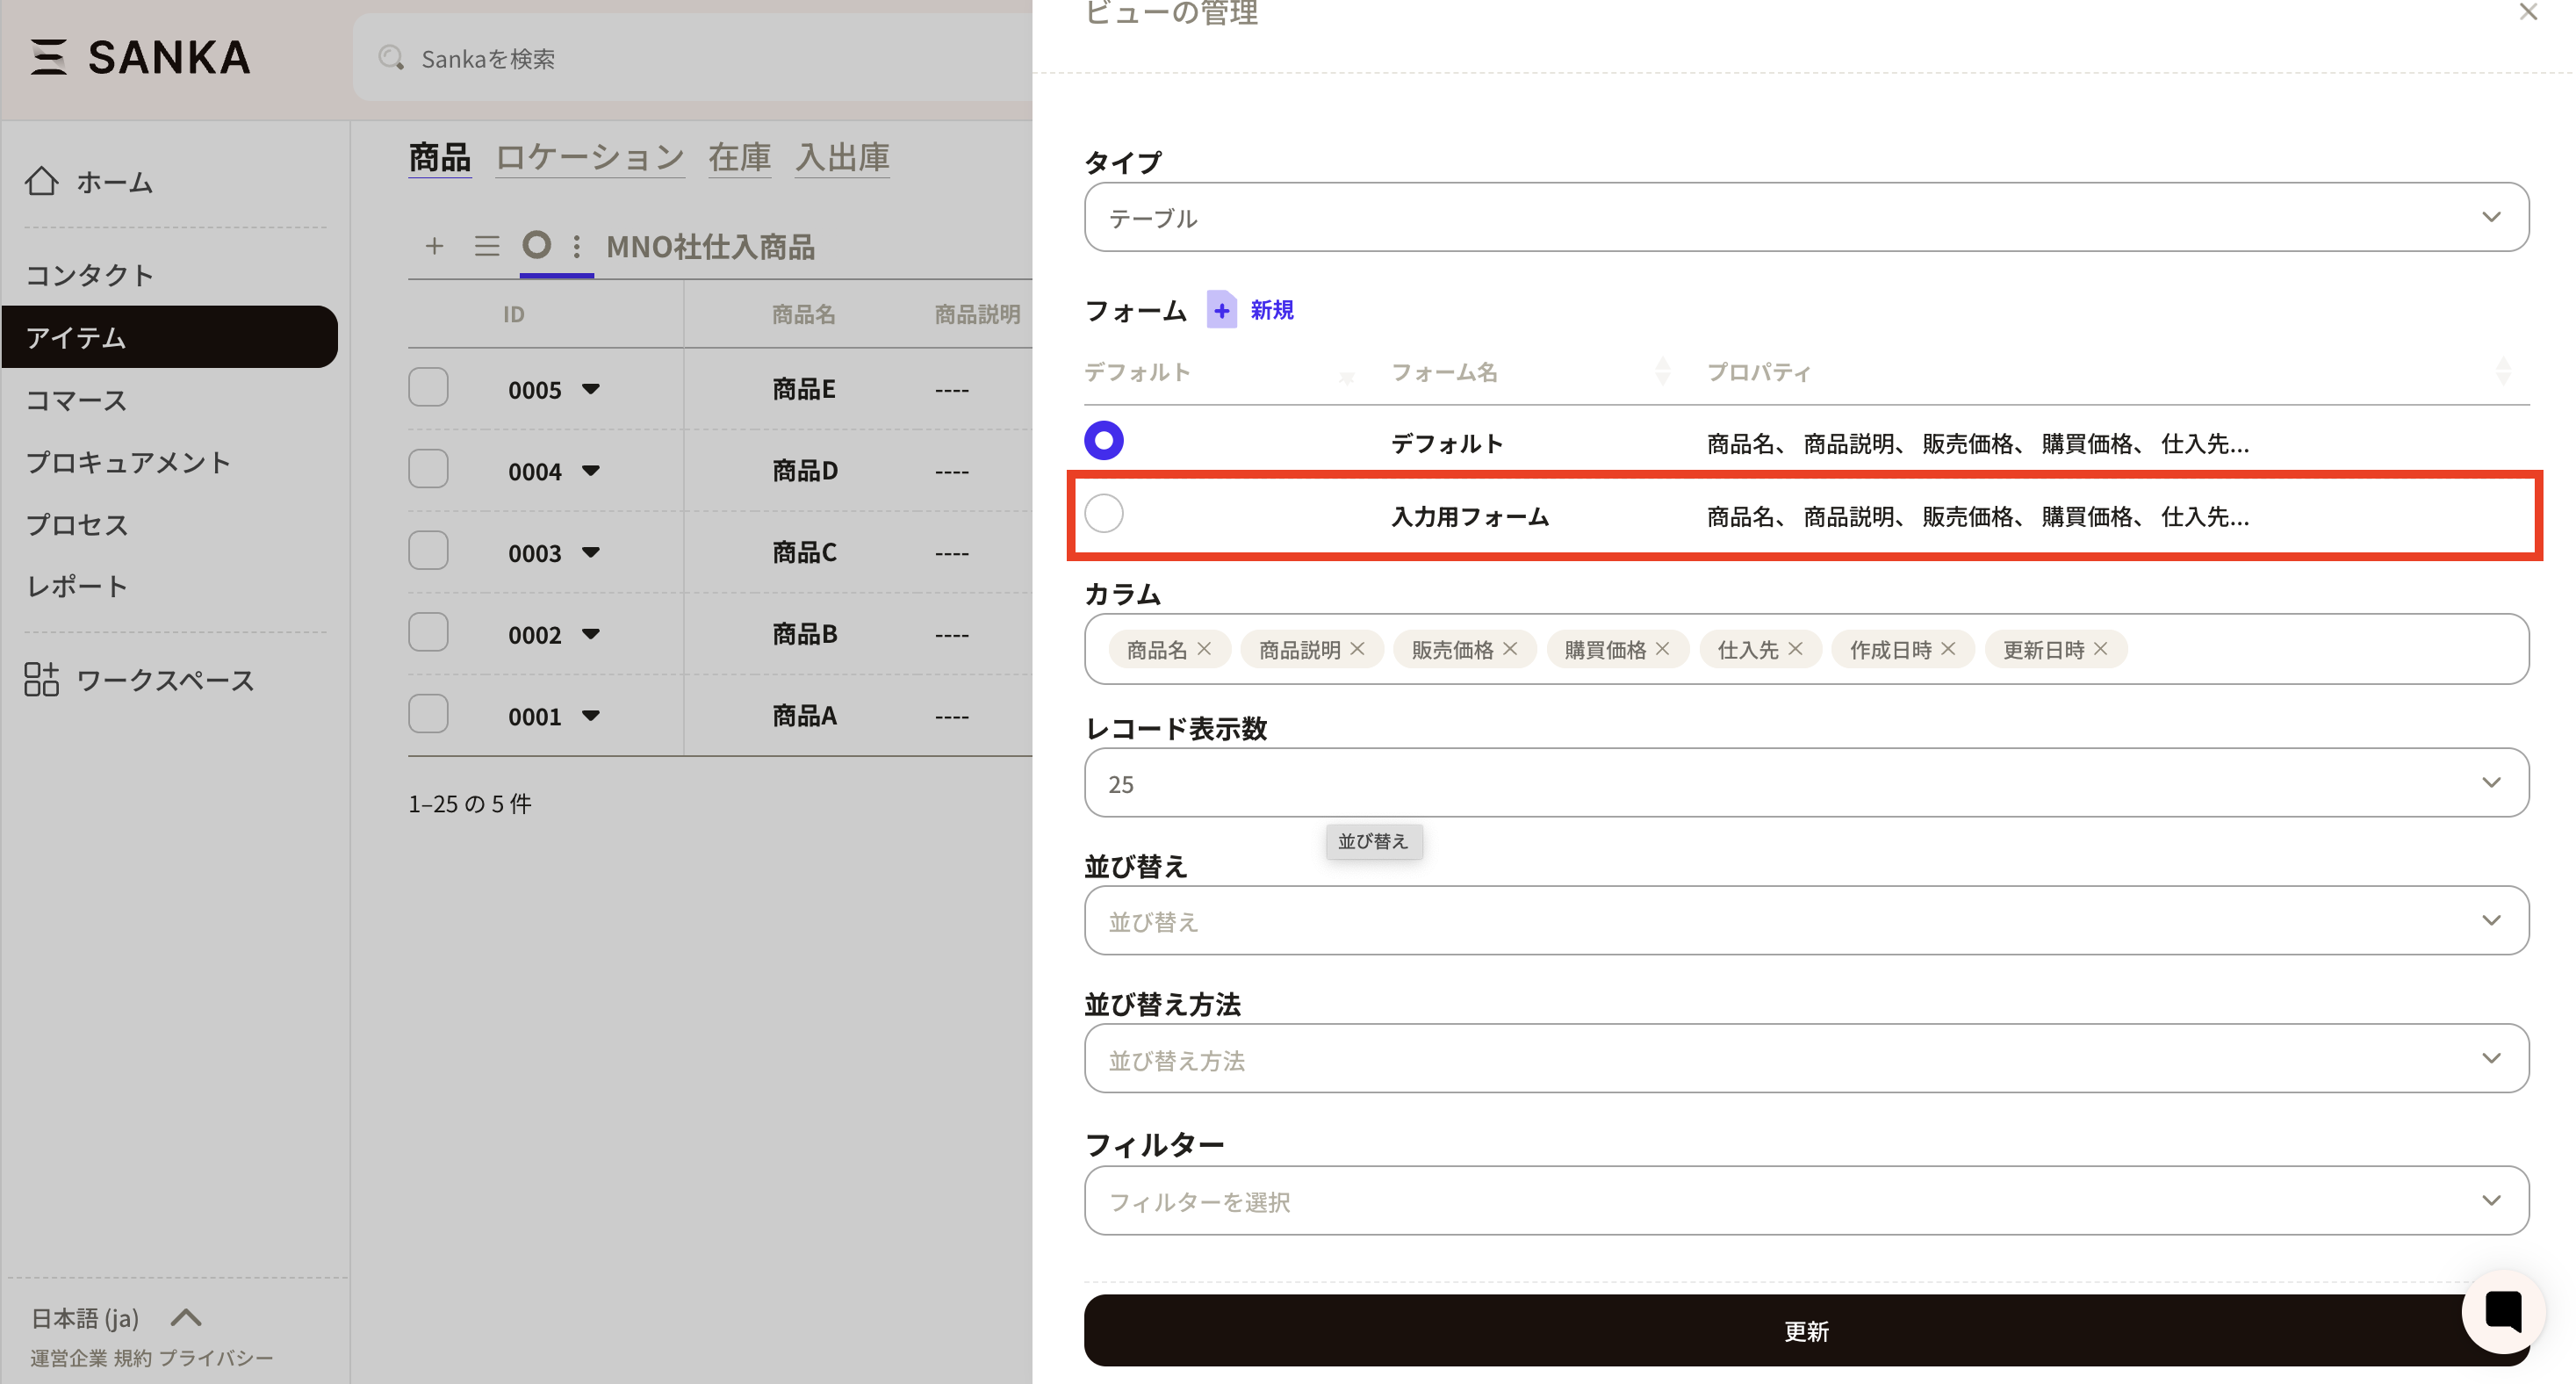
You return to view management. The new form is applied. Form settings are shared across all views in the same object, so be careful not to edit or delete a form by mistake.
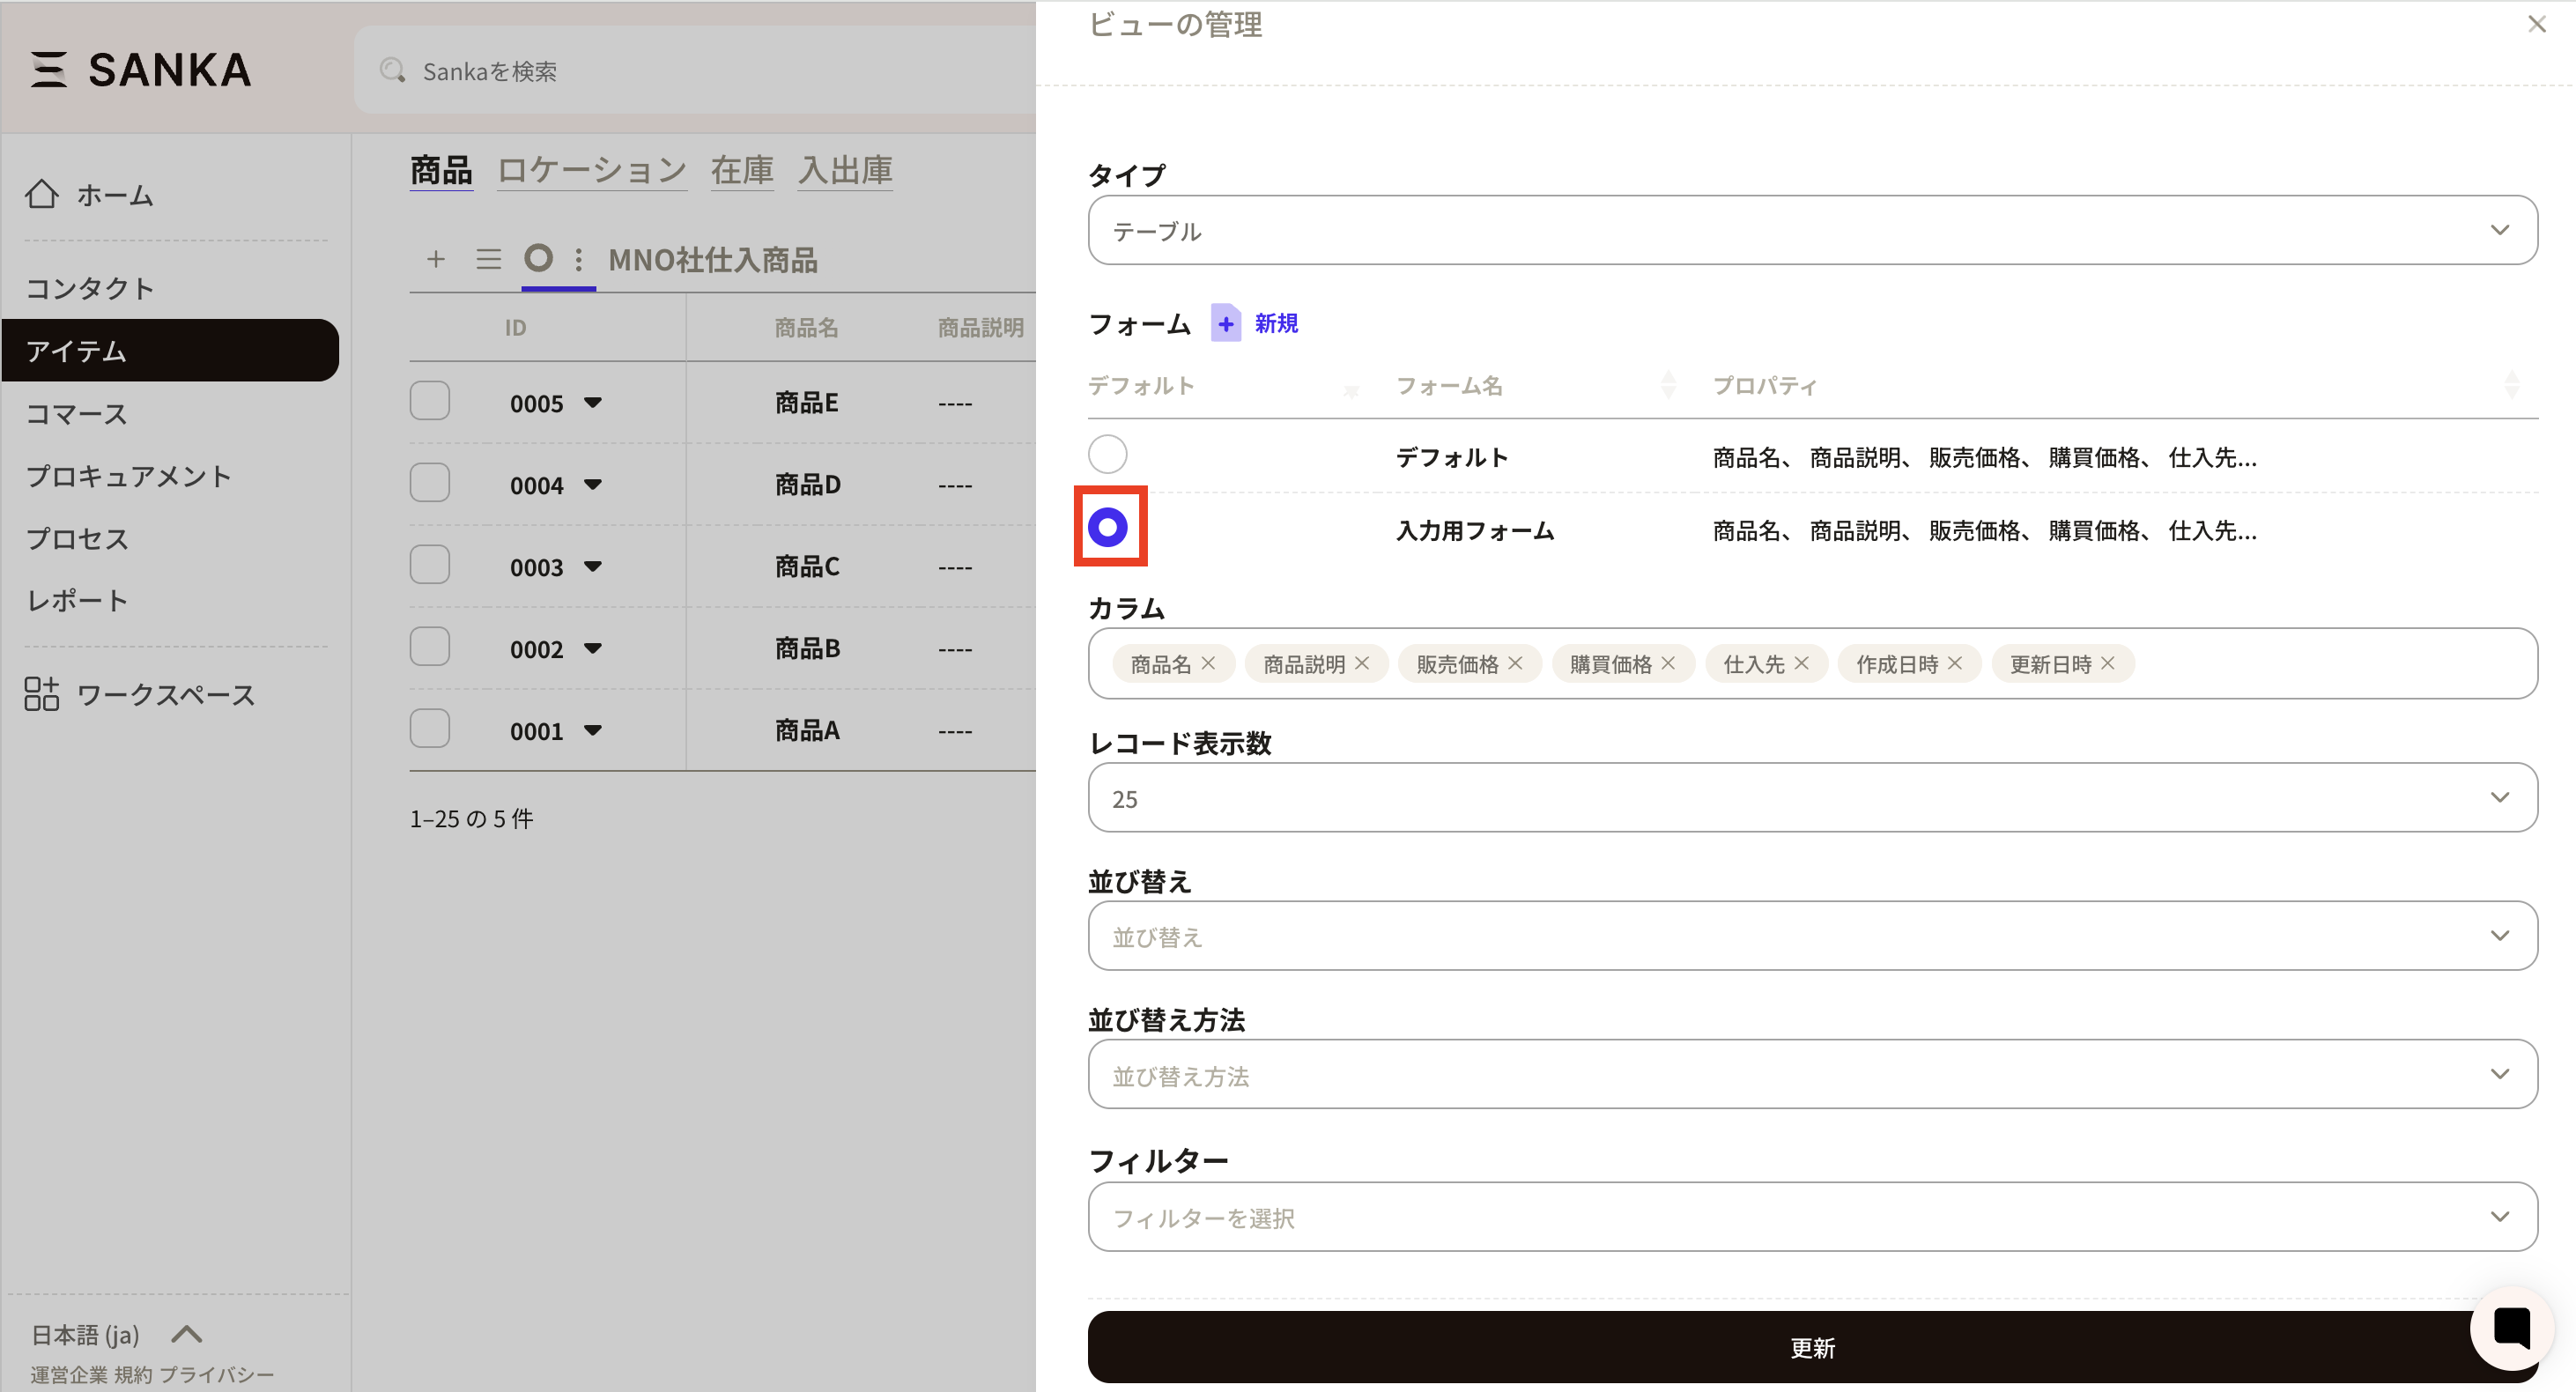
To apply the form to the actual record input screen, click the circle check on the left. In this example, we are in the default view, so the form is applied to the default view. Click Update to apply.
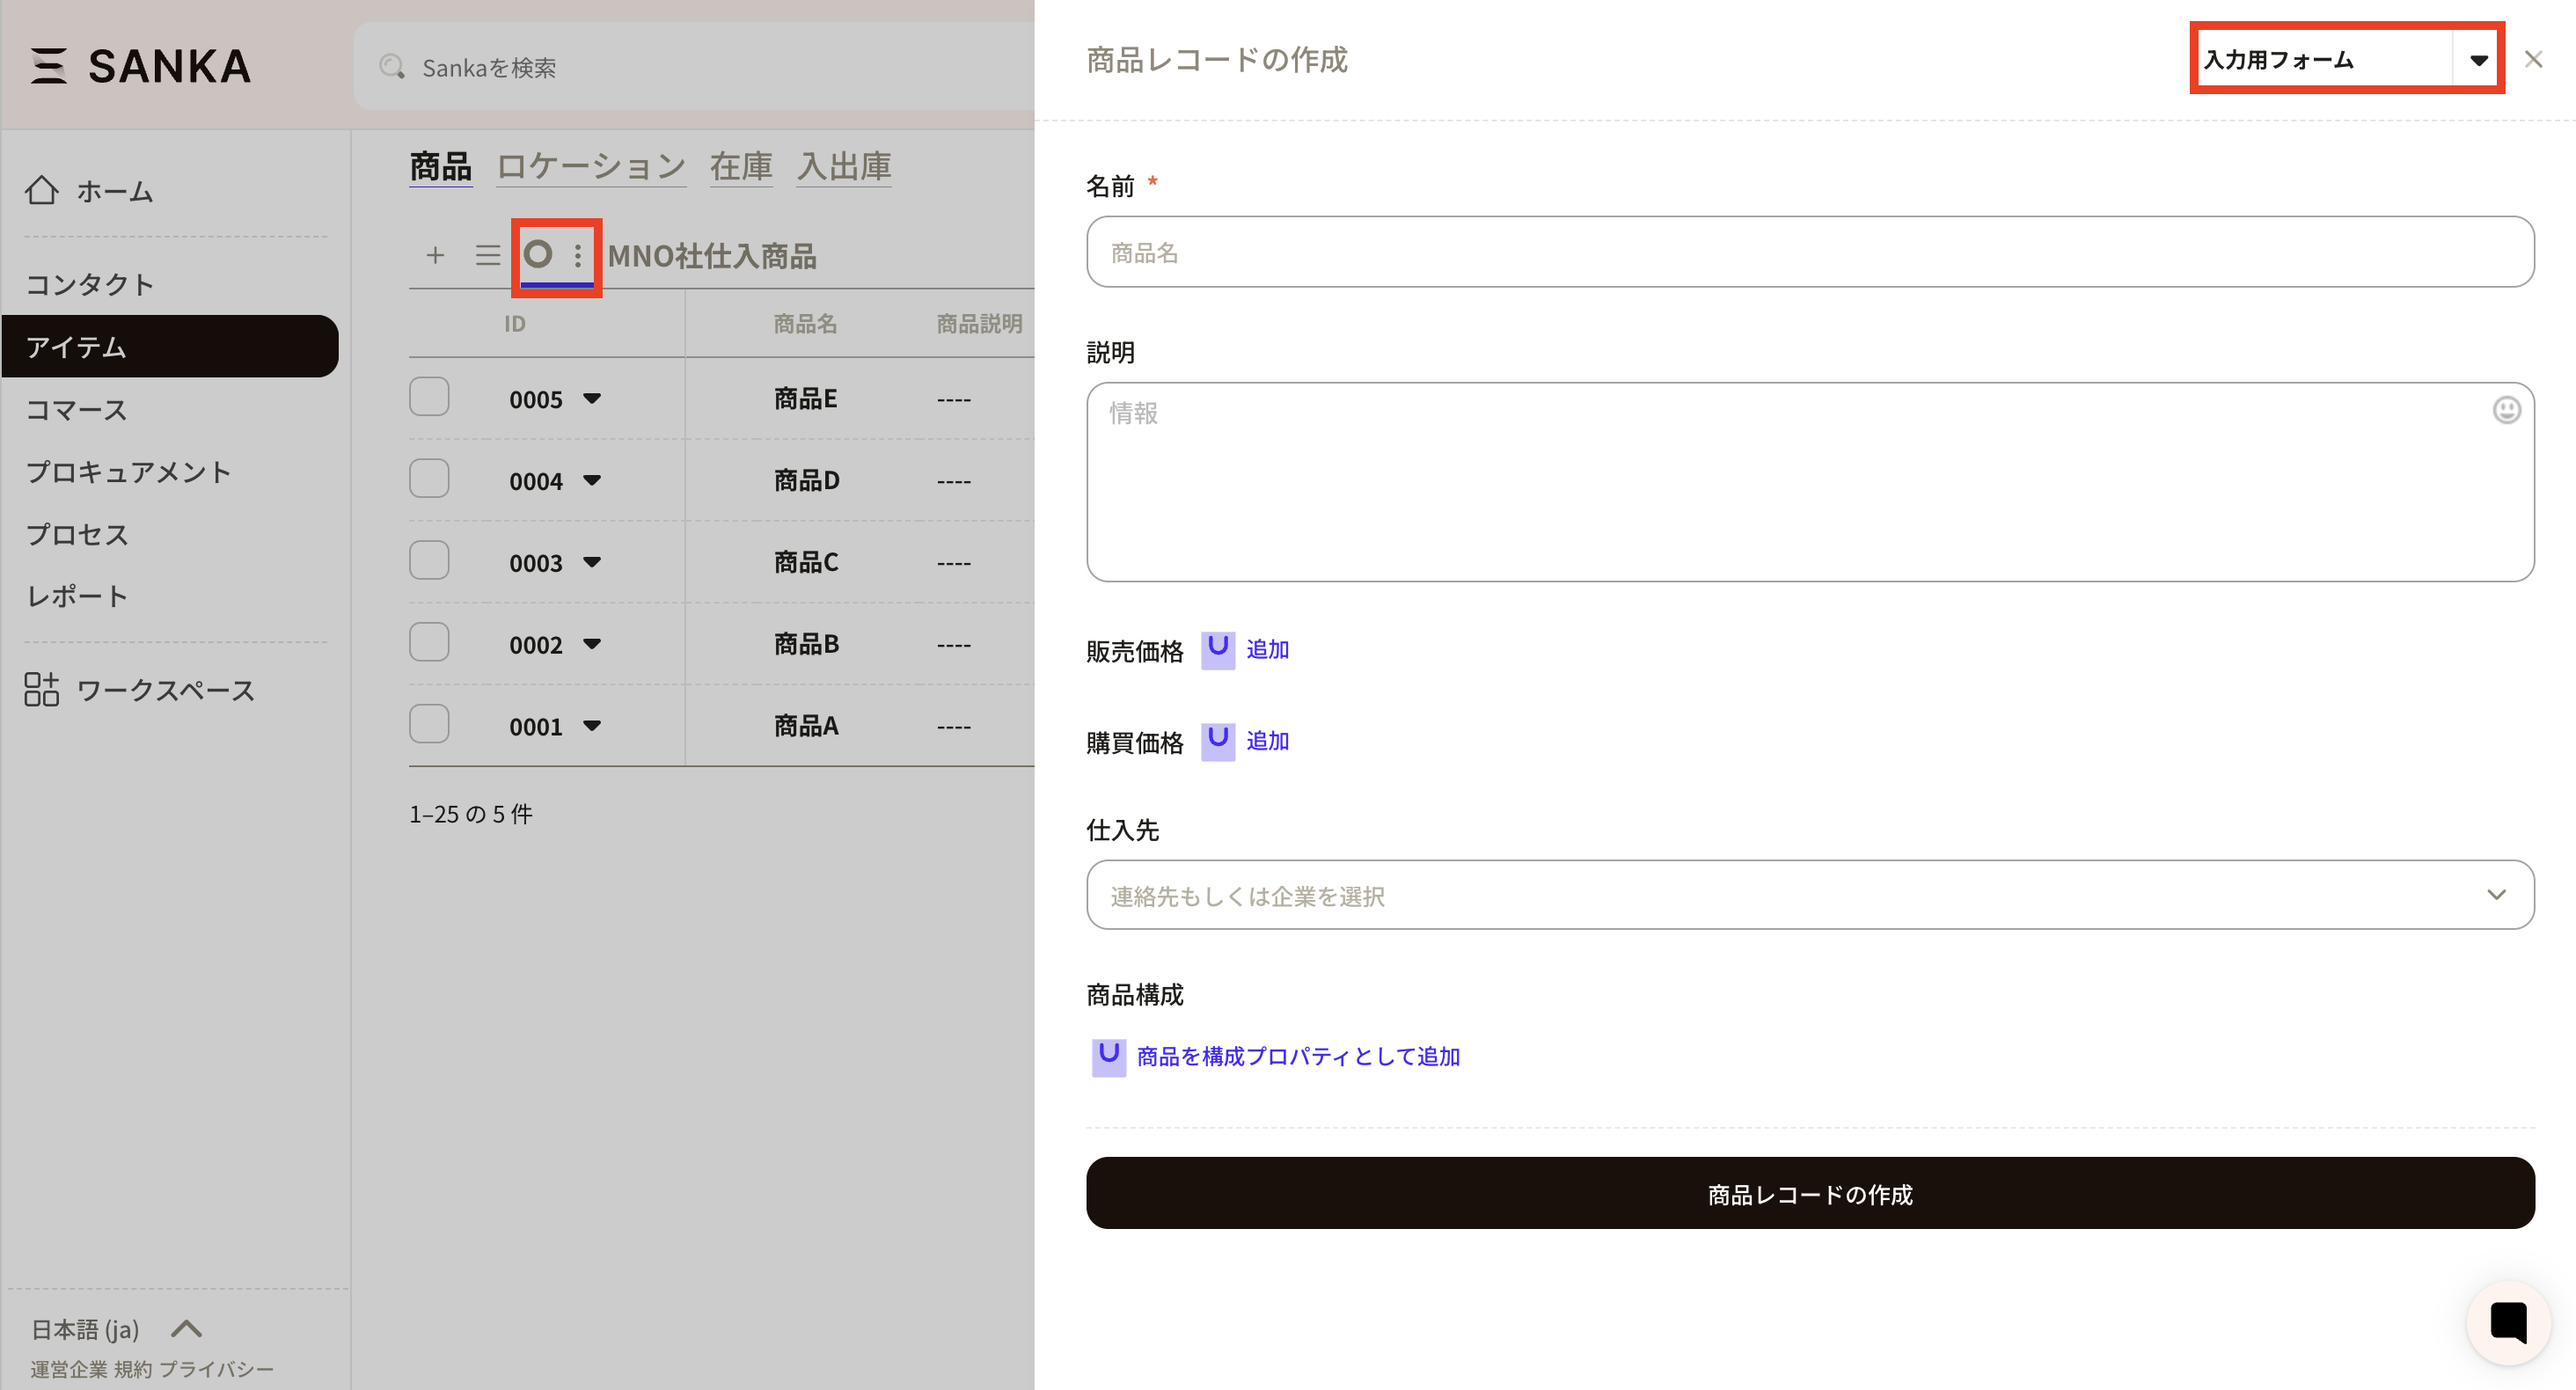
Open New from the default view management screen. You can see the form you just set on the Create record form.
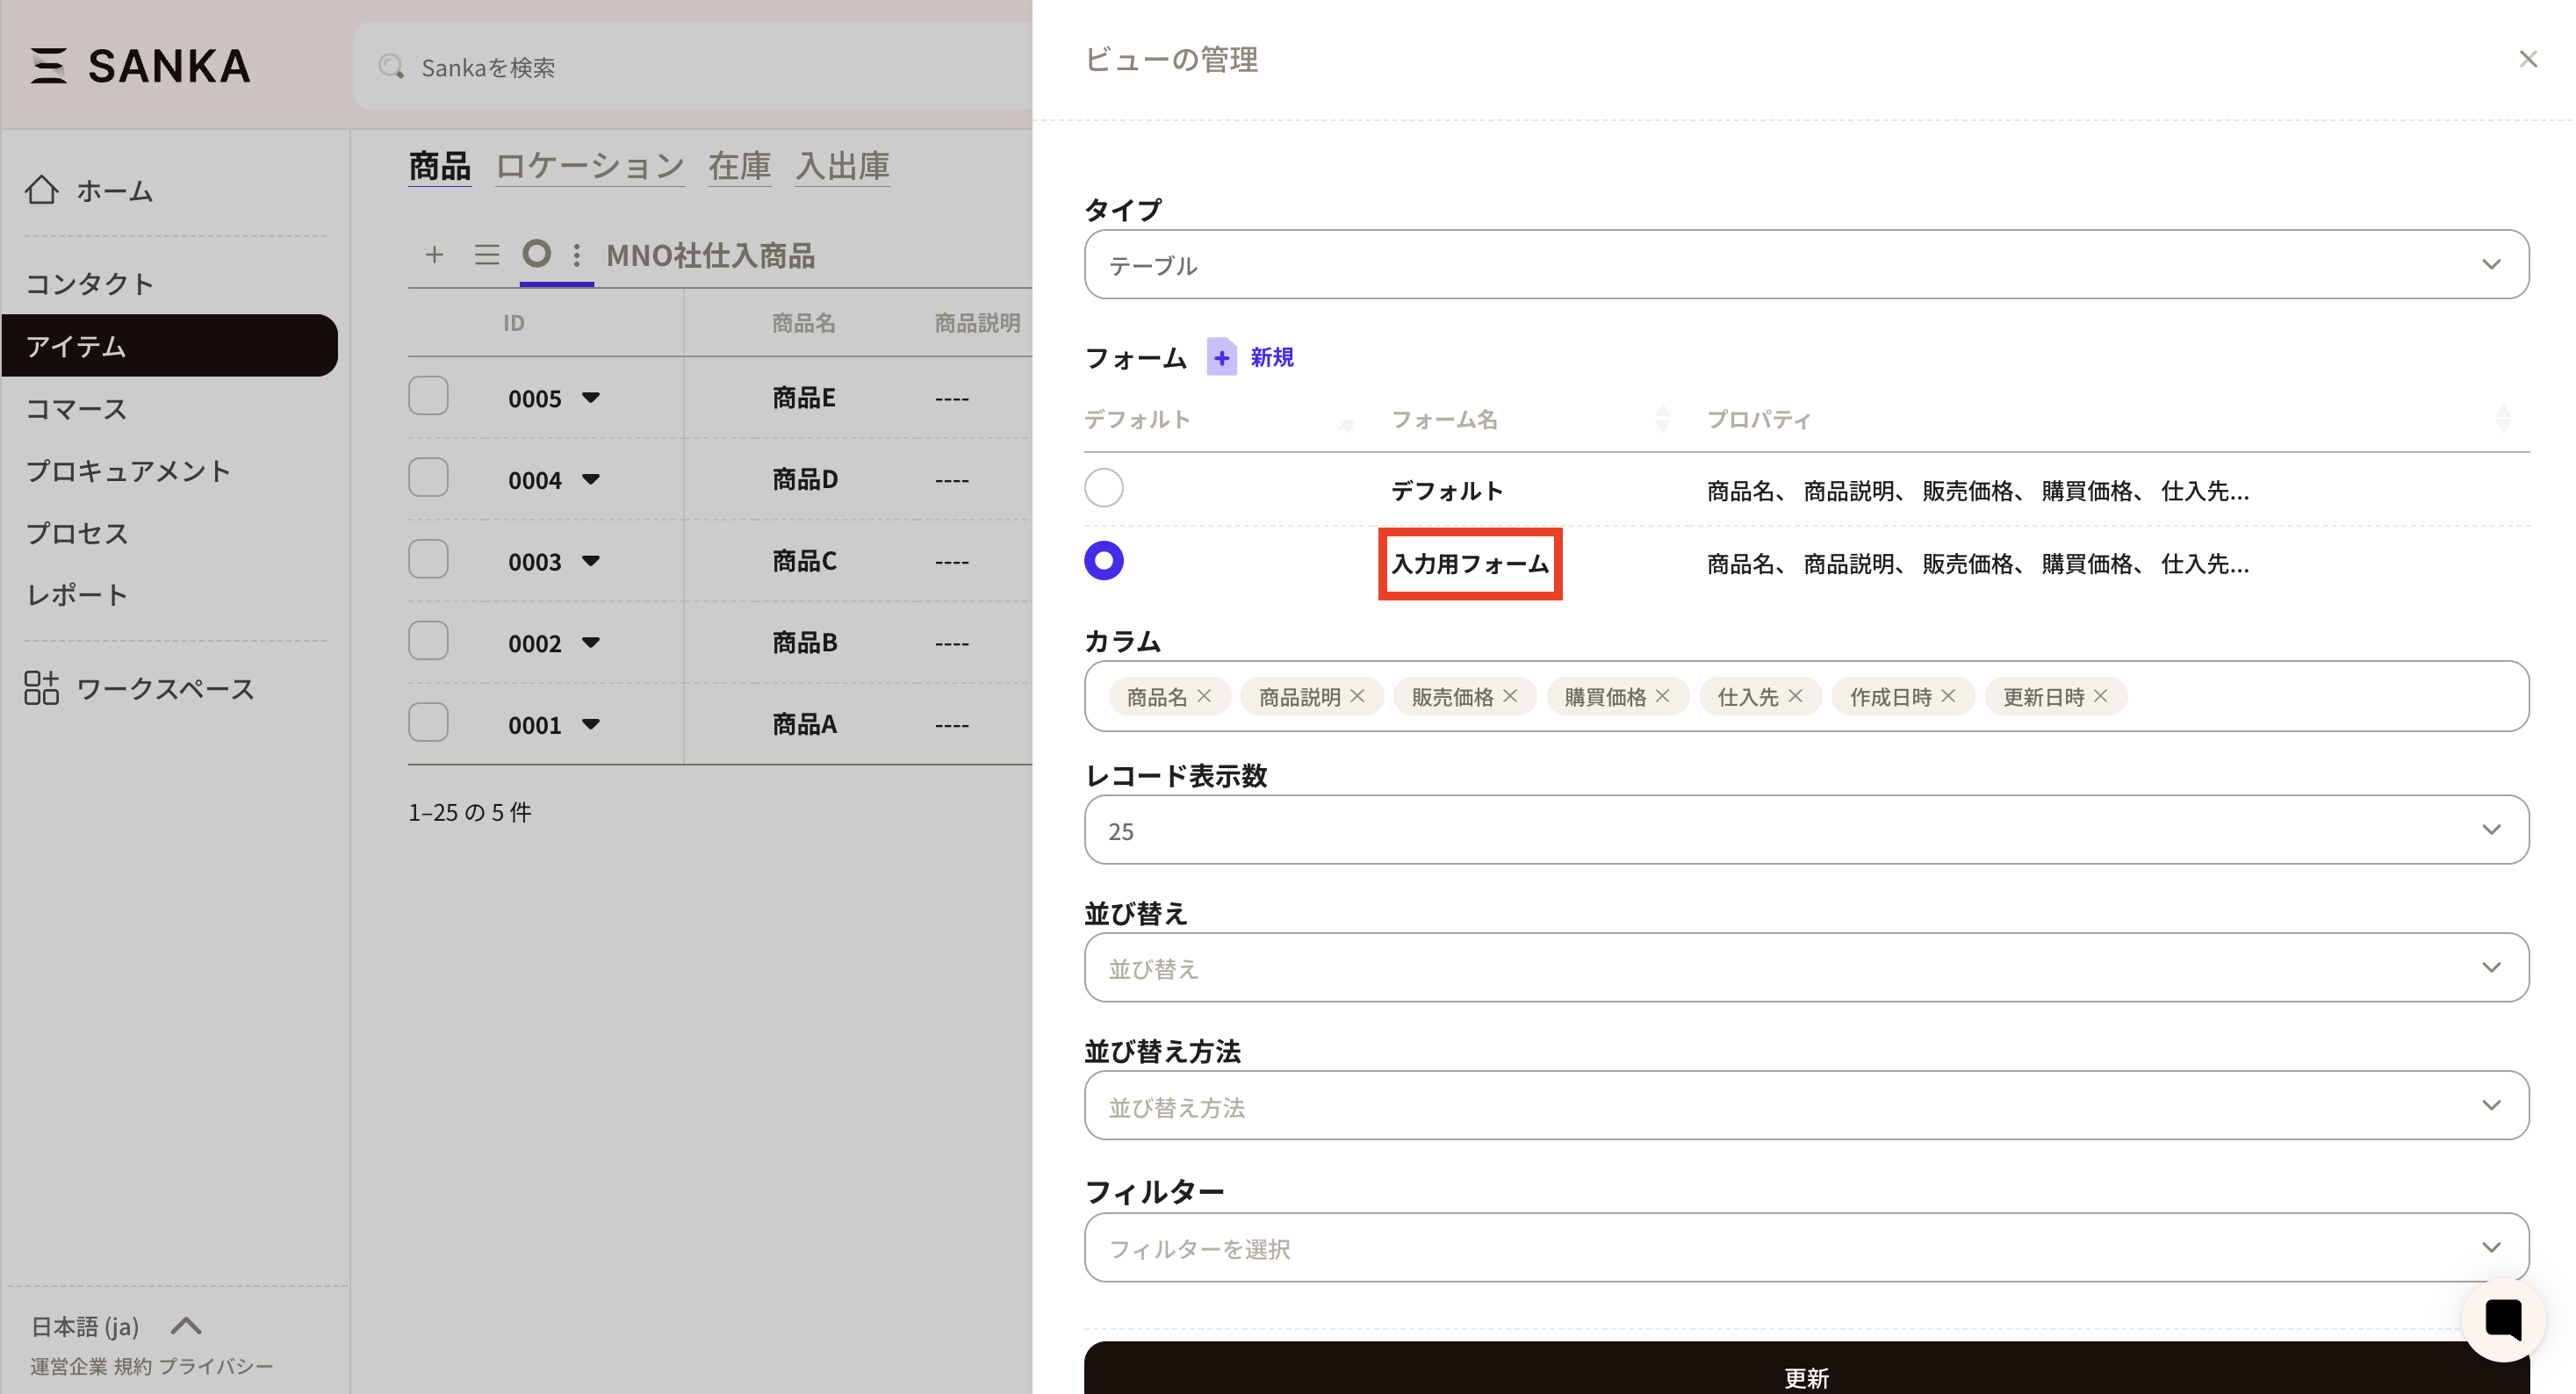
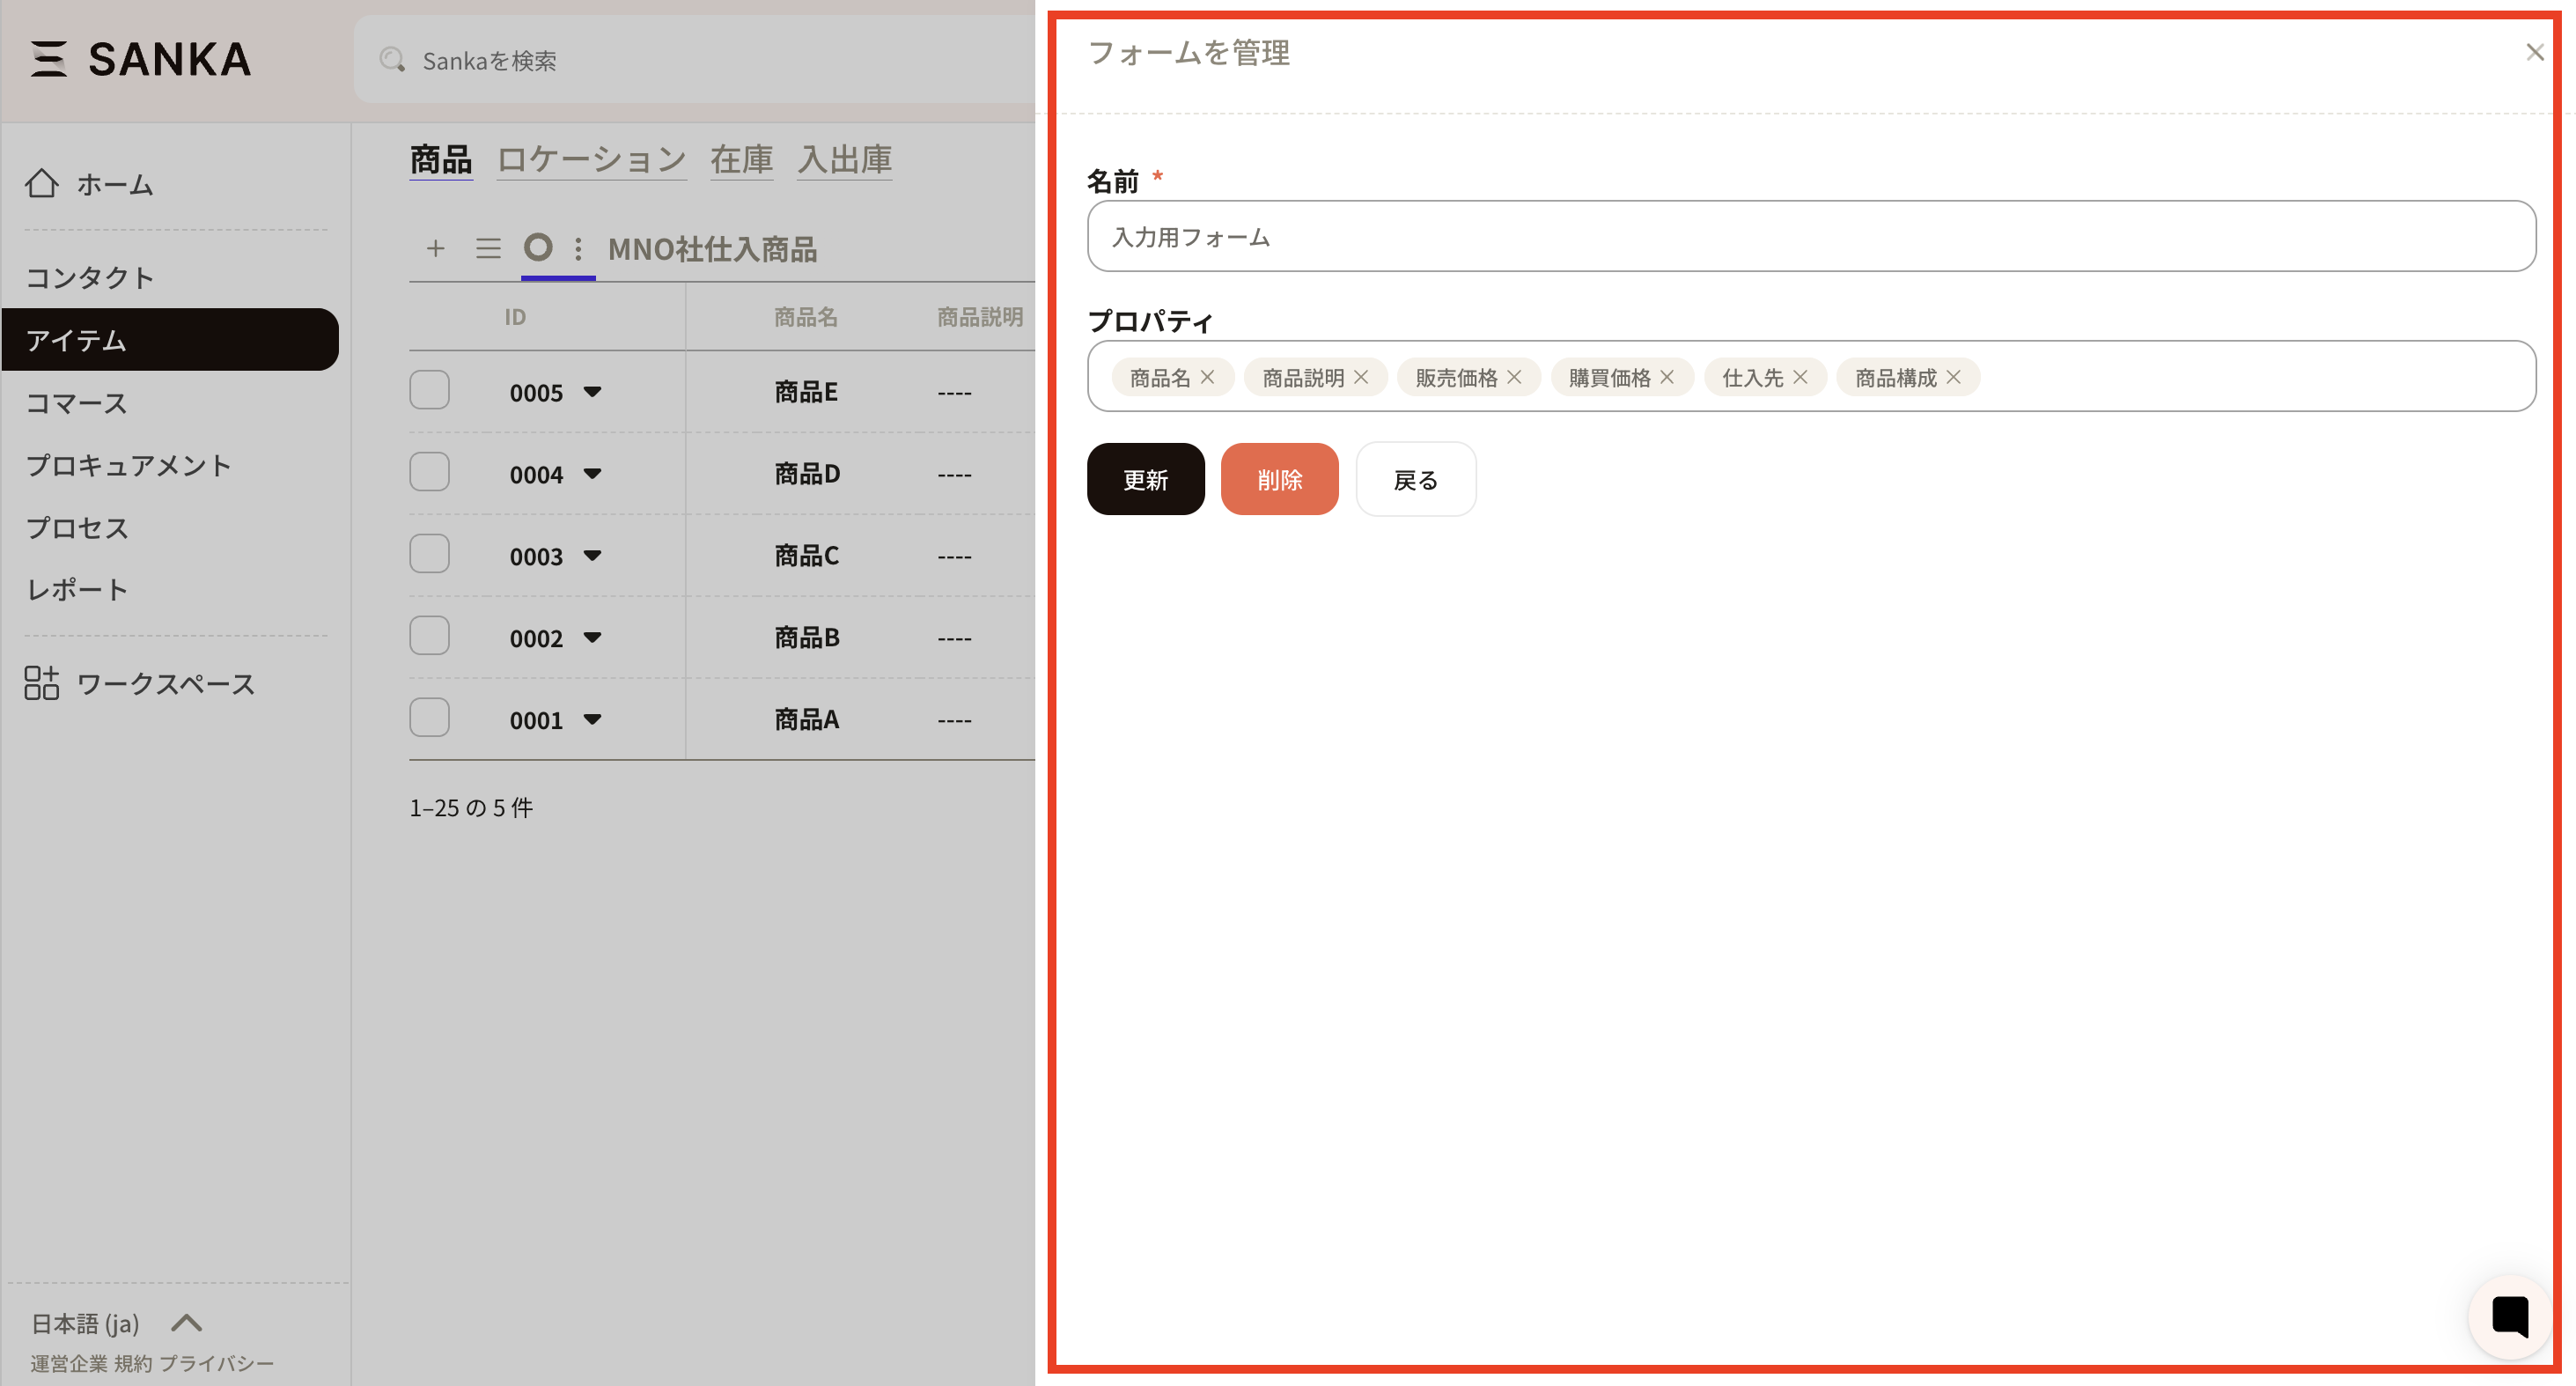
To edit or delete a form, click the form name you created. The default form cannot be edited or deleted.
The Manage form screen appears. Make changes as needed, then click Update. To delete a form, click Delete.
Create or edit forms from the record creation form
This section explains how to create forms directly from the record creation form.
Select the view you want to add the form to.
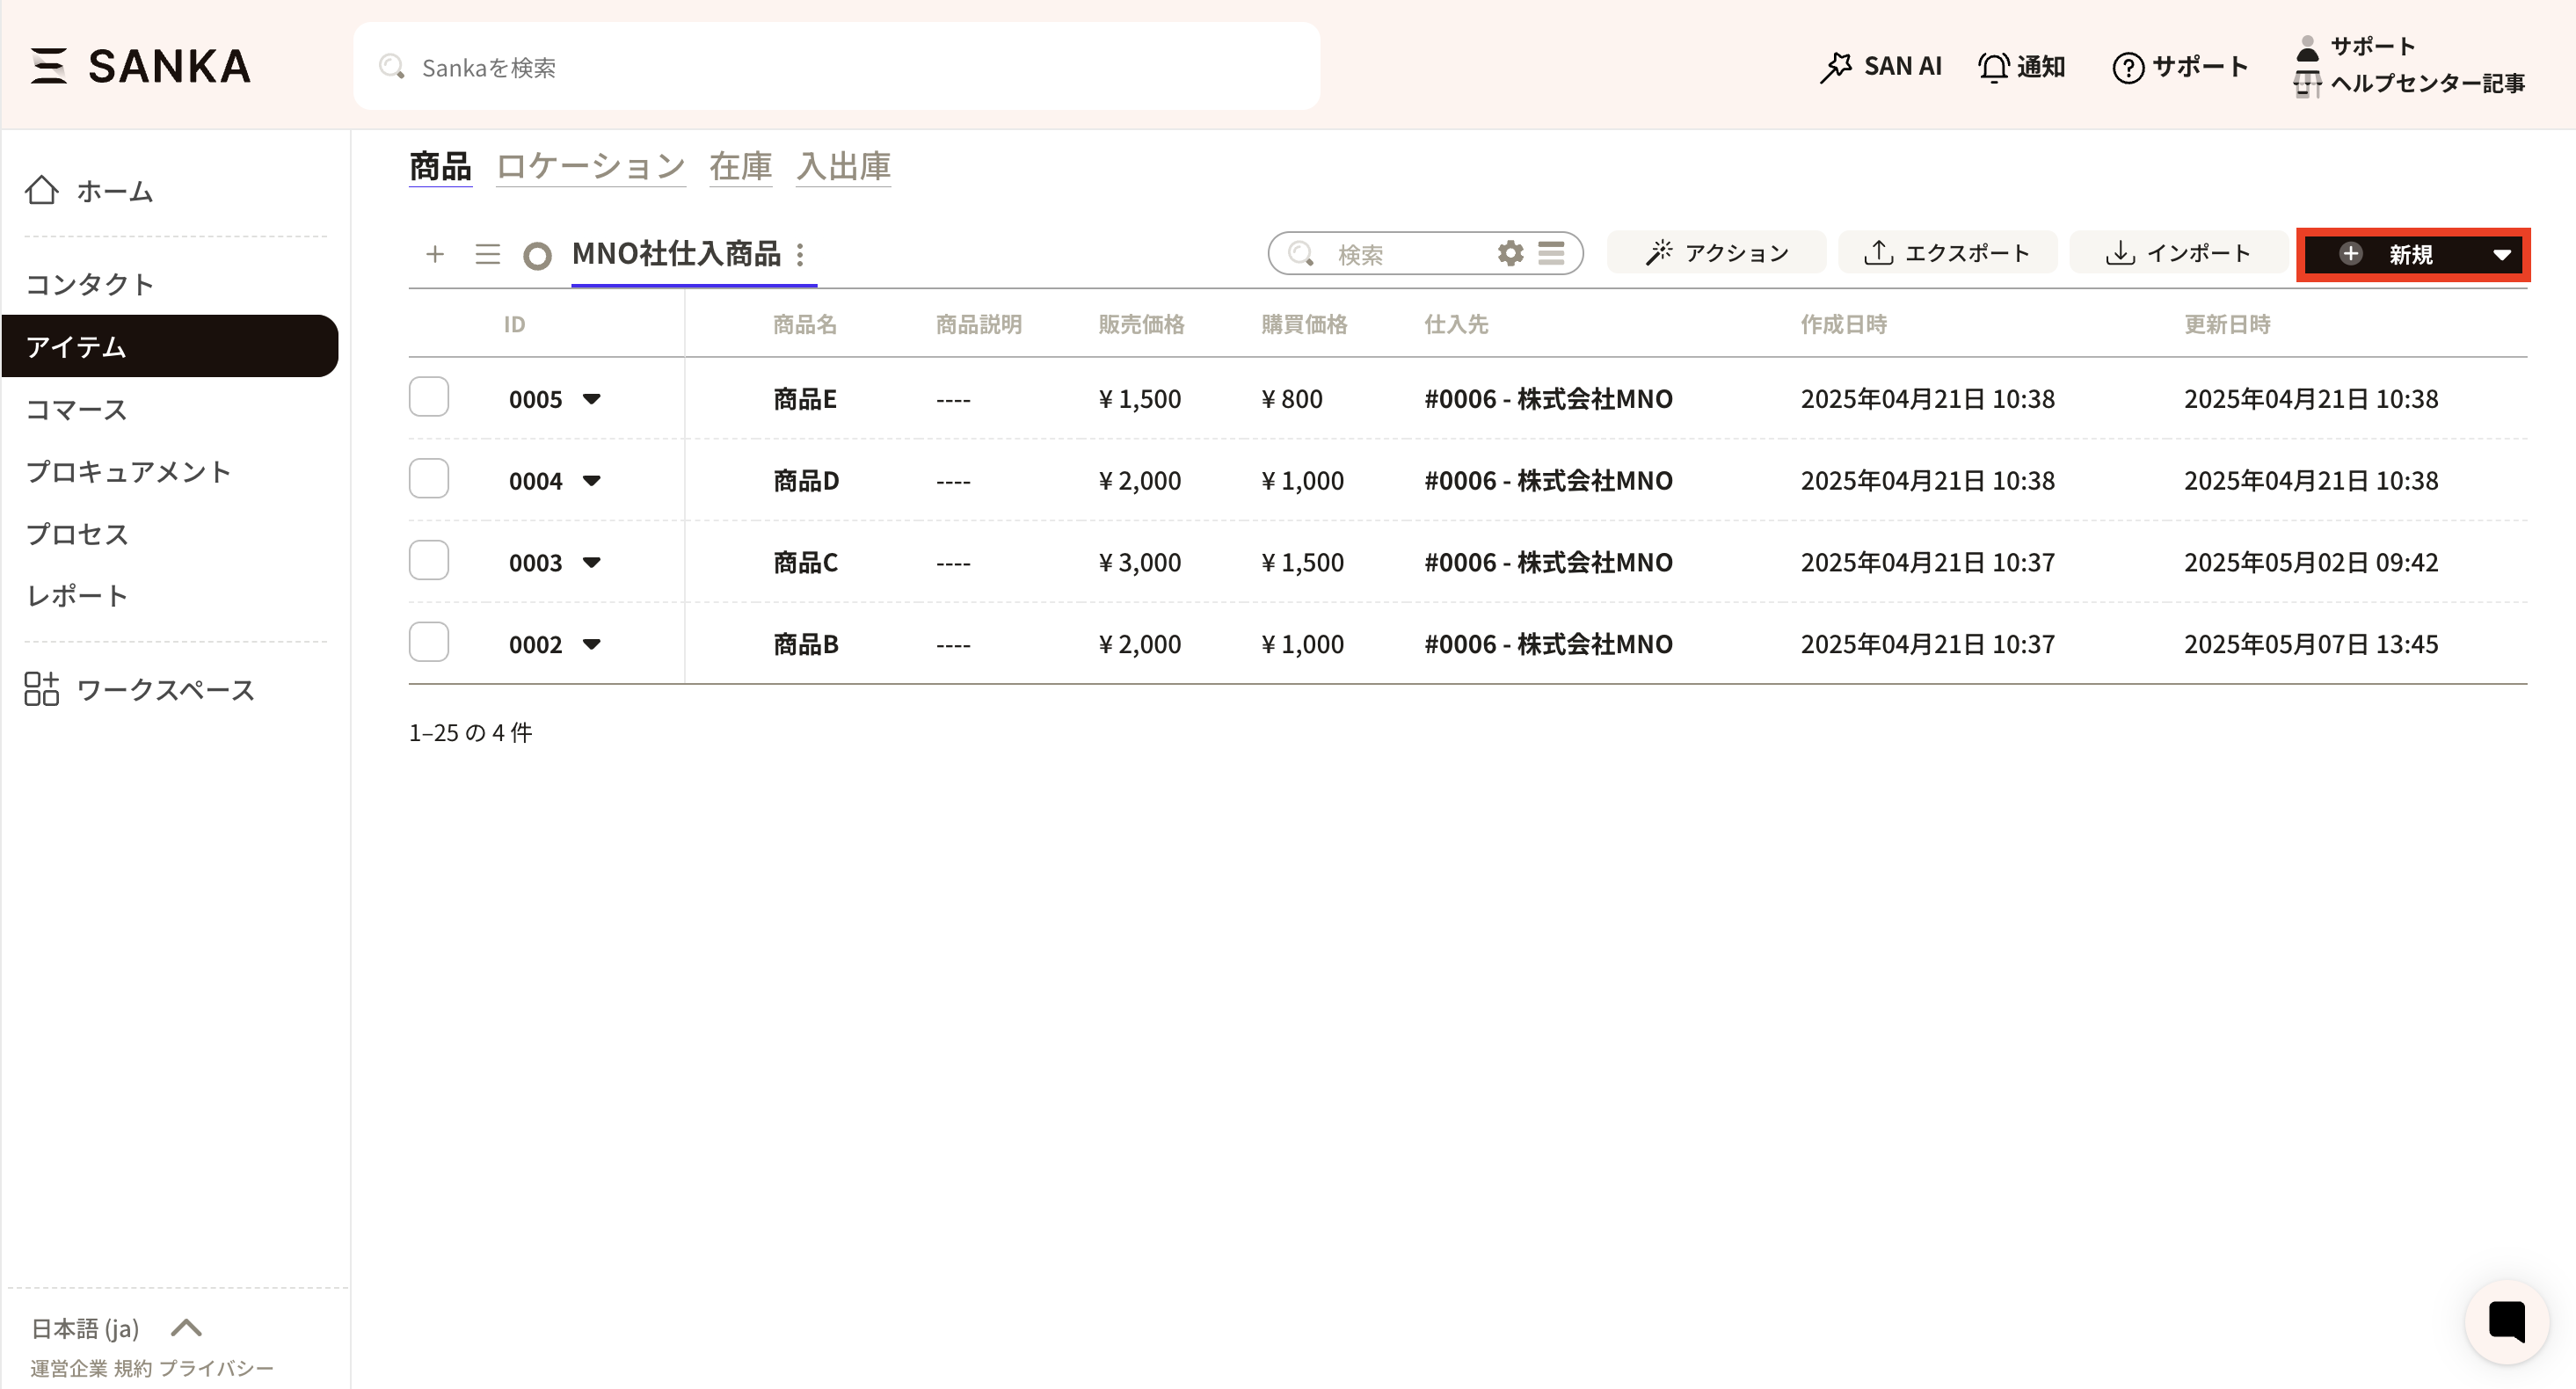
Click New in the top-right to open the record creation form.
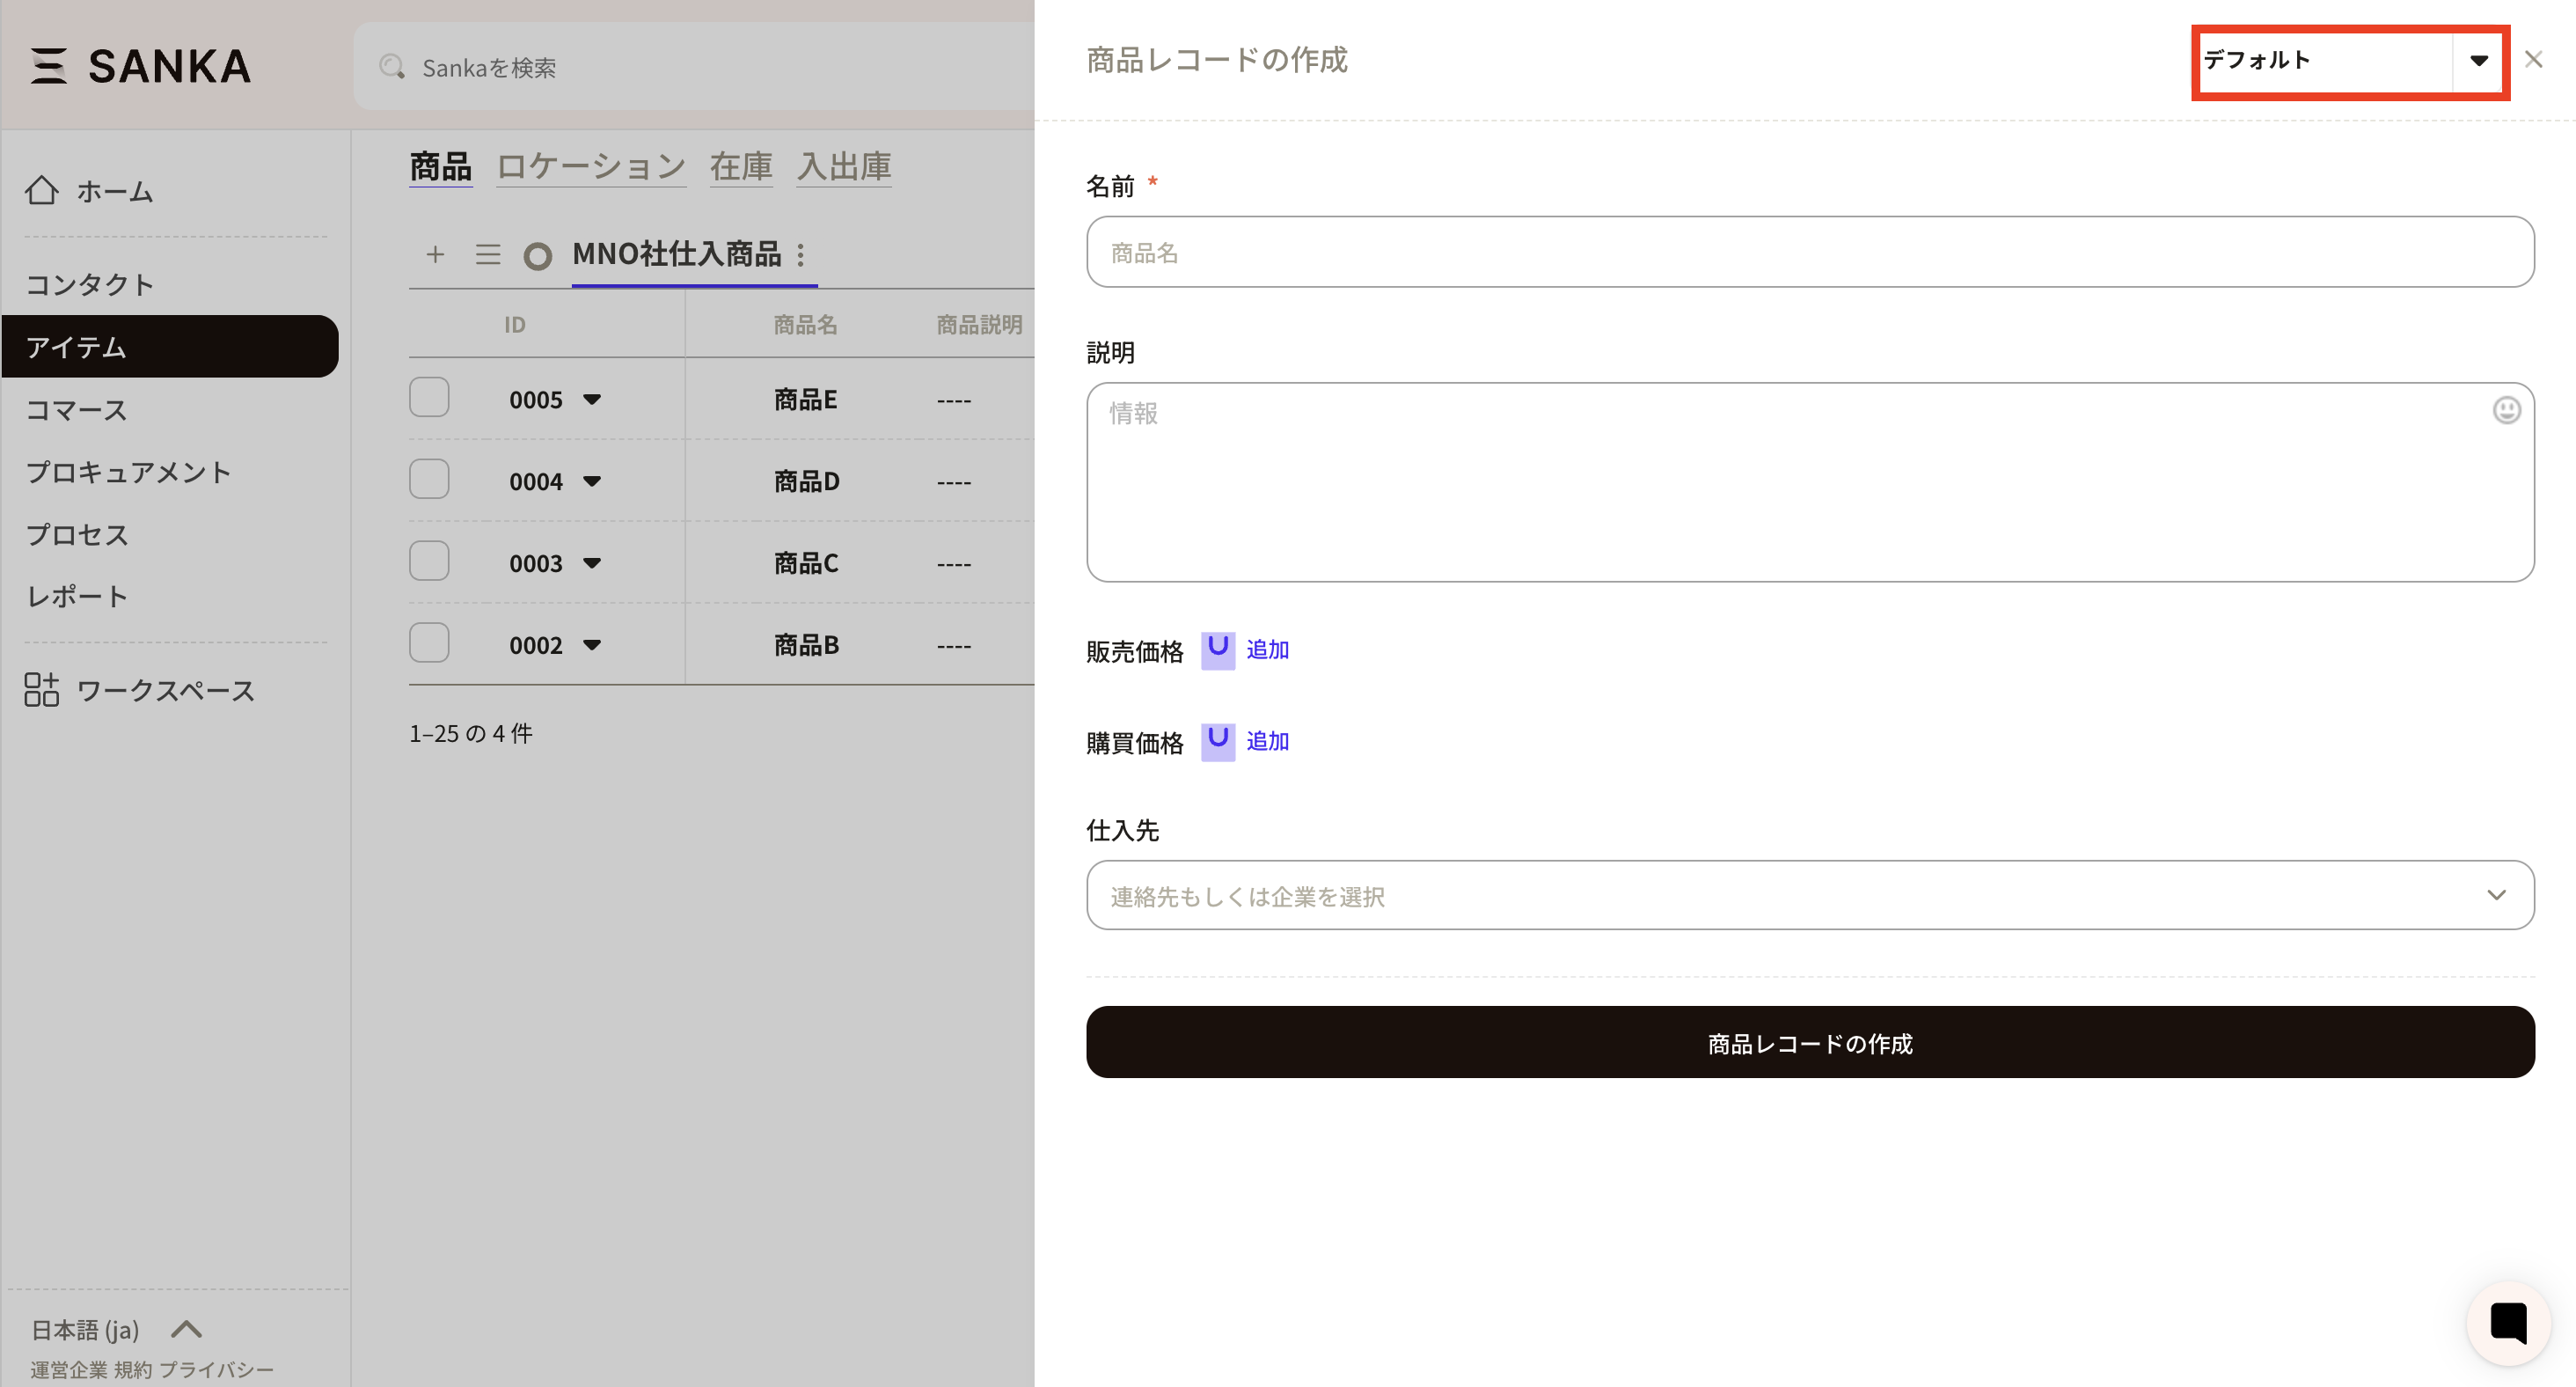
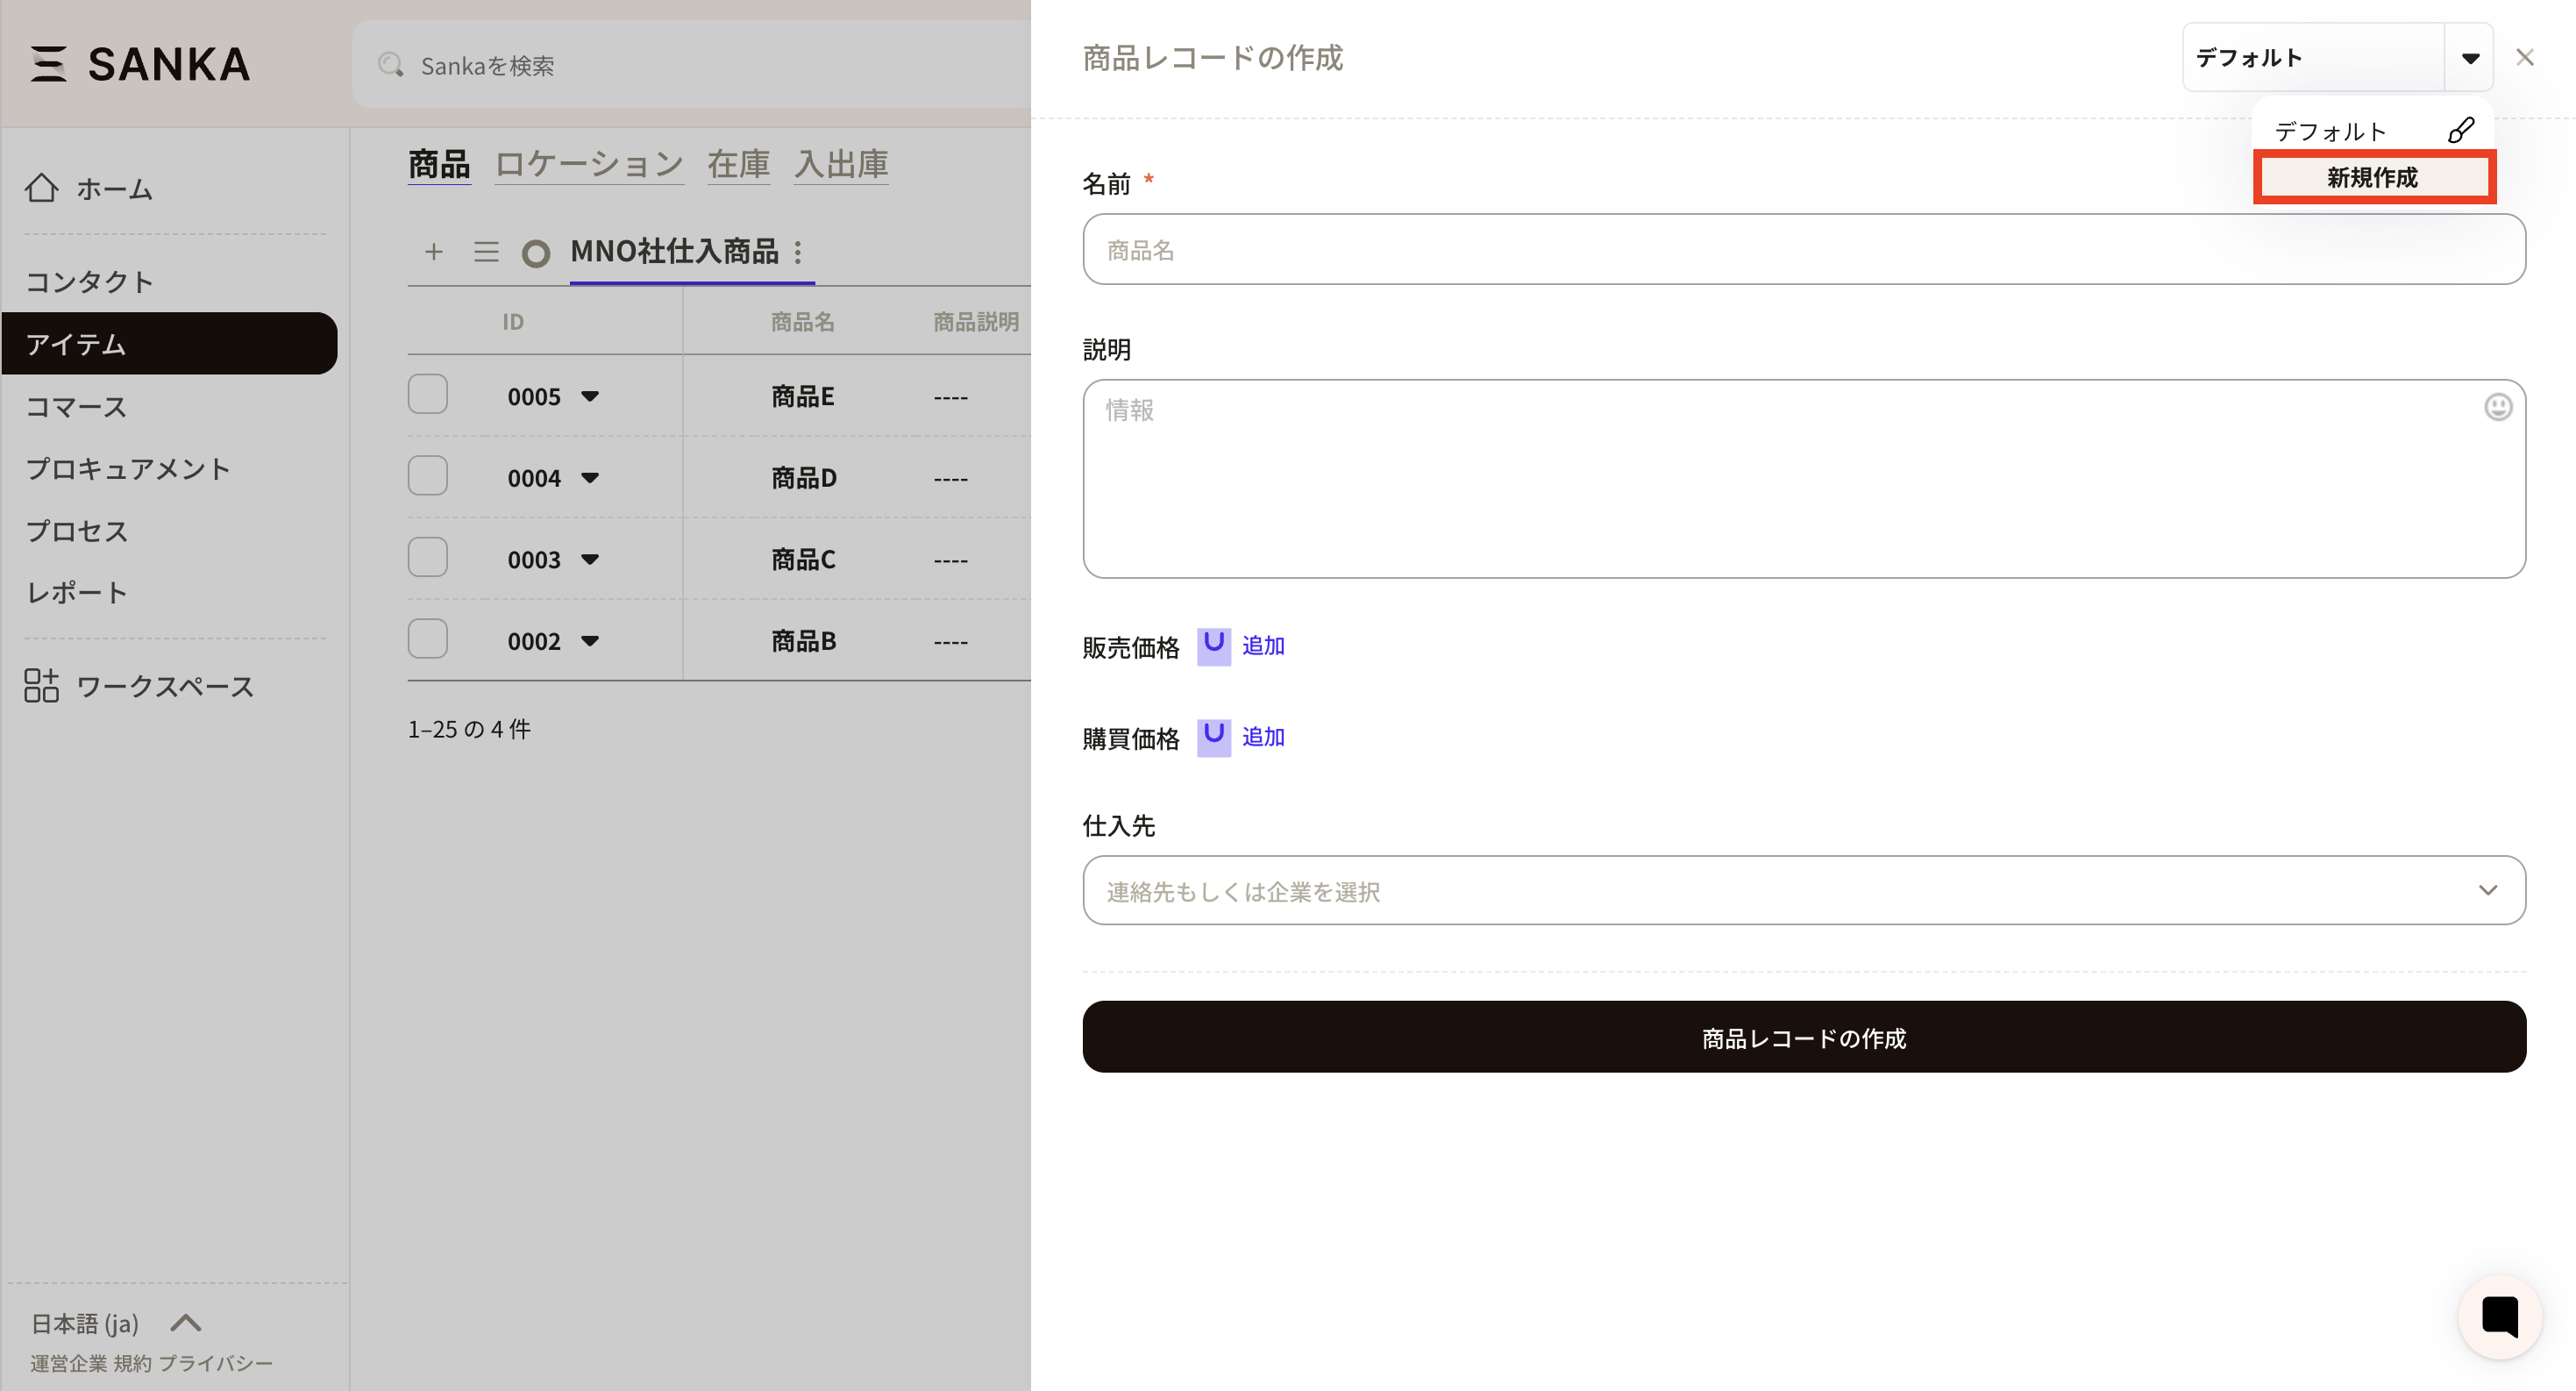
In the record creation form, there is a Default tab at the top-right. This indicates that the current form is the default. Click the triangle button on the right to create a new form.
Click Create new.
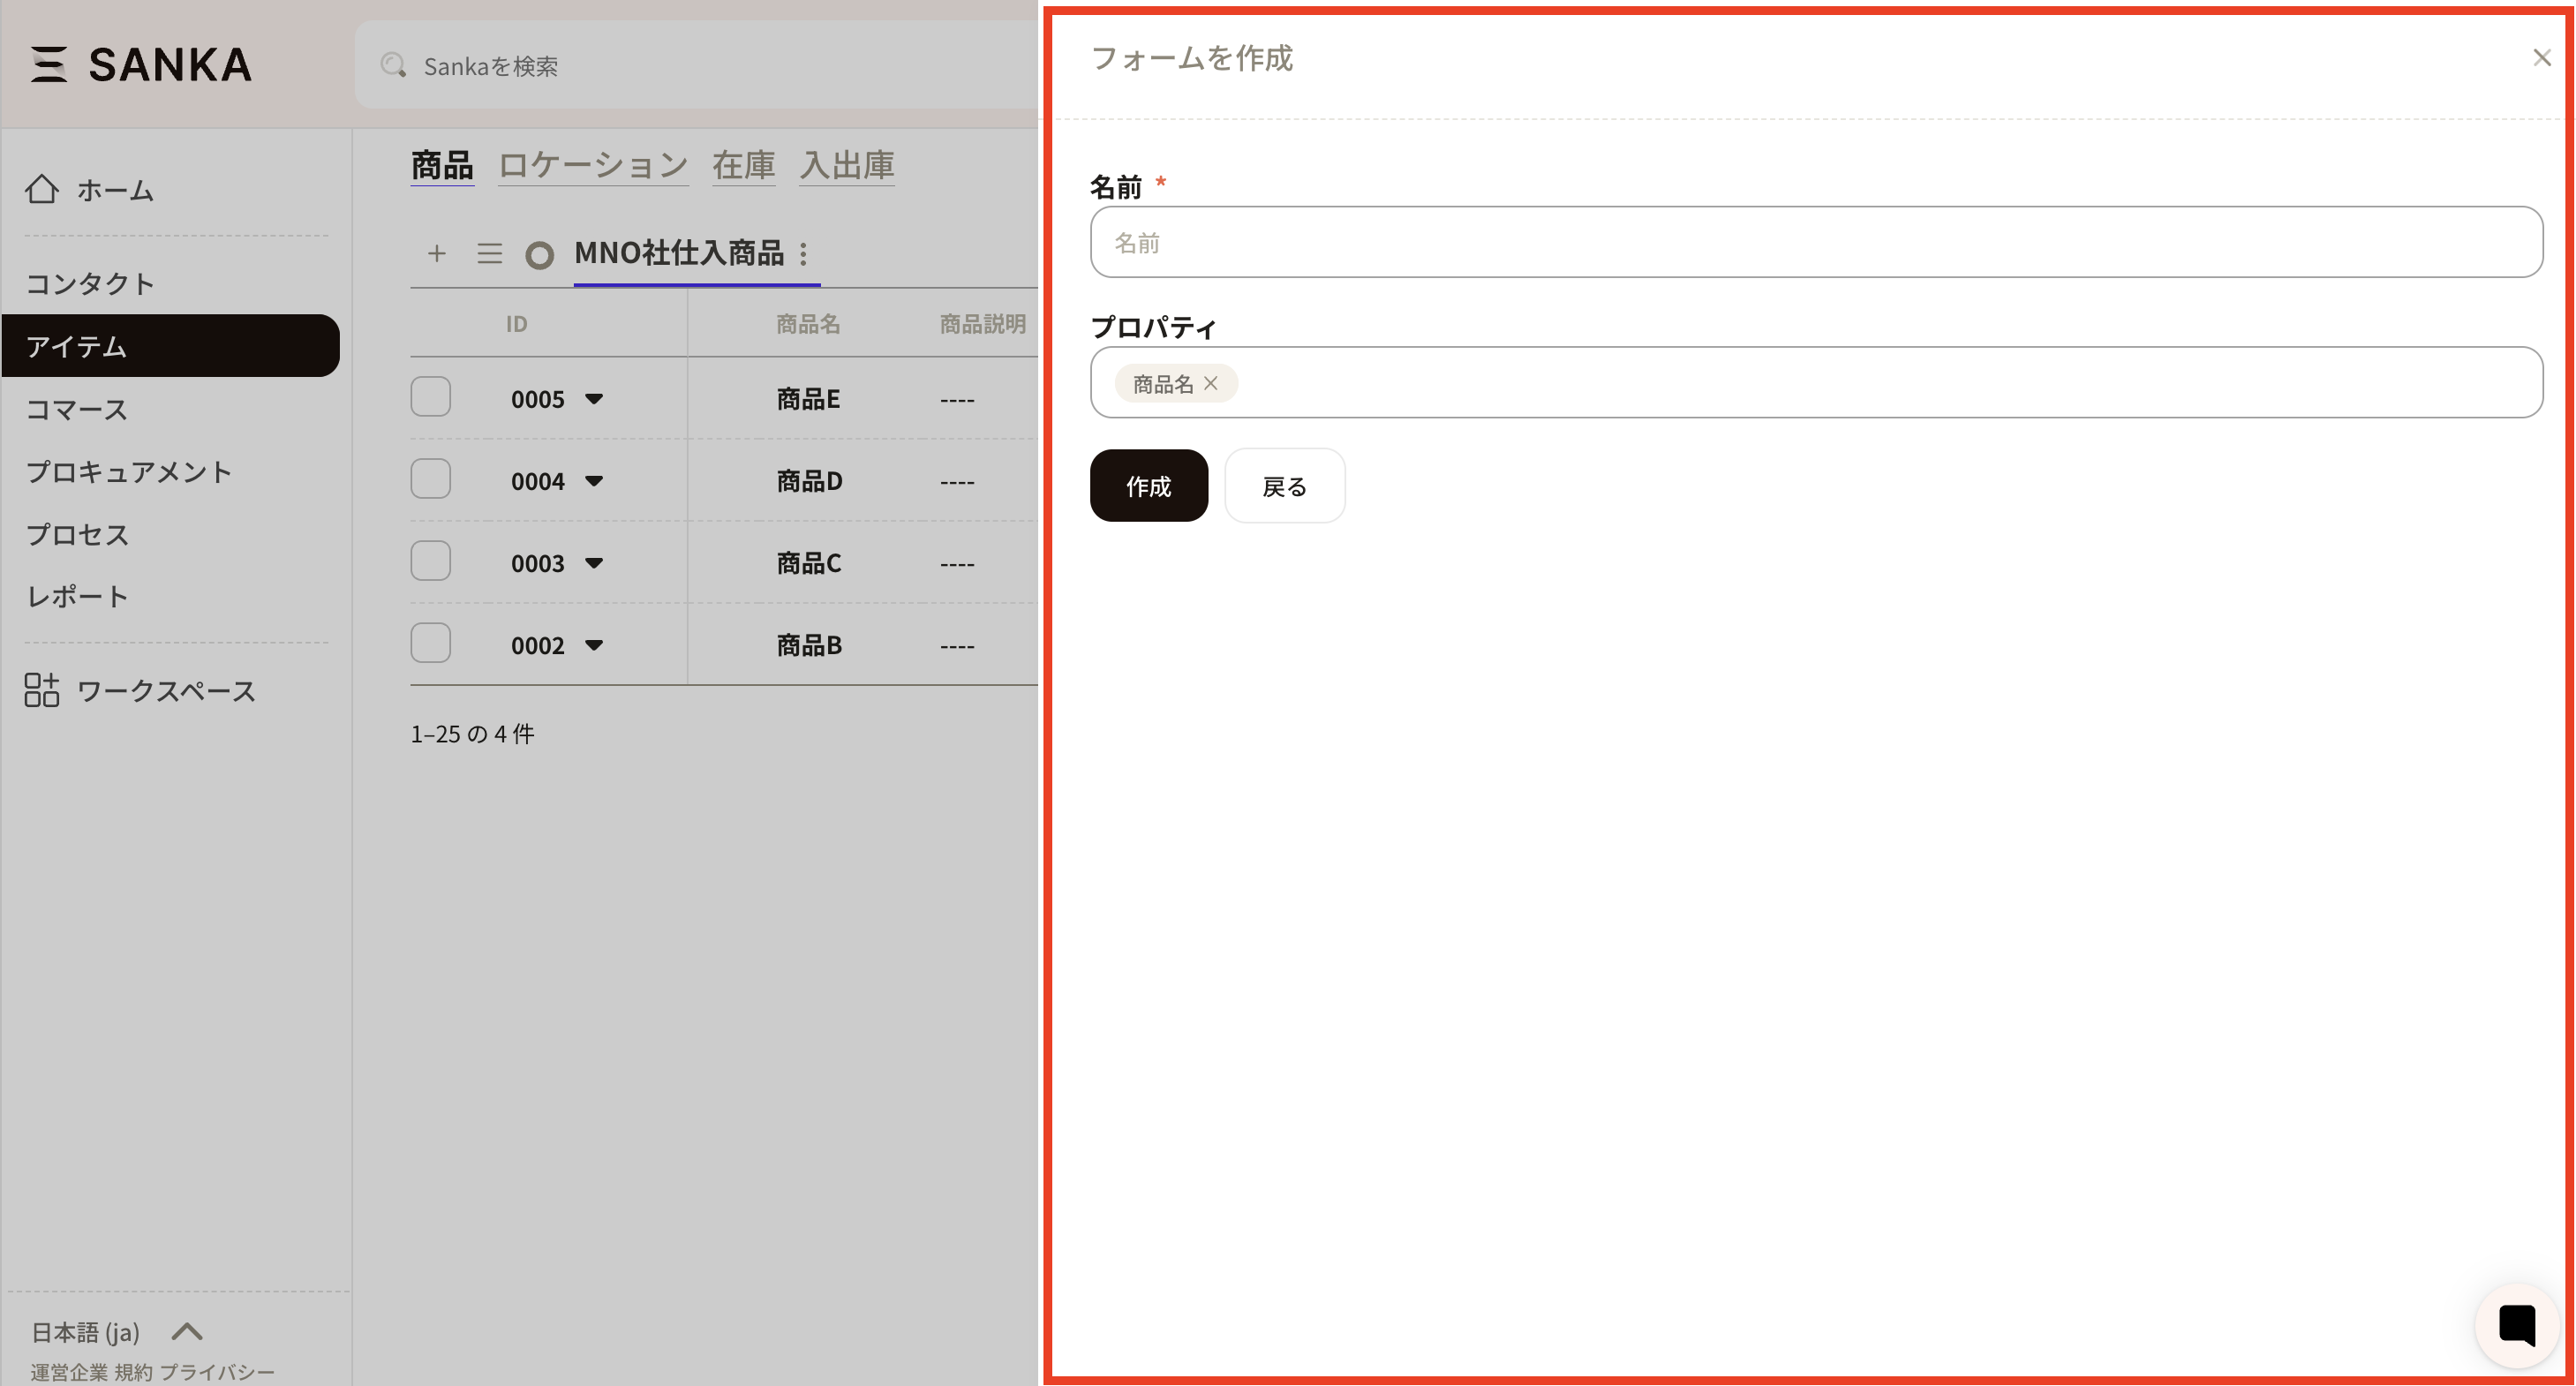
The form creation screen appears. Configure the required fields.
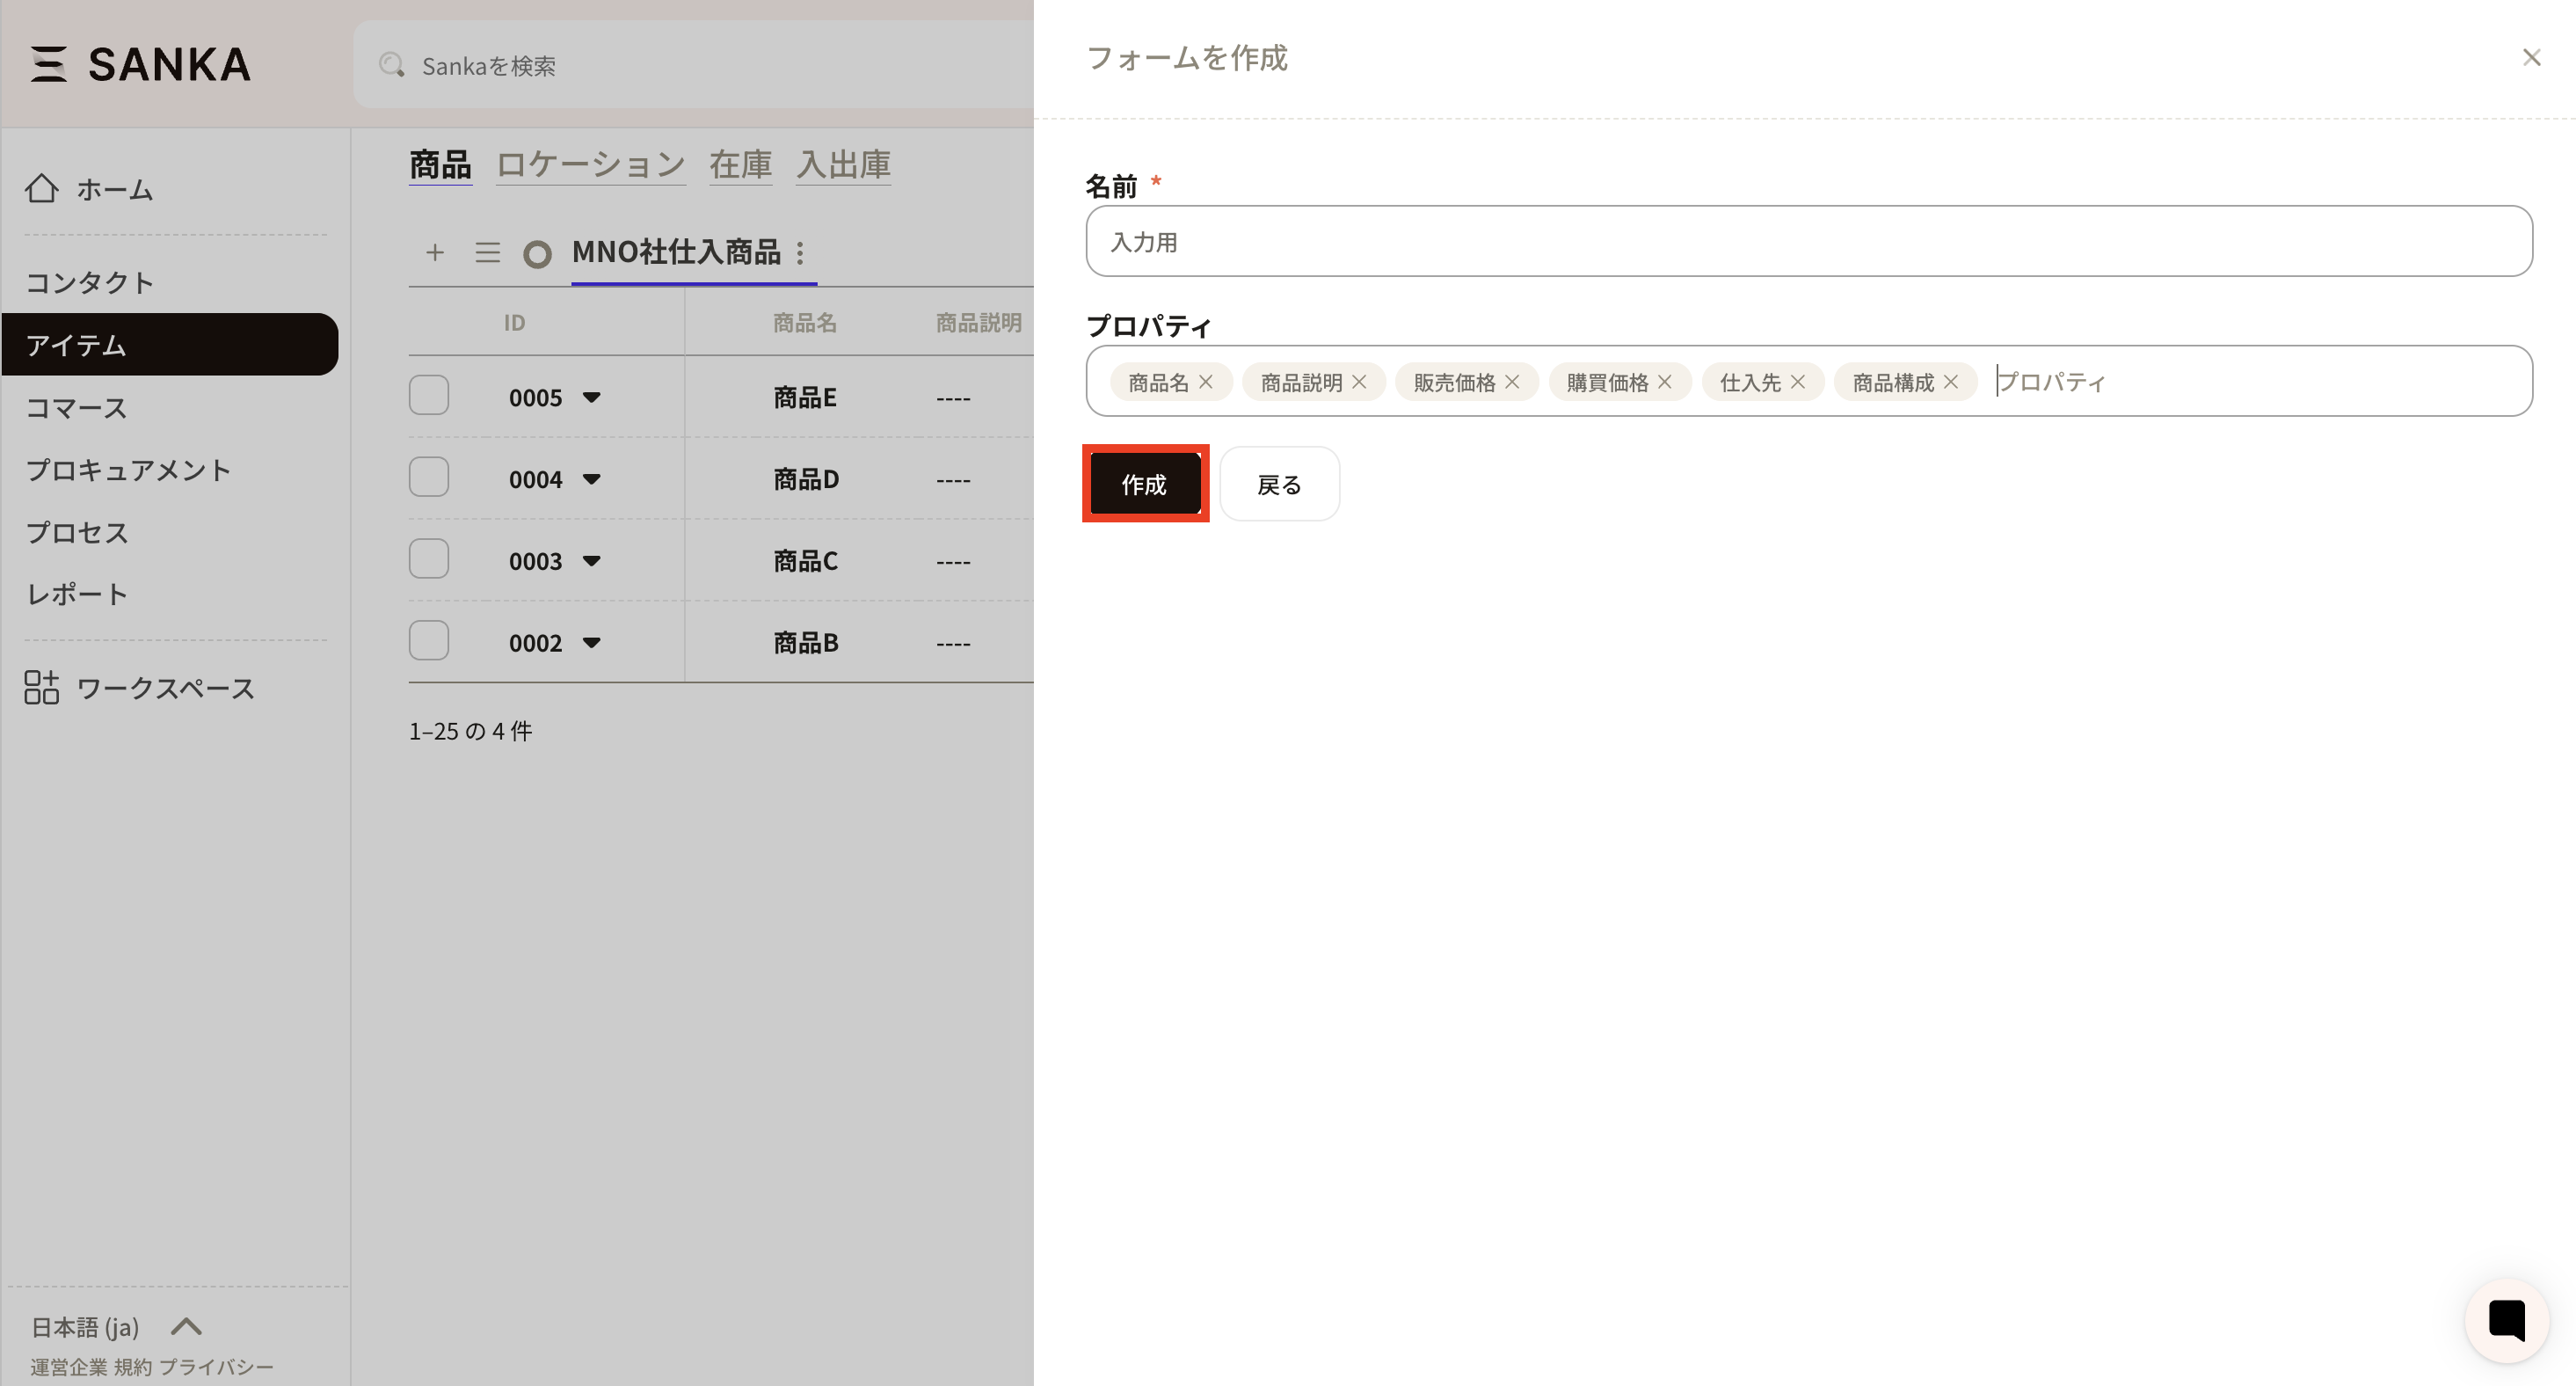
Set a recognizable name. Drag properties to change their order. After setting the required fields, click Create.
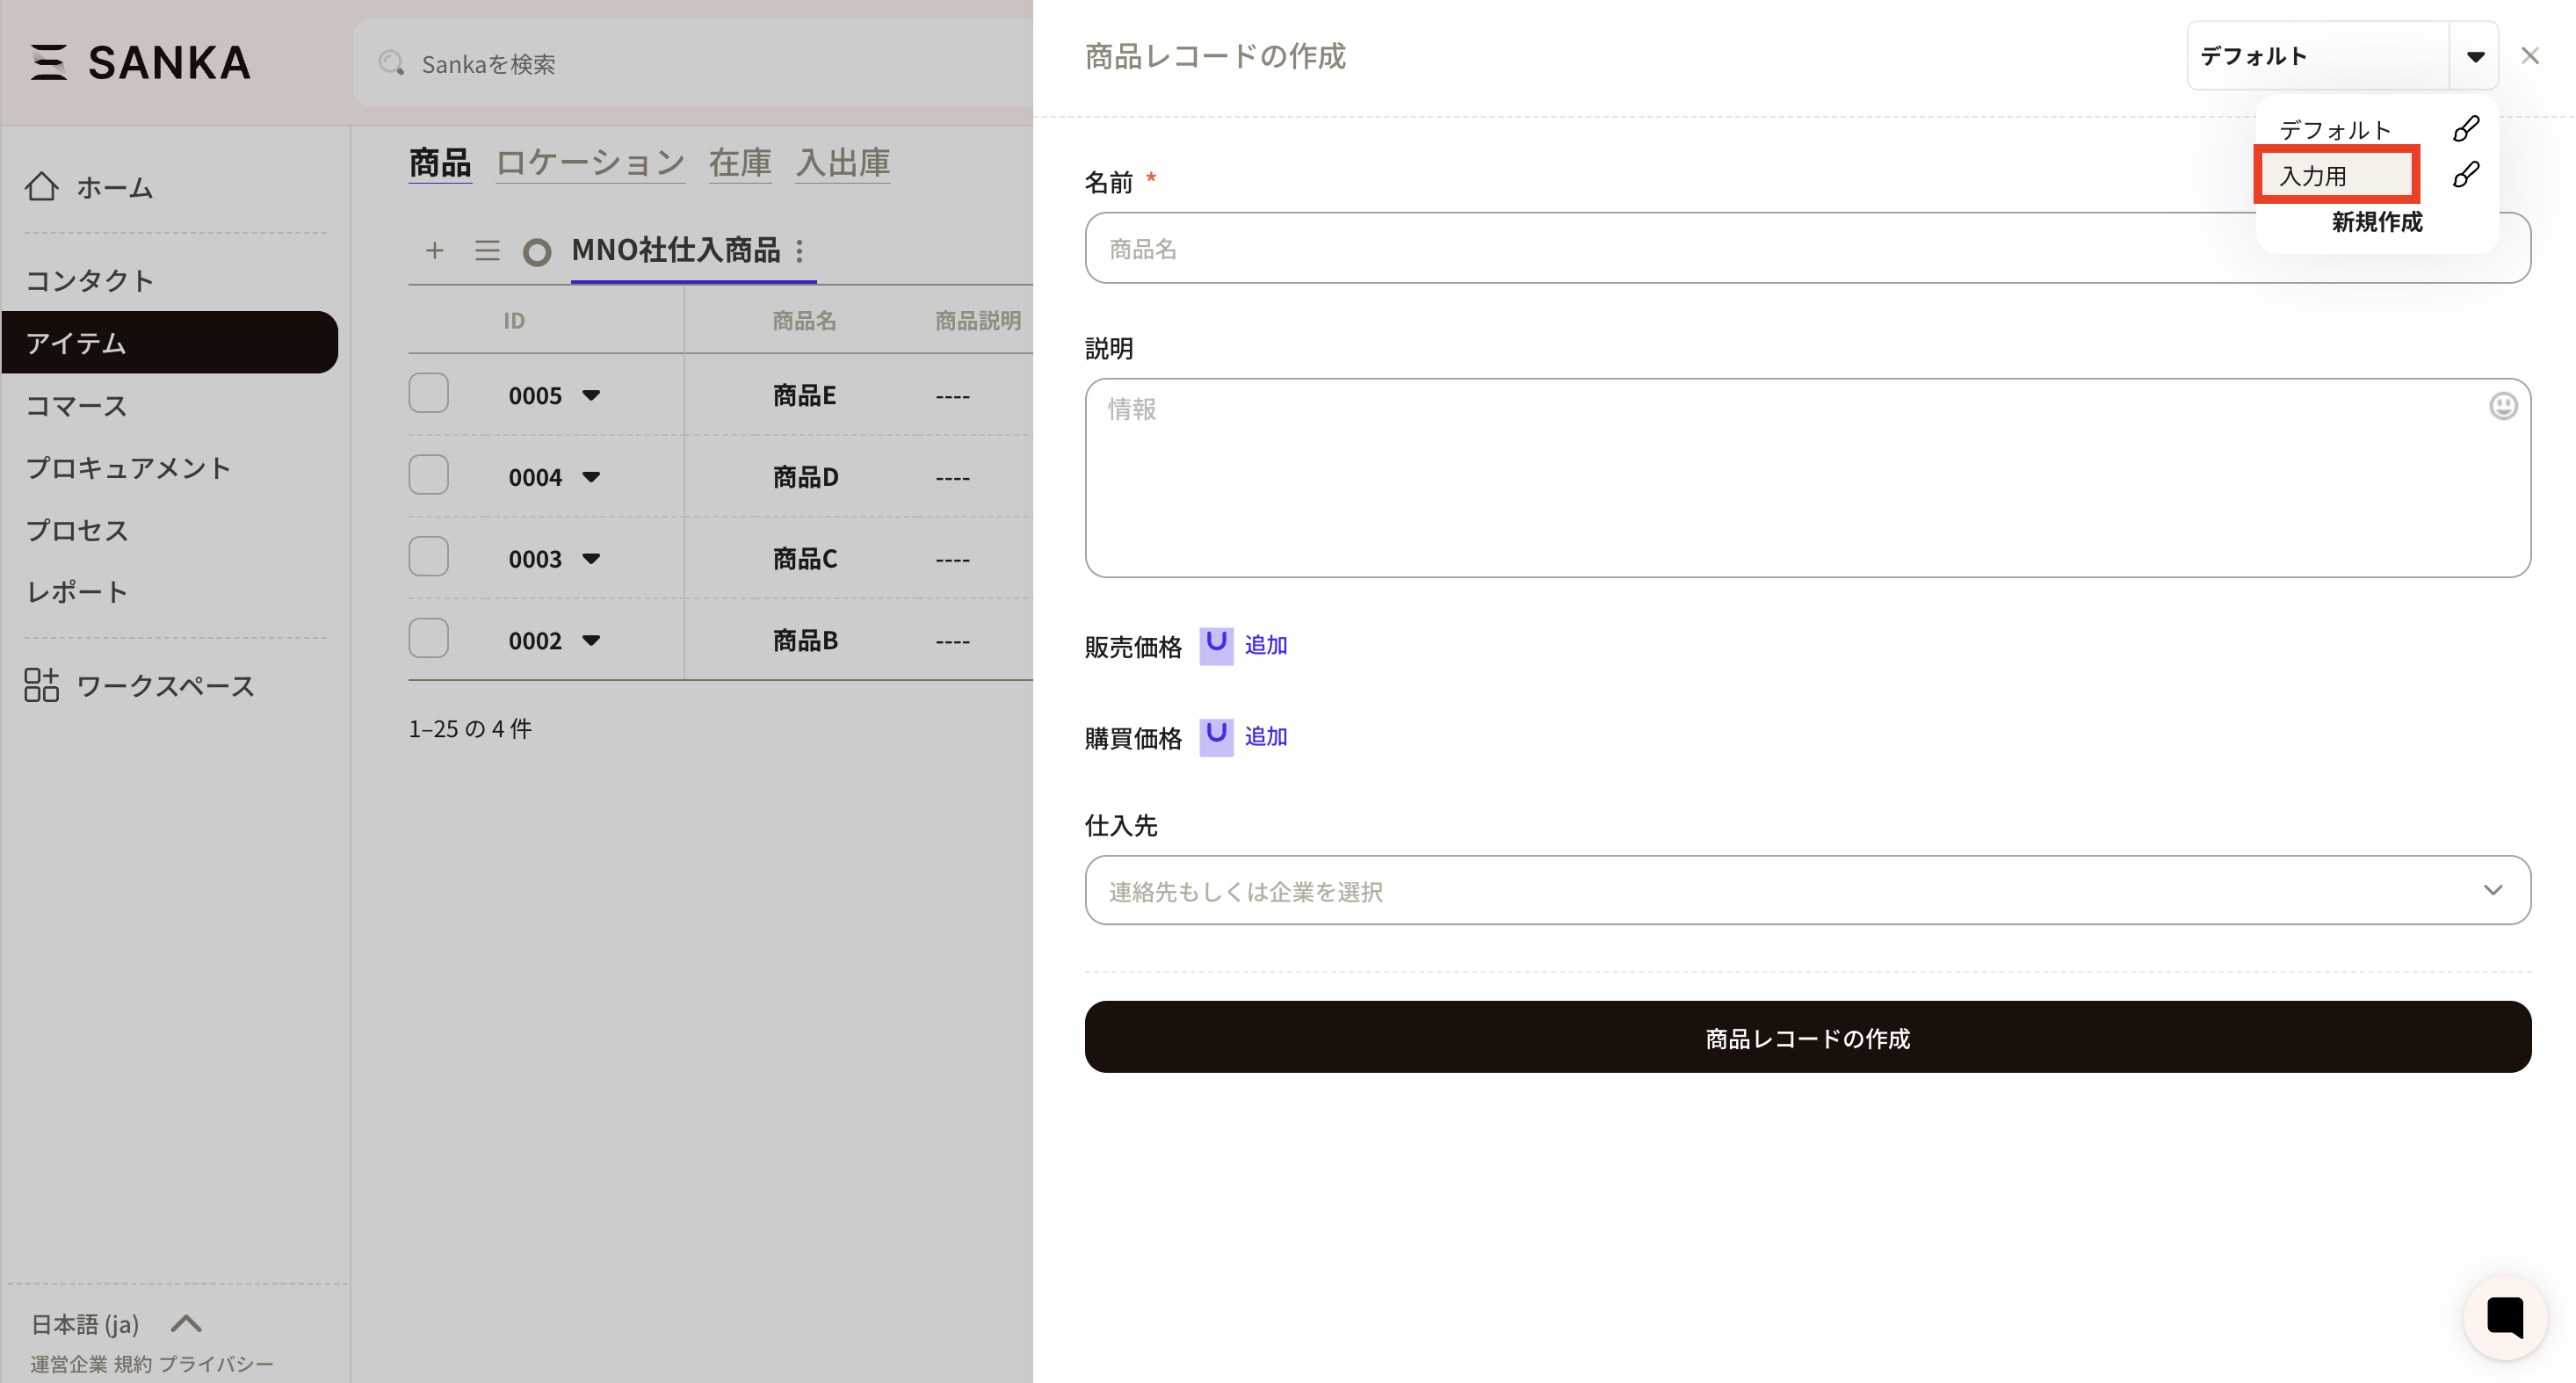
Return to Create record. The form you just set is applied.
 Name: Set the view name. Choose a clear, recognizable name.
 This is how it appears.
 Type: Choose between a table view or a group table view. The default is a table view that lists records. For most cases, the table view is sufficient.
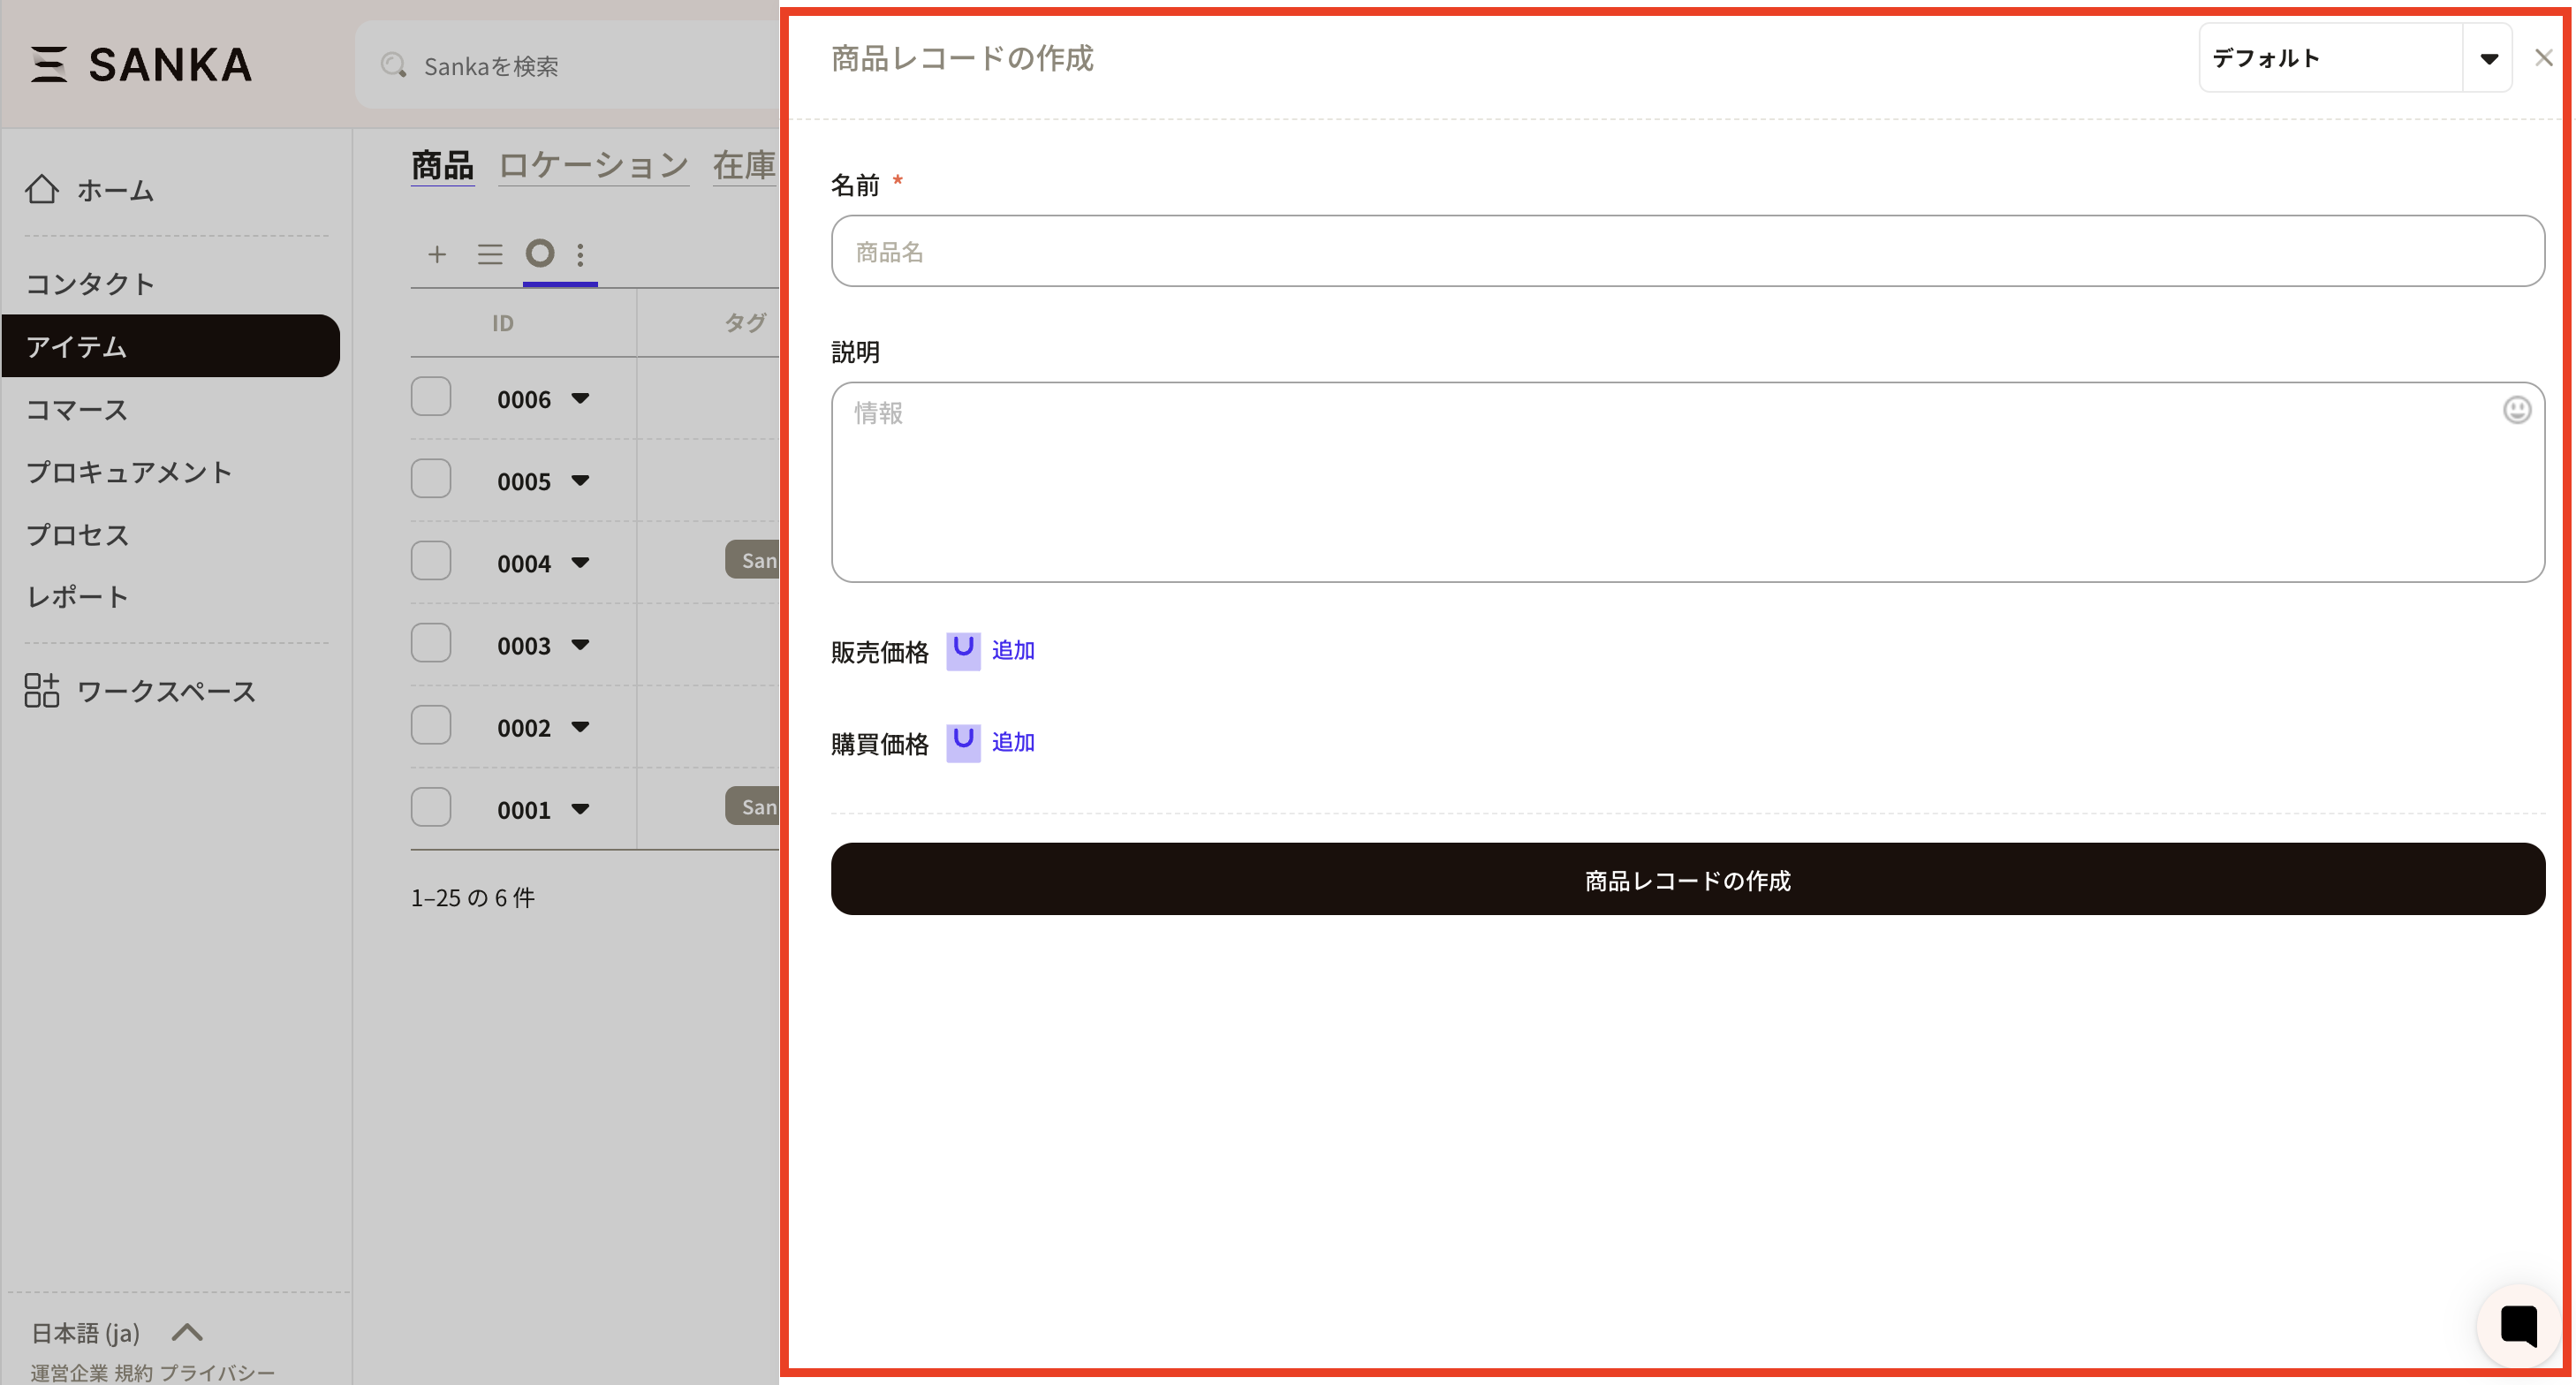
 Form: Customize the properties shown on the Create record form. By default, it uses the system form. You can create a new form with New.
 Items set on the form are reflected in the new record form.
 Columns: Choose which properties appear in the record list. Click a column slot to select properties and arrange them freely.
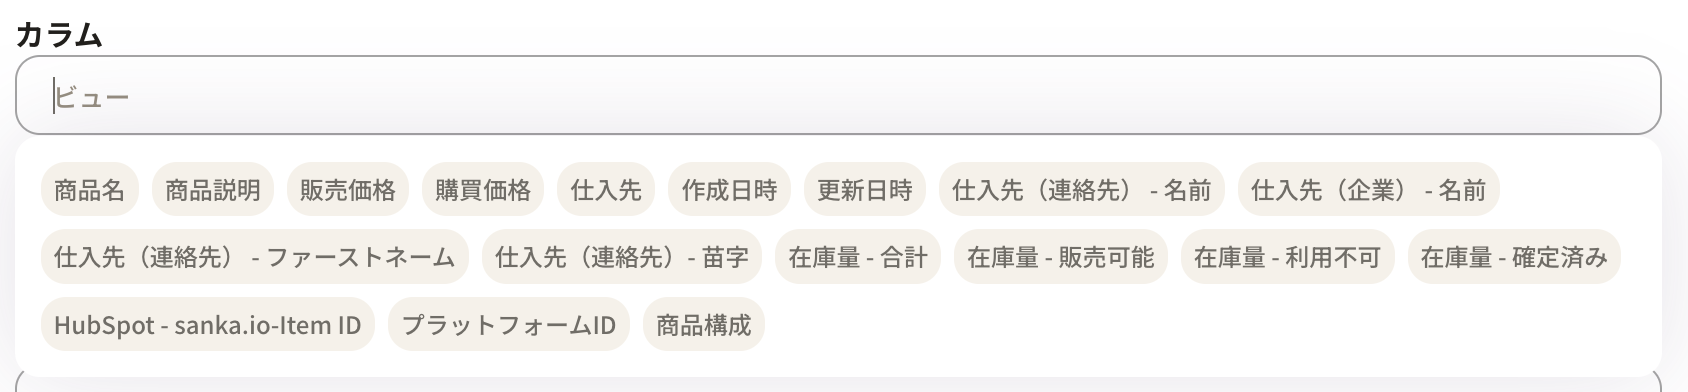 Select property names to add them. You can also drag properties to reorder.
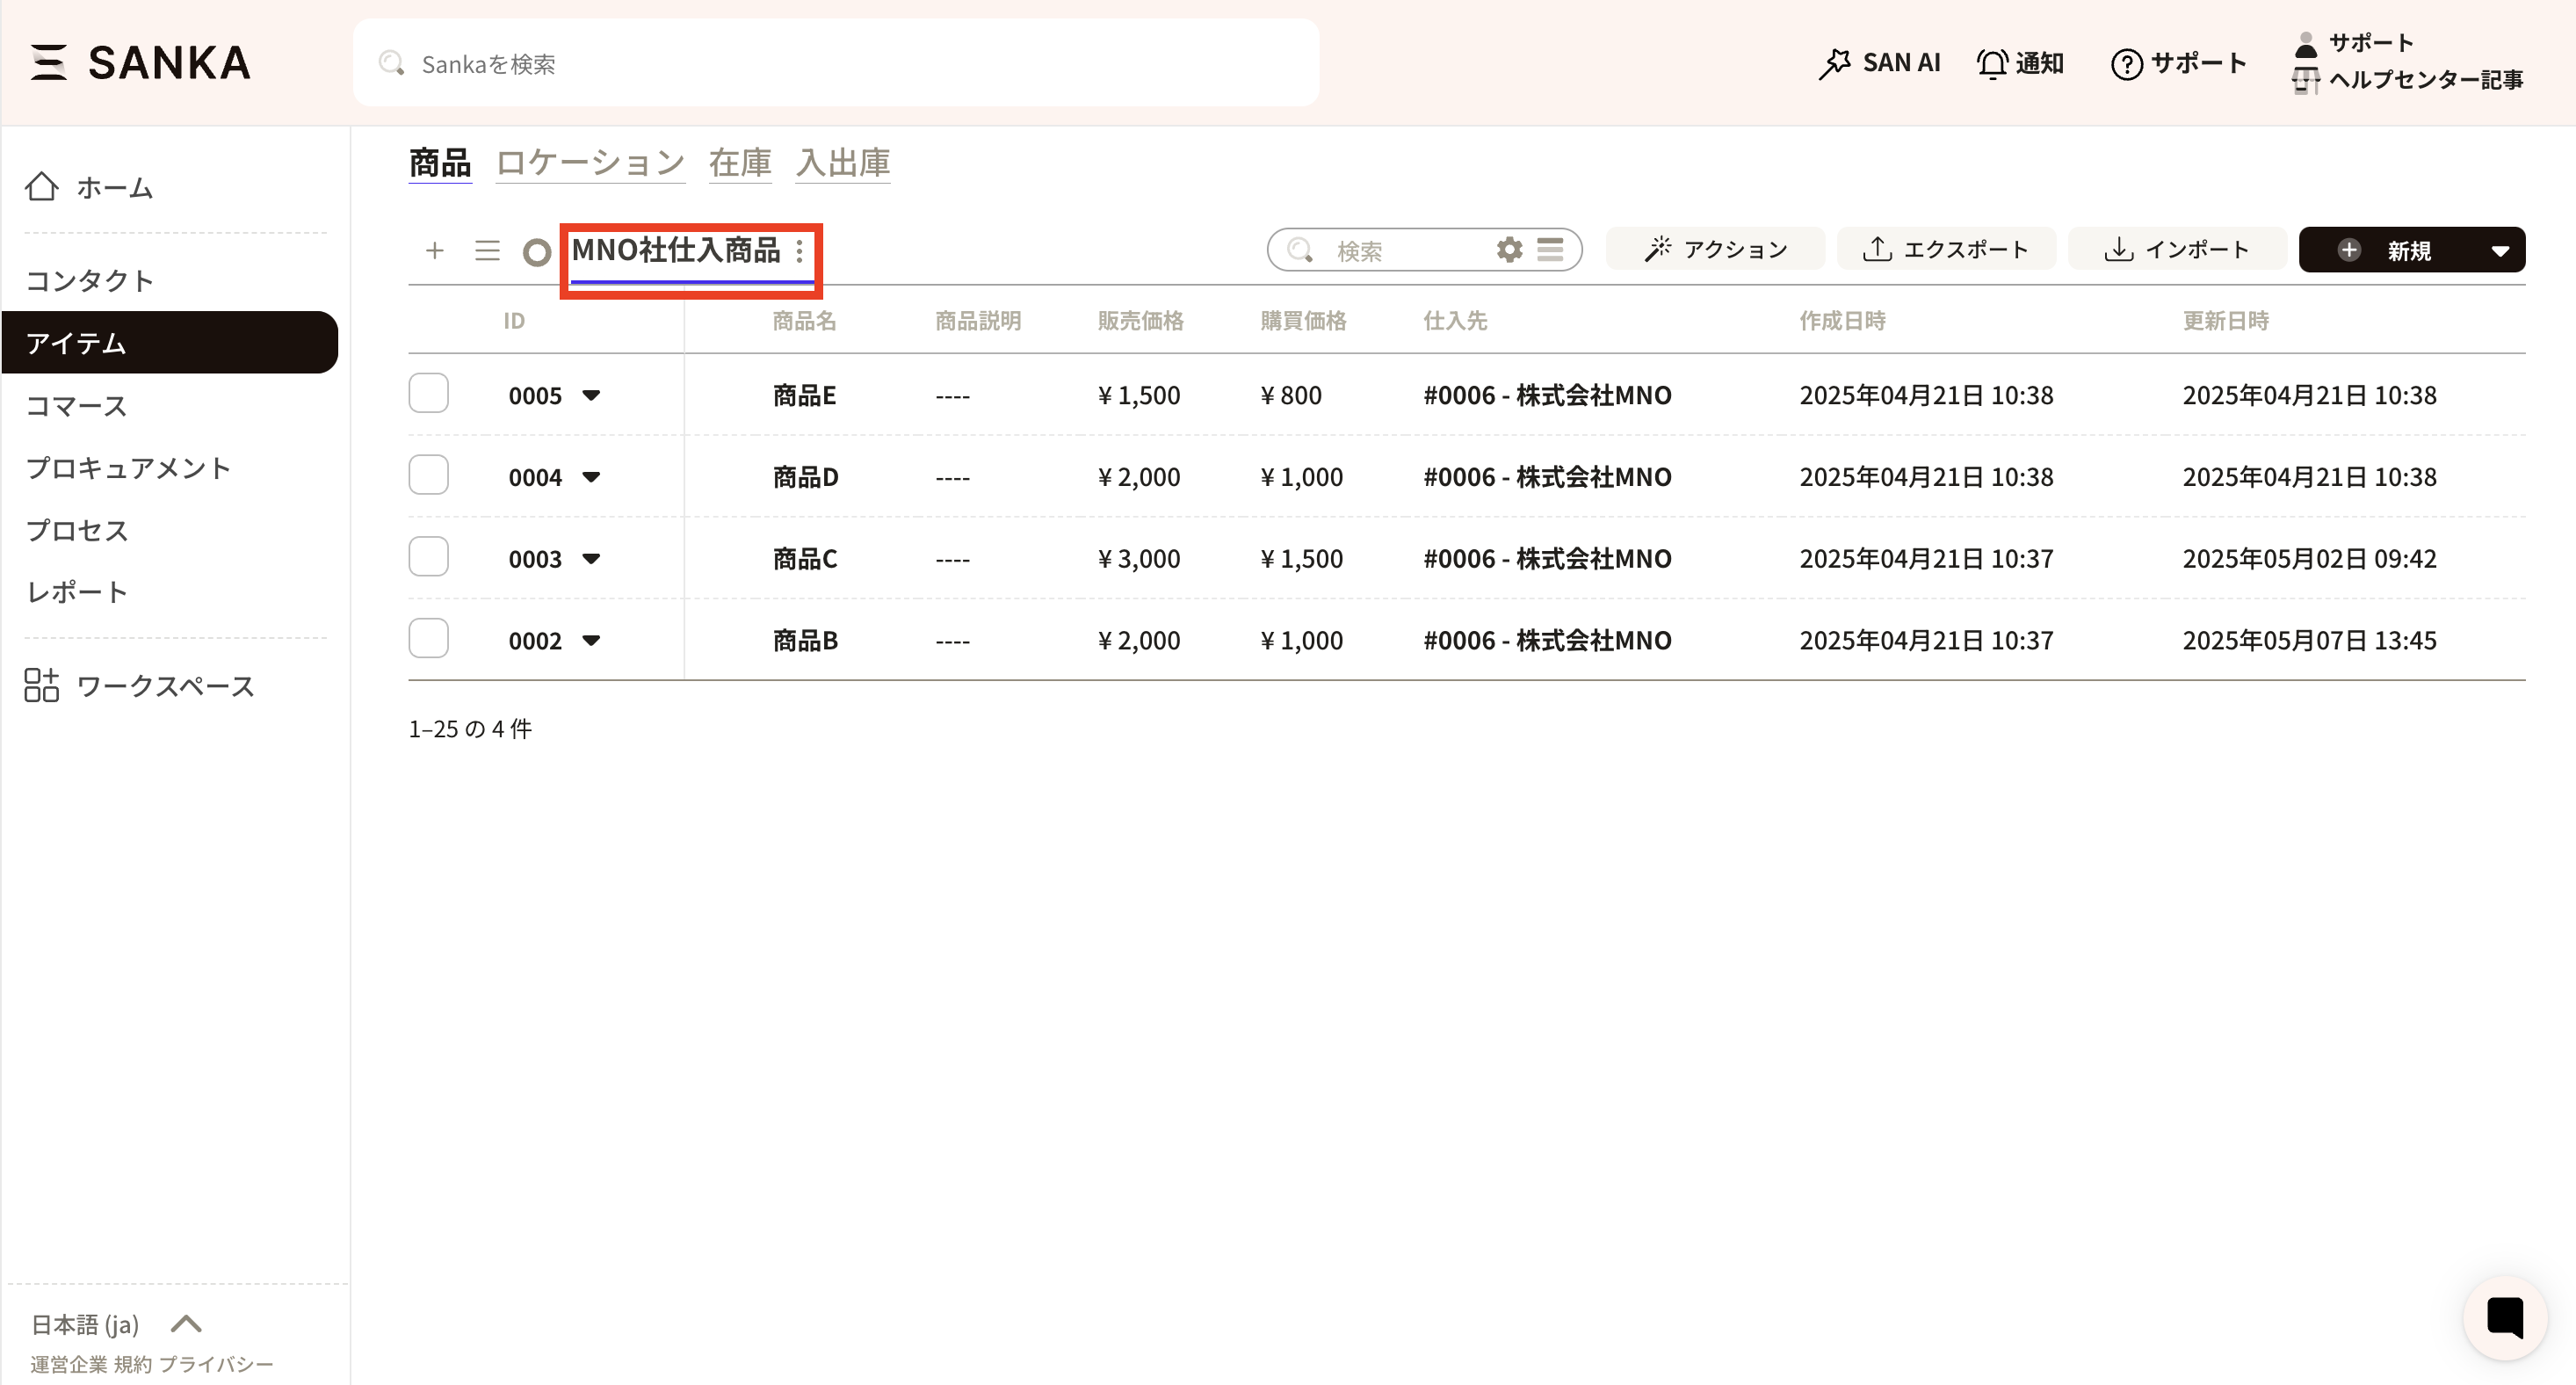
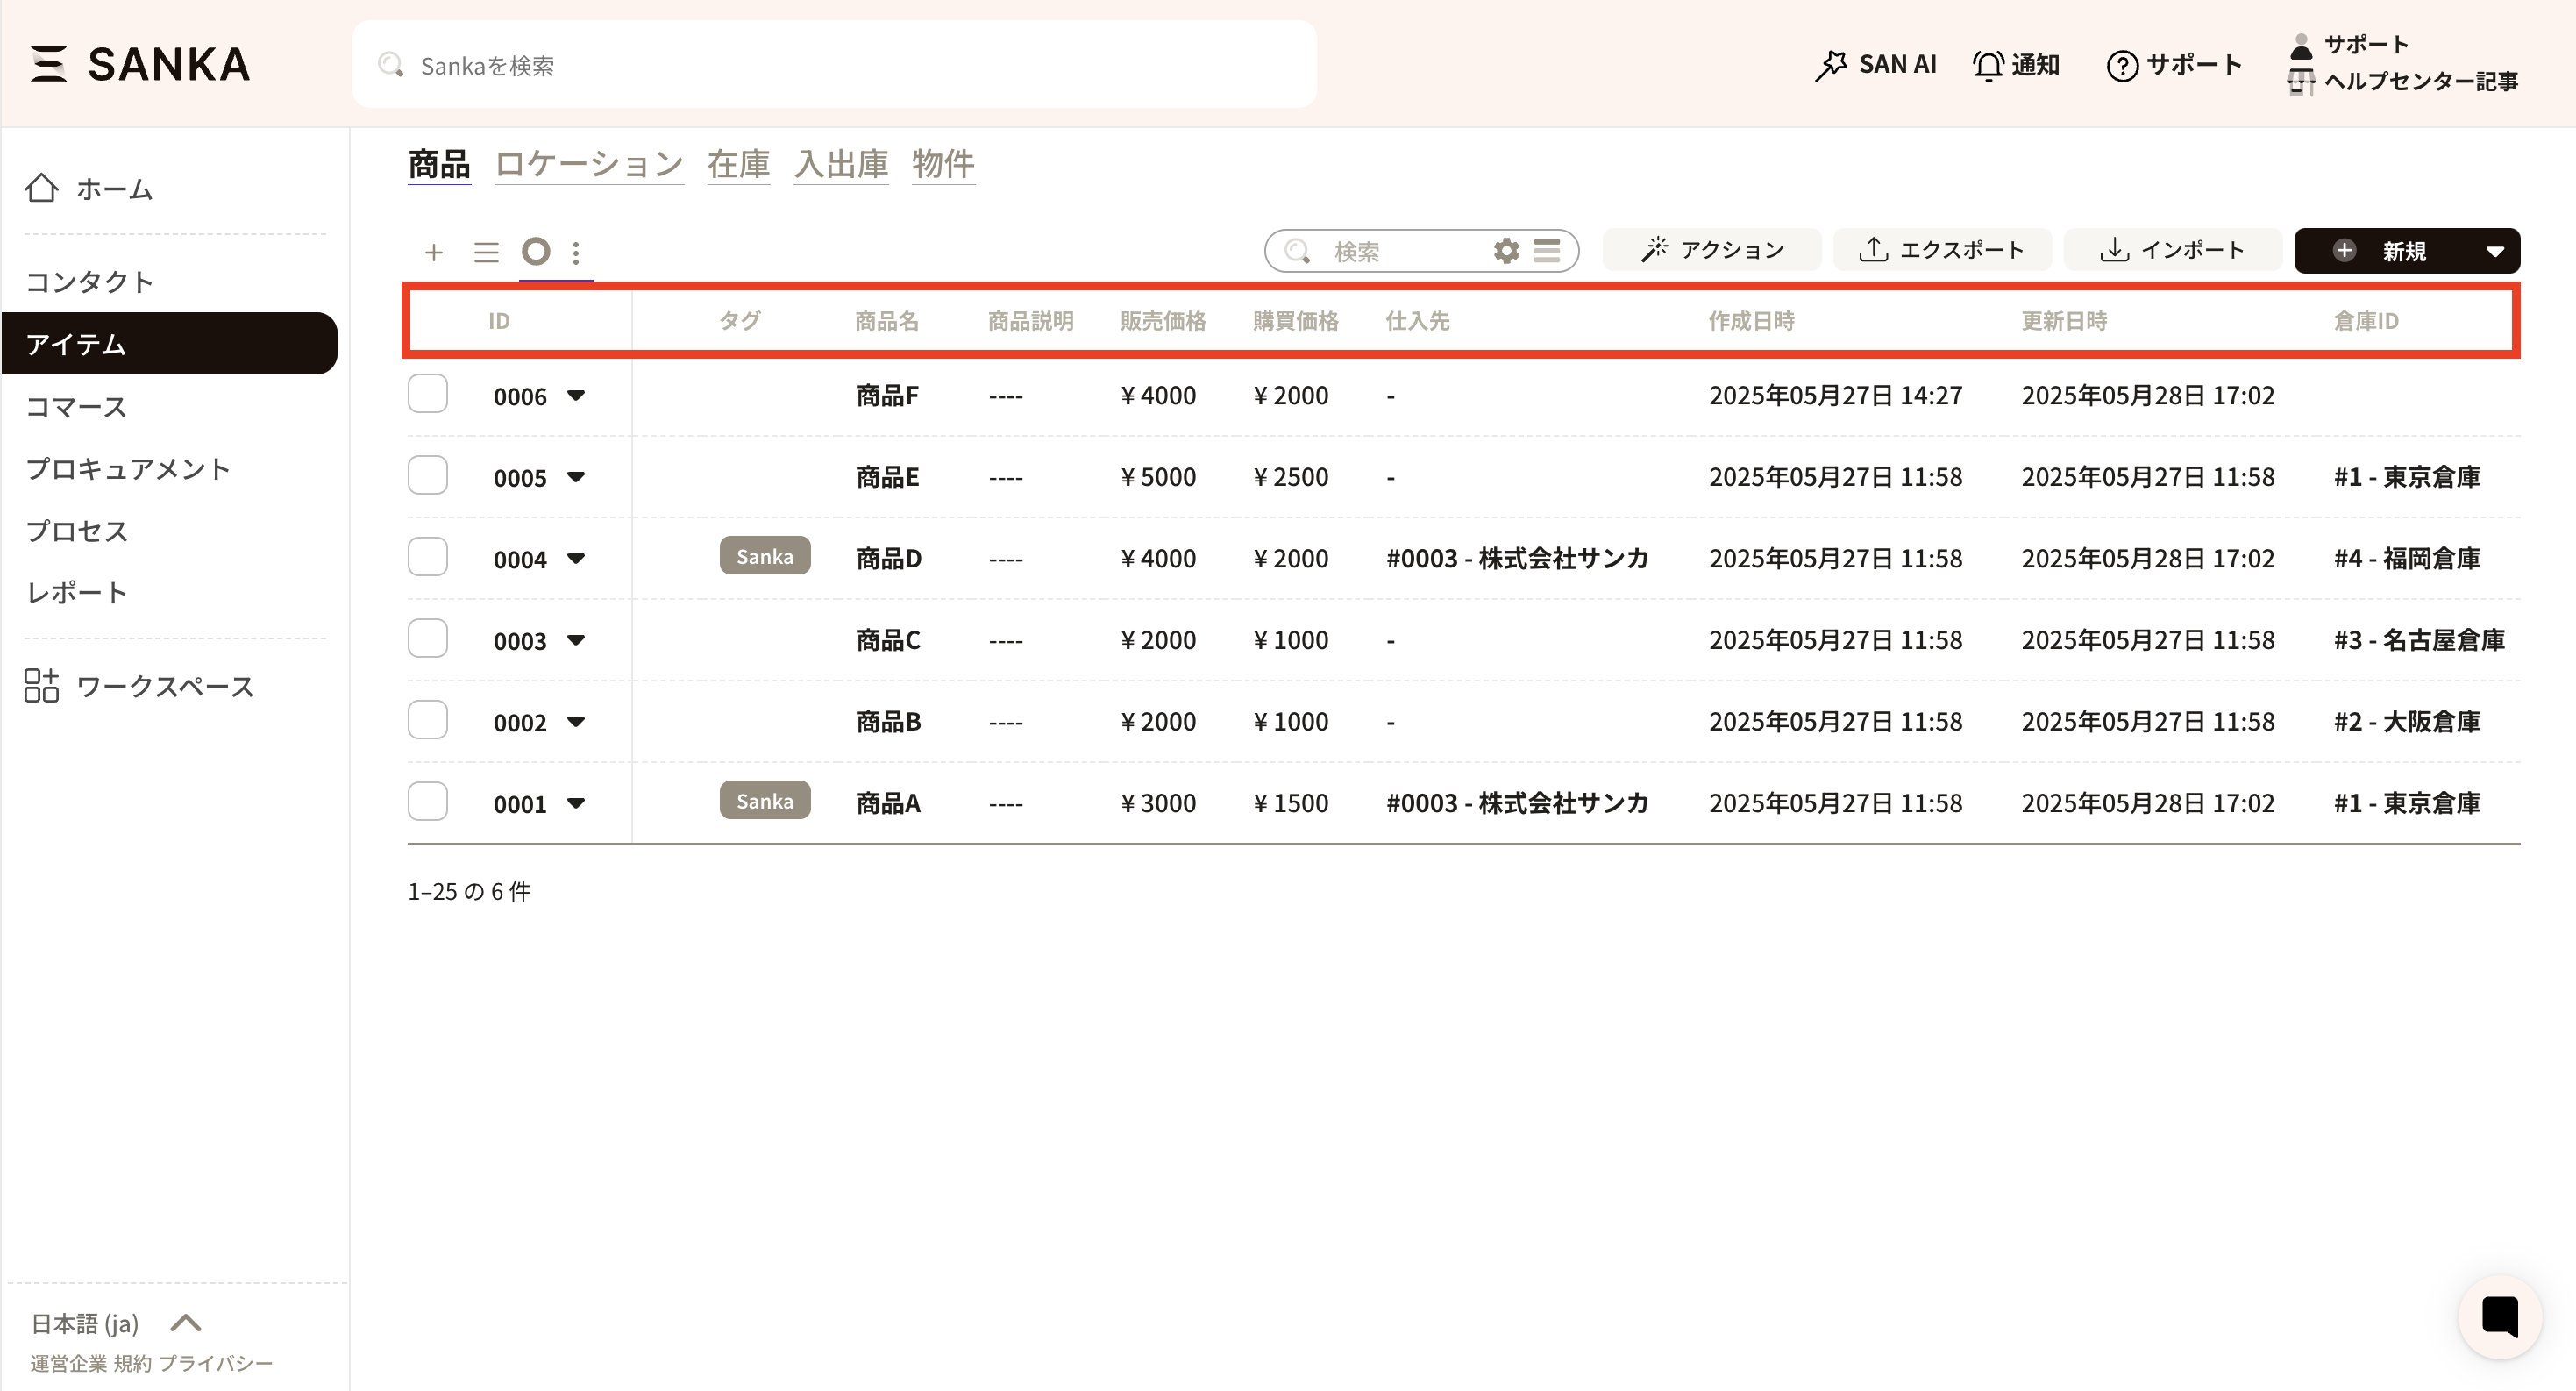
 These column settings appear as the header in the record list (the red line section below).
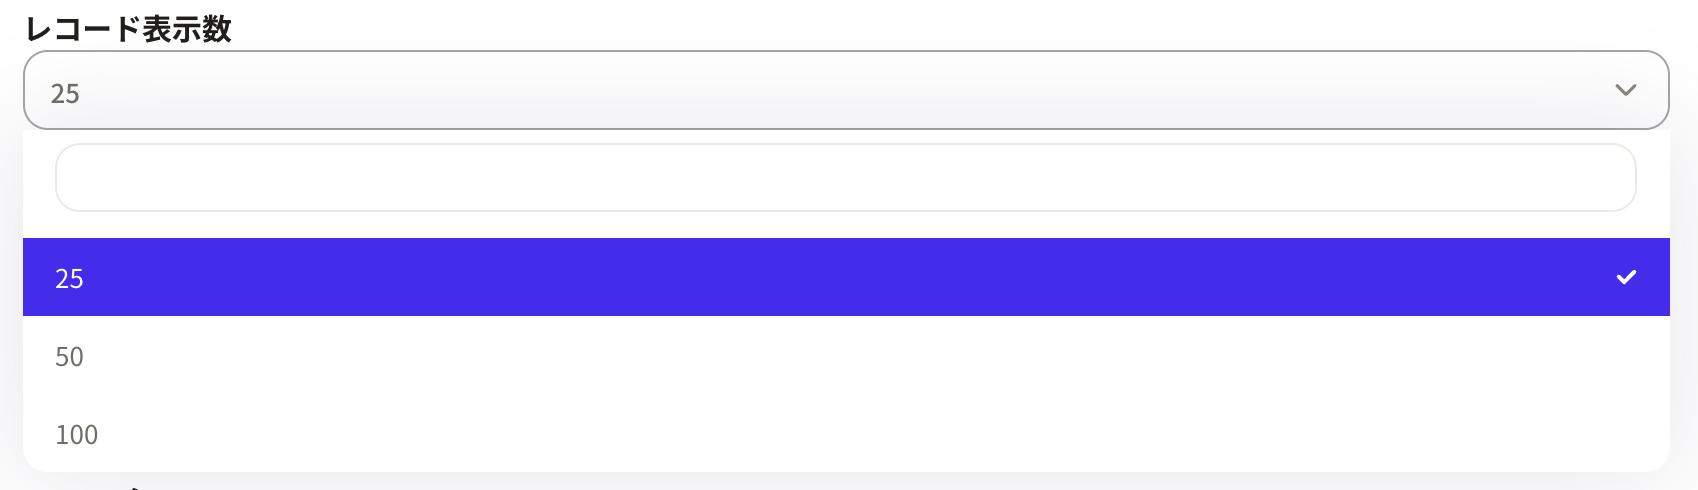
 Record count: Set how many records to display per page.
 Sort: Change the record order to ascending or descending. First choose the property to sort by. Only numeric properties can be used here.
Sort order: Linked to the selected sort property. Choose ascending or descending.
Sort: Change the record order to ascending or descending. First choose the property to sort by. Only numeric properties can be used here.
Sort order: Linked to the selected sort property. Choose ascending or descending.

 Filter: Set which records to include or exclude.
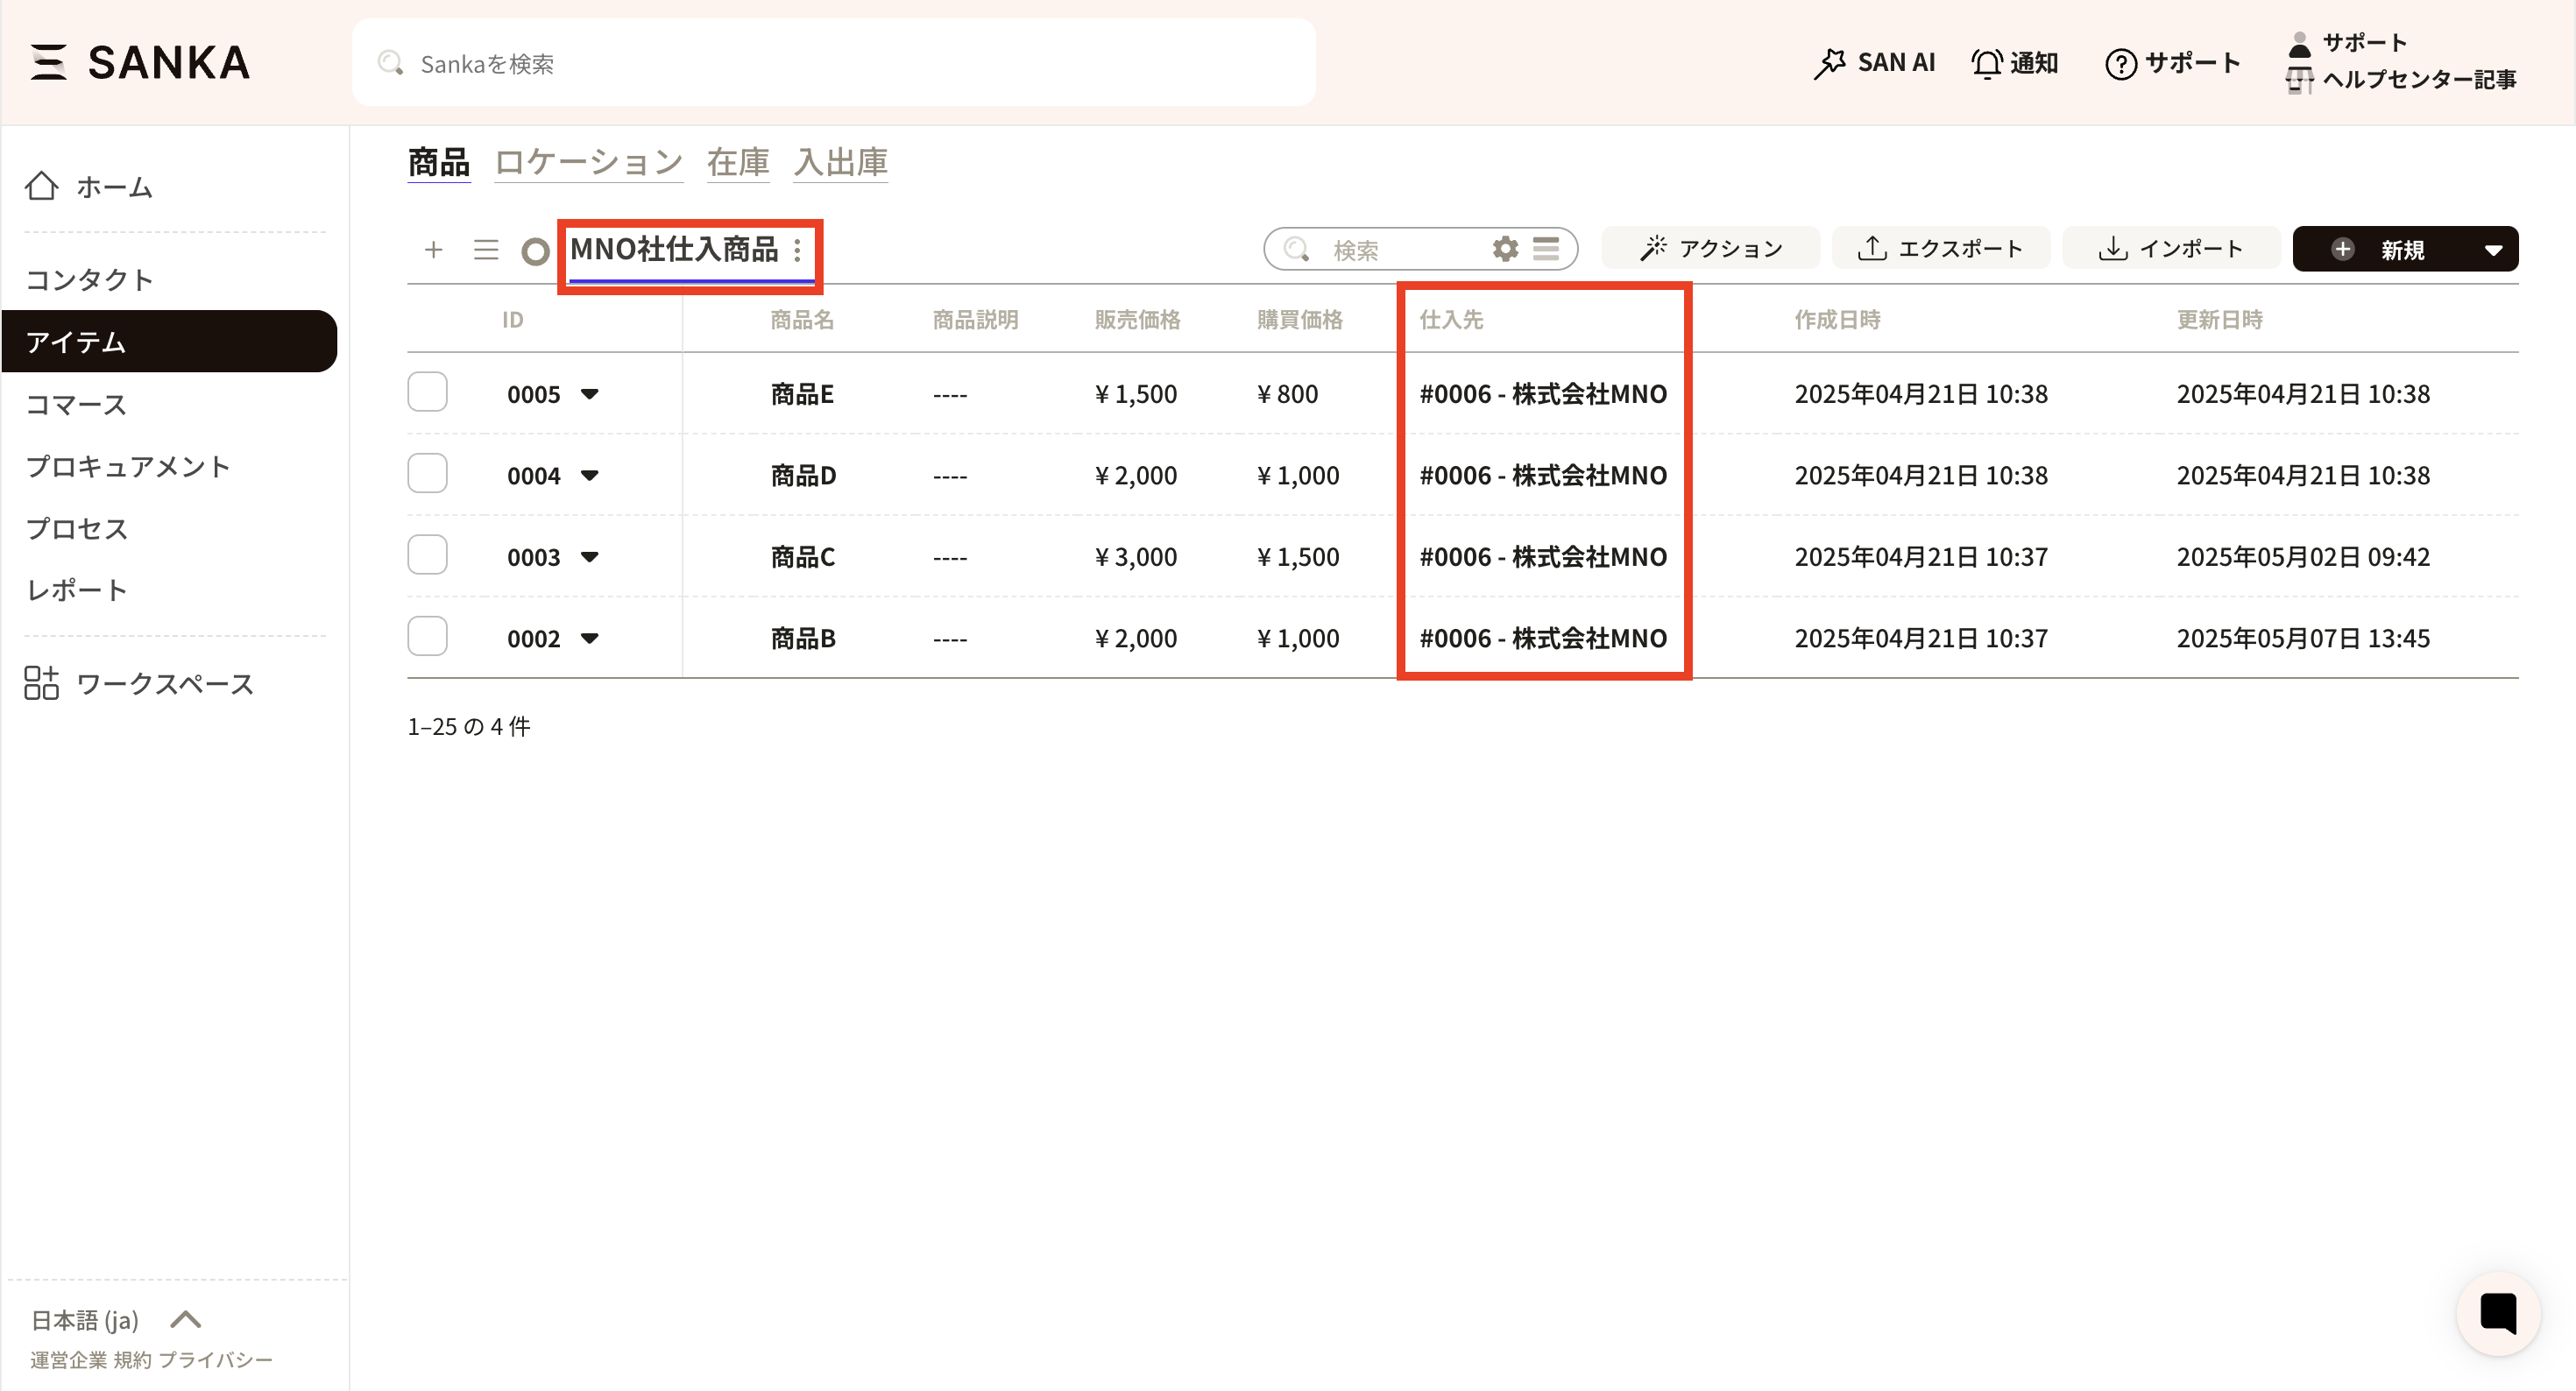
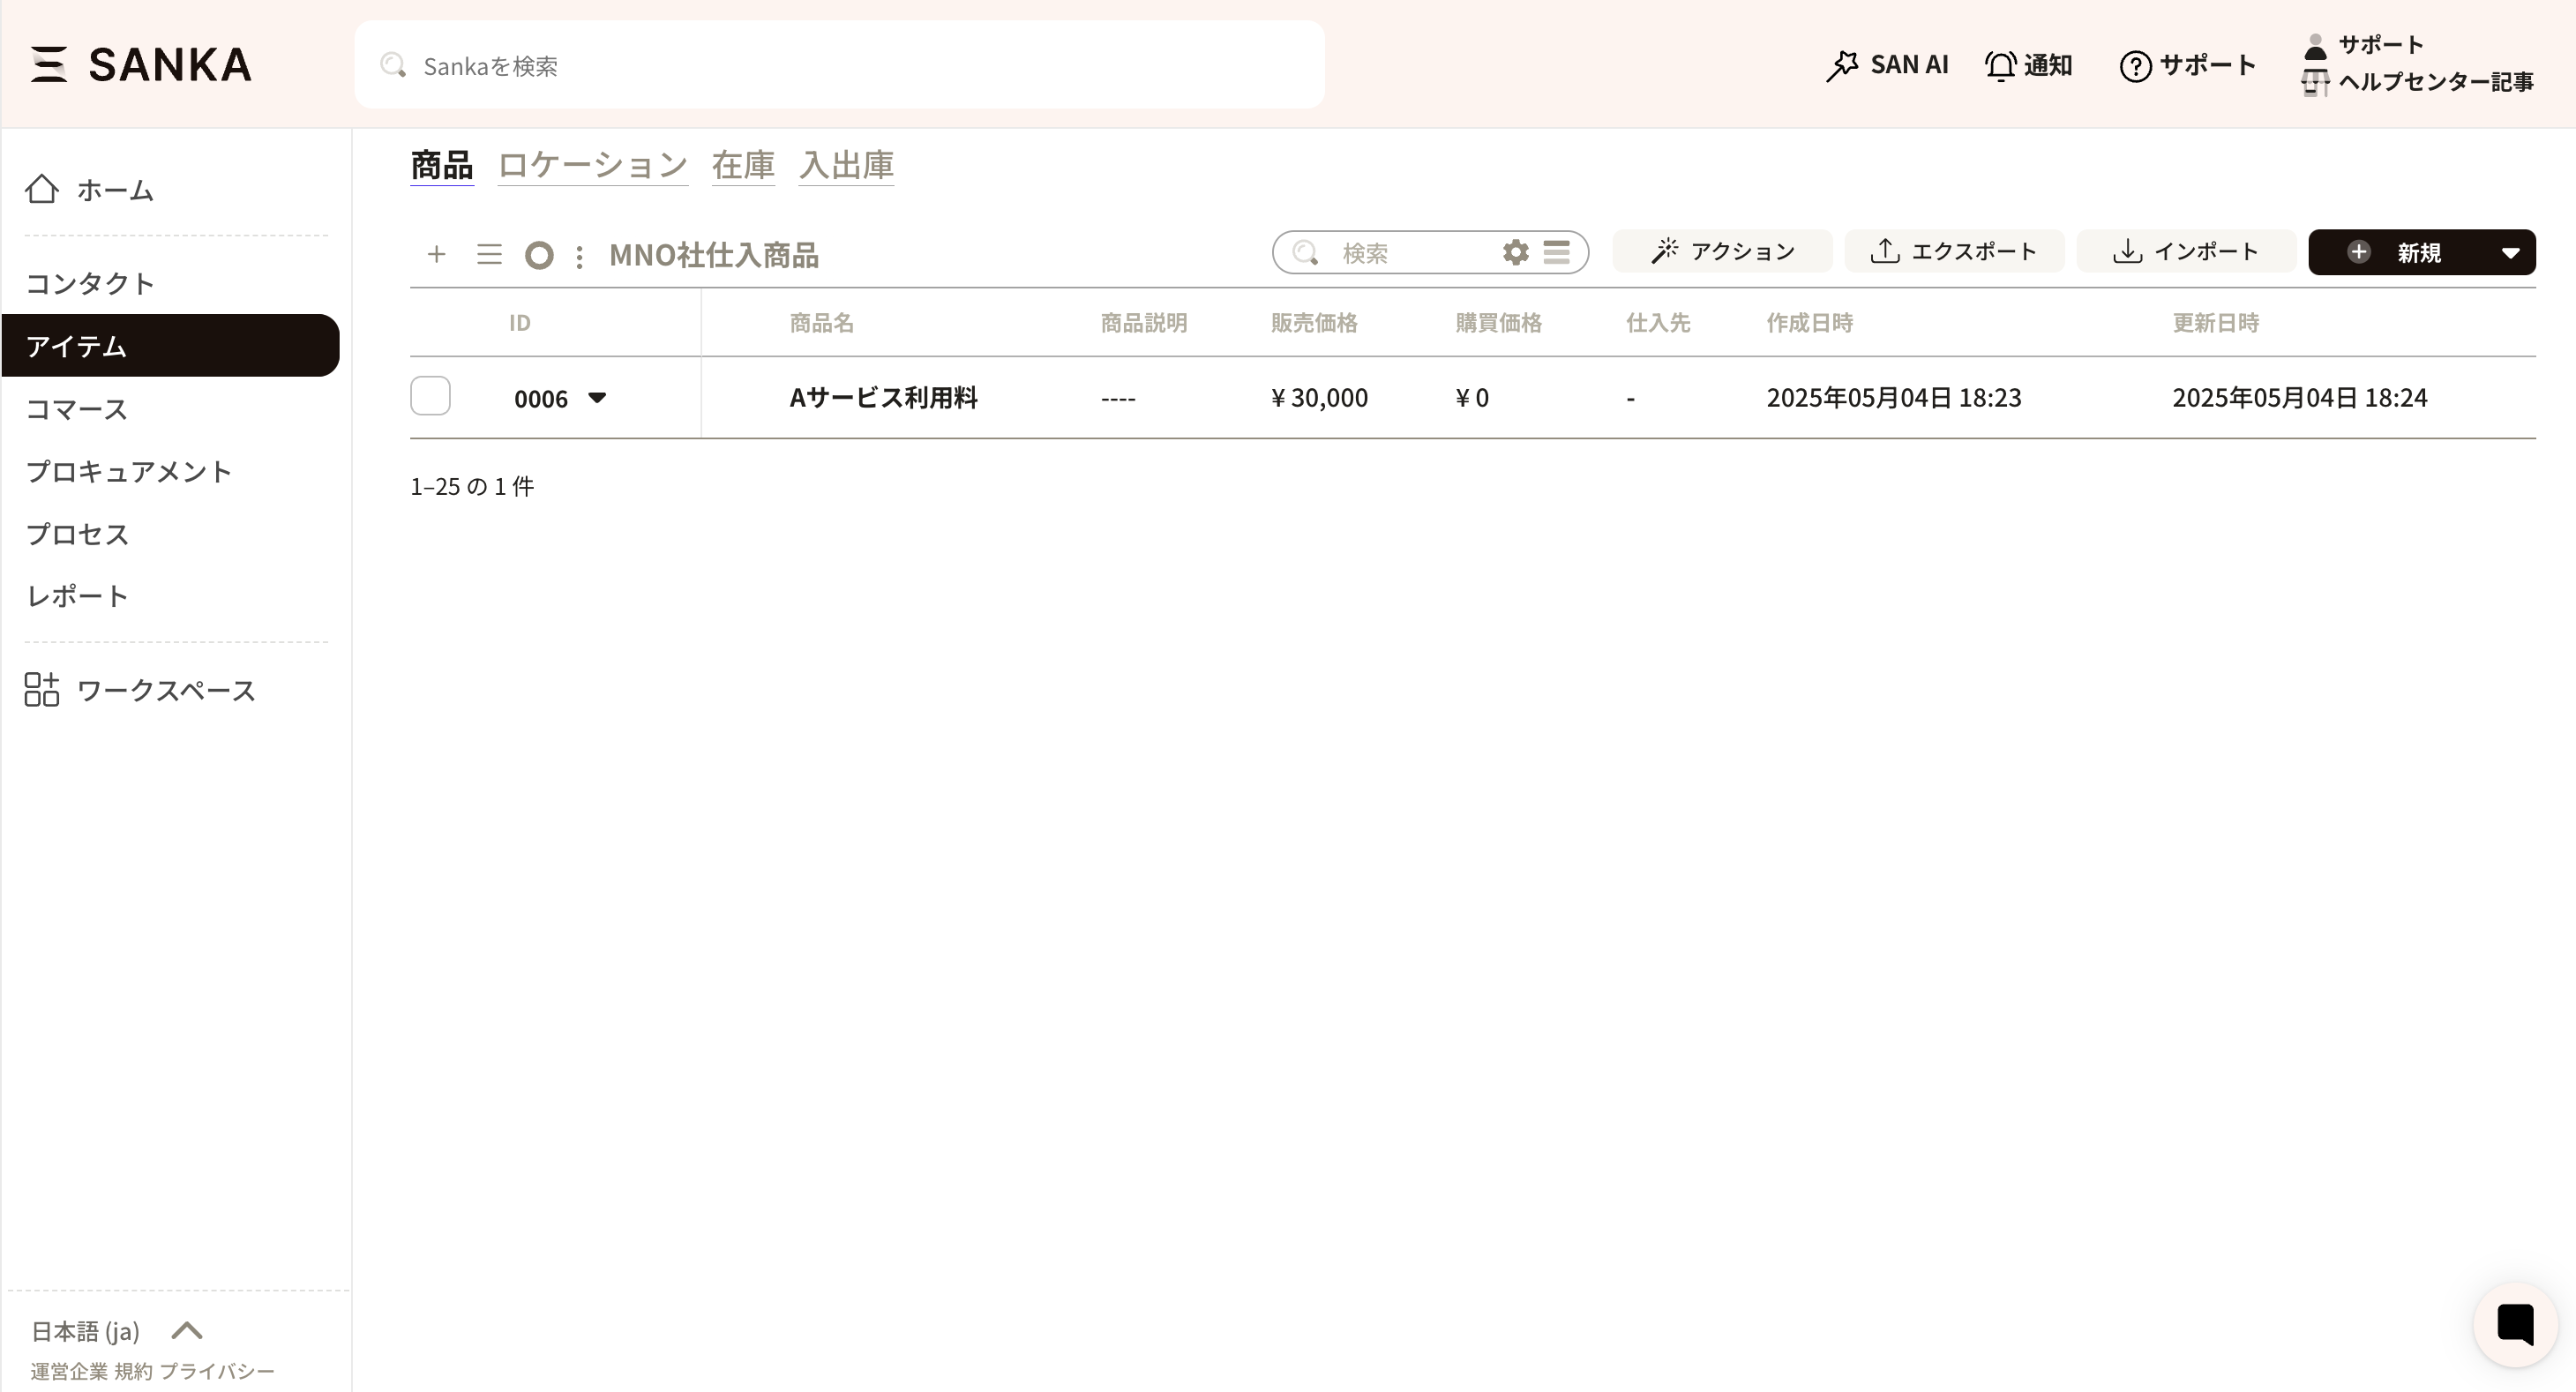
 In this example, we create a view that shows only products purchased from company MNO. Set the filter to Supplier (Company) - Name, and set the value to MNO Co., Ltd. You can choose values based on your own properties.
Update button: After setting the information, be sure to click Update.
In this example, we create a view that shows only products purchased from company MNO. Set the filter to Supplier (Company) - Name, and set the value to MNO Co., Ltd. You can choose values based on your own properties.
Update button: After setting the information, be sure to click Update.
 The new view is applied, and only items from MNO appear. You can create multiple views to match your workflow.